• Enter your email address to subscribe to this blog and receive notifications of new posts by email.

    Join 237 other subscribers
  • Noshing on

    raw blueberry pie with microwaveable filling and graham cracker crust

    This mostly-raw blueberry pie is a snap to make and very versatile--the filling microwaves in a few minutes, and you don't even have to bake the zippy gingered graham cracker crust--perfect for a hot Fourth of July and all summer long.

  • Recent Posts

  • Contents

  • Archives

  • Now Reading

  • See also my Book Reviews

  • Copyright 2008-2022Slow Food Fast. All writing and images on this blog unless otherwise attributed or set in quotes are the sole property of Slow Food Fast. Please contact DebbieN via the comments form for permissions before reprinting or reproducing any of the material on this blog.

  • ADS AND AFFILIATE LINKS

  • I may post affiliate links to books and movies that I personally review and recommend. Currently I favor Alibris and Vroman's, our terrific and venerable (now past the century mark!) independent bookstore in Pasadena. Or go to your local library--and make sure to support them with actual donations, not just overdue fines (ahem!), because your state probably has cut their budget and hours. Again.

  • In keeping with the disclaimer below, I DO NOT endorse, profit from, or recommend any medications, health treatments, commercial diet plans, supplements or any other such products.

  • DISCLAIMER

  • SlowFoodFast sometimes addresses general public health topics related to nutrition, heart disease, blood pressure, and diabetes. Because this is a blog with a personal point of view, my health and food politics entries often include my opinions on the trends I see, and I try to be as blatant as possible about that. None of these articles should be construed as specific medical advice for an individual case. I do try to keep to findings from well-vetted research sources and large, well-controlled studies, and I try not to sensationalize the science (though if they actually come up with a real cure for Type I diabetes in the next couple of years, I'm gonna be dancing in the streets with a hat that would put Carmen Miranda to shame. Consider yourself warned).

Microwave tricks: keeping cool and colorful

Cold salad vegetables, water and fruit are always a key part of my survival strategy once the weather gets hot–and by hot, I mean by Pasadena standards, 90-plus, which it’s finally started hitting–along with a very large part of the US this week. It’s normal here, even though we had an unusually cool and rainy spring, and up until last week we were just into the 70s most days. Obviously it’s not normal to be pushing 100 degrees over so much of the country.

Even the newspapers that tend to carry all-brown/all-beige food pics along with their recipes are remembering and recommending fewer heavy starches, more vegetables and fruit as a hot-weather strategy.

Most veg and fruit you can just wash and nosh, which is perfect in hot weather. You don’t have to run the dreaded stove, and biting into fresh salad vegetables–tomato, pepper, cucumber, lettuce or cabbage–will actually cool you down. On one road trip a few summers ago I got a lot of eyerolls from my nearest and dearest for packing cucumbers–small ones, but whole–along with the usual sandwiches and water bottles. But when we hit a rest stop halfway to San Jose, they really proved their worth. It was a pleasant surprise that my kid and my husband both said so…

In any case, just wash and nosh the vegetables you can get away with raw, and the ones that do need cooking can go in a microwave for a few minutes so you stay cool in the kitchen.

With that in mind, I have a couple of colorful, cheap and very simple microwaveable tricks for the moment.

Multicolor carrots, no colors touching

You can now get big 2-lb. bags of multicolor carrots, even organic, for nearly the same price as orange whole carrots even at the big chain supermarkets like Ralph’s/Kroger, so I do. I love the look of the purple-and-gold “black” carrots when I first slice into them, but how do you keep the purple from bleeding onto the white or yellow carrots beside them? I still haven’t figured out how to keep the purple completely purple once they cook, because any acid or heat will turn the purple part maroon, but I have found a way to keep it from bleeding.

Start by grouping each color of cut-up carrots in a separate pile on an open microwaveable dinner plate or casserole dish. Sprinkle lemon juice and a drizzle of olive oil, maybe a grating of ginger if you have some, on each pile and mix it in gently. Then nuke the plate with its different piles of carrots for a minute or two on HIGH to parcook. That sets the colors without cooking the carrots to death. You can cook the carrots longer if you want to, or keep them crisp-tender. Mix the carrot colors together right before serving–they’ll end up looking fun and not tasting overcooked.
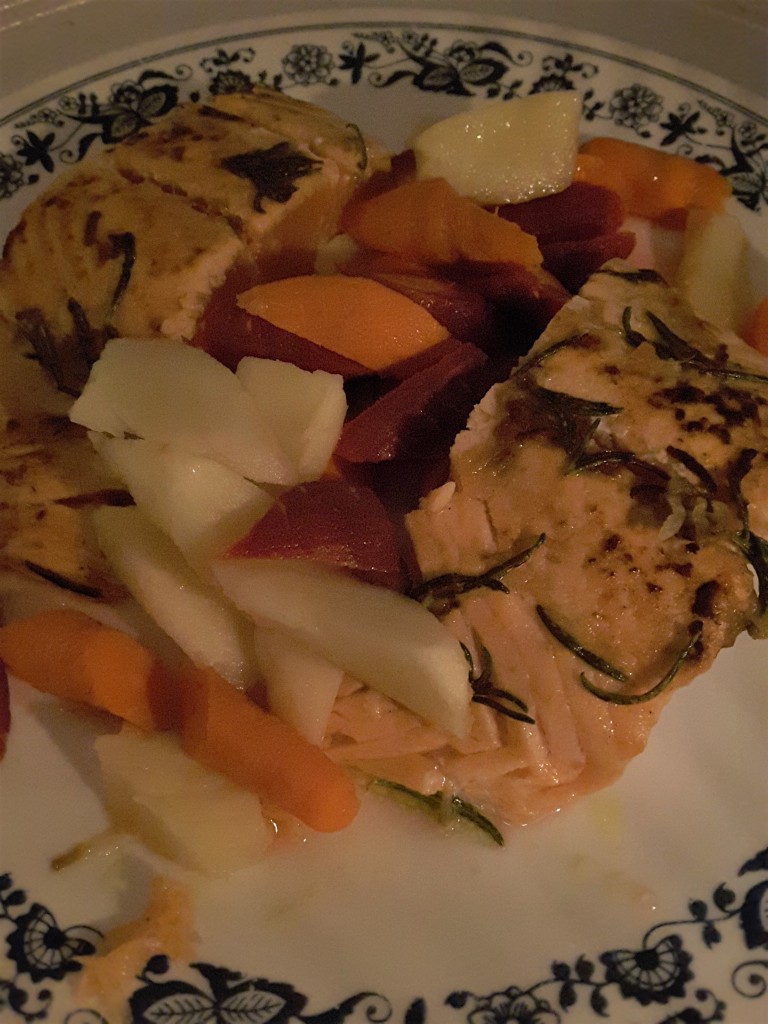
With seared salmon, these parcooked carrots are color-set and ready to finish in the microwave

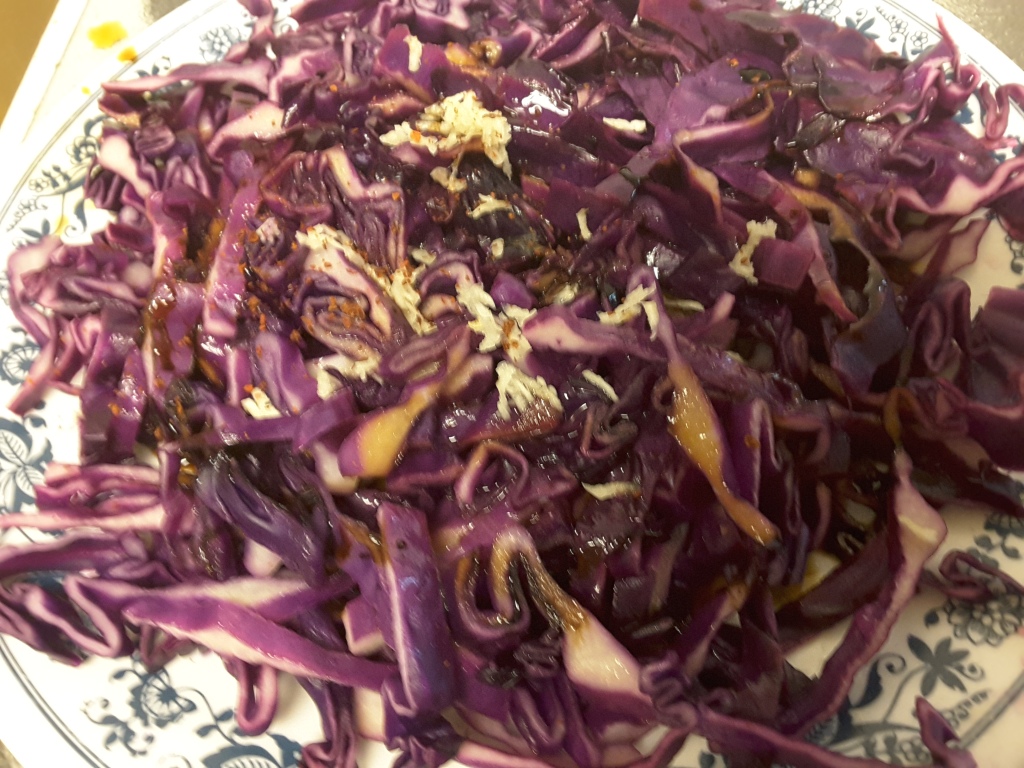
Red Cabbage “Stir-Fry” Salad

Red cabbage, my relatively cheap perennial favorite useful vegetable (other than Fresno tomatoes and bok choy), is a little more cooperative about staying purple as long as you keep it with acidic ingredients. Usually I like red cabbage raw for salads, and occasionally in the winter I cook it in the microwave Swiss/German sweet-and-sour style, but I was in the mood for something more like a pan-browned stir-fry, only without actually bothering to stir-fry.

I had most of a head of red cabbage sitting in the fridge for more than a week, and I knew I had to use it up, probably cooked, though as lightly as I could get away with, because it was just starting to wilt and was no longer entirely crunchy. After seeing an article on charcoal grilling cabbage and romaine wedges as a dramatic 3-smoke-alarm barbecue side dish, I decided to cut it in thin wedges, cook it lightly in the microwave with a little acid to keep it purple and a little oil to keep it from being rubbery, and then decide whether I really wanted to pan-brown it or not.

…I decided to skip the pan-browning and just toss the microwaved cabbage with a few basic stirfry-type flavorings–vinegar, garlic, sesame oil, soy sauce, dab of molasses, hot pepper flakes, basically my version of a jao tze dipping sauce. I ended up with a surprisingly good impromptu hot salad that tastes something like the noodles from pad see ew or the chewy seaweed salad at a sushi restaurant. But bright vivid purple. In any case, it’s delicious, takes less than 5 minutes, and the leftovers are just as good–maybe even better–cold the next day.
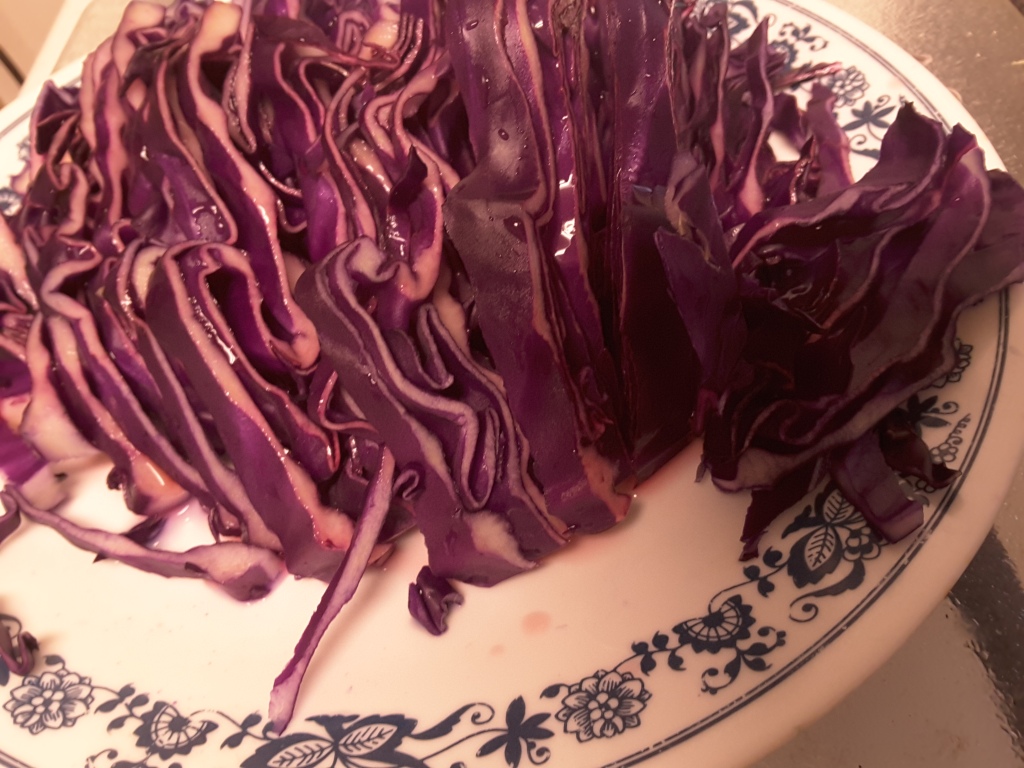
The trick for this dish is to keep both the color and the flavor bright while you keep the cabbage from going limp or rubbery. So just as with the multicolor carrots, it’s a two-step microwave. The lemon juice and/or vinegar go on with a little oil first, to keep the purple bright and the cabbage from going rubbery, you nuke it briefly just to set the color and parcook, then mix in the rest of the flavorings and nuke it again briefly to get it to the degree of cooked you prefer.

The amounts here are “use your best judgment”–you can use 1/4, 1/2 or the whole head of cabbage for this, depending how many servings you want to make. I did about 1/4 head of a medium cabbage for 2-3 servings, so the dressing amounts are for that but can stretch a little. Cooking times will vary a little by how much food you have, so if you make half a head or more at a time, check the doneness and stir up the cabbage so any undercooked shreds are on top for additional microwave time.

  • Head of red cabbage, rinsed, 2 outermost leaves peeled off and discarded, and cut in halves, you decide how much you want to chop for this recipe and wrap the rest tightly in plastic in the fridge for your next masterpiece.
  • A spoonful or so of cider or red wine vinegar and/or squeeze of lemon juice, or just enough to turn all the sliced cabbage magenta
  • A small drizzle of olive or salad oil, about 1 T

Flavorings for 1/4 head worth or so of salad (so scale up and adjust to taste)

  • 1/2 t toasted sesame oil
  • 1/2 t. dab of blackstrap molasses or a couple of pinches of sugar, brown or white
  • 1-2 t low-sodium soy sauce
  • small minced clove of garlic (or half a bigger clove)
  • pinch of hot pepper flakes or a few drops sriracha to taste
  • toasted peanuts and/or chopped scallion, optional

Slice the red cabbage into thin (quarter-inch) lengthwise wedges or crosswise shreds. Pile them on a microwaveable plate or bowl large enough to hold them and squeeze on some lemon juice and/or sprinkle on the vinegar, toss them to coat just so that all the purple starts turning brighter magenta. Drizzle on the olive or salad oil, toss again, then microwave uncovered 2-3 minutes (3-4 minutes if more than 1/4 head of cabbage), or until lightly cooked. Mix in everything else but the peanuts and scallions and toss, let sit a few minutes, taste and adjust, nuke 1-2 more minutes depending on your preferences for tender vs. chewy, and top with the peanuts and scallion as desired. Serve hot or cold.

For taste–I prefer mine balanced slightly toward the toasted sesame oil, with undertones from the garlic, vinegar, soy sauce and molasses and just a little latent heat from the chile flakes, but not overtly vinegary, sweet, salty or hot. Your mileage may vary; feel free.

This goes well with any proteins and other vegetables you’d stirfry, grill or dress with soy sauce-type dressings. Steamed or pan-browned tofu, pan-grilled tuna or salmon, chicken or seitan with bok choy, beef with broccoli, broccoli and ginger, etc. Toasted sesame seeds, sunflower seeds, walnuts or almonds would also work in place of peanuts. Thinly sliced raw or barely-nuked carrots too.

And if you run across some bargain-bin snow pea or sugarsnap pea pods, carrots of many colors, or any other vegetable you think goes, snag them, wash and trim them, nuke them very lightly and toss them in.

Be good, eat nice, and stay cool and colorful!

Persian-ish grill ideas for Purim

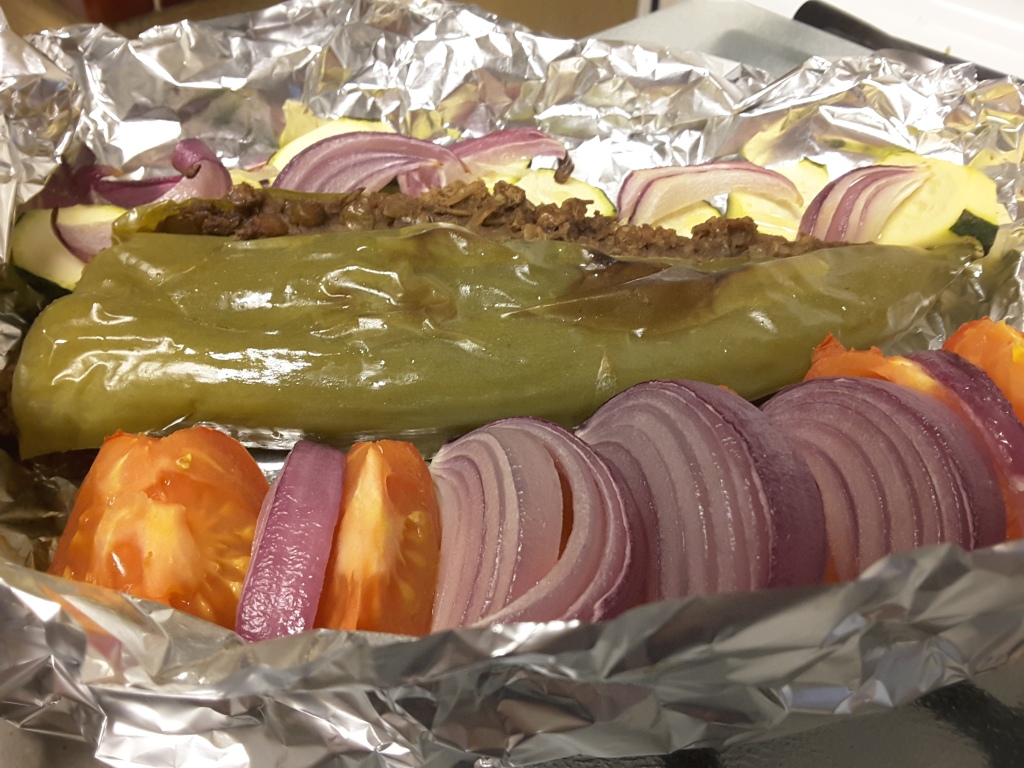
Lentil-stuffed Anaheim chile with zucchini, tomatoes and red onion in a Persian-style vegetarian platter grilled in the toaster oven.
Microwave-to-toaster-oven version

Last year our synagogue signed up for a catered Persian grill dinner (served takeout-style for pickup) from a restaurant on the West Side of LA, and this year they’re doing it again from a restaurant with kosher meat options. Last year, we weren’t sure so we went with a vegetarian option that turned out to be a little bleak–just grilled but dry unsauced vegetables, including some very-middle-American-style broccoli and babycut carrots that looked like they’d just been thrown in with the more traditional eggplant, pepper, zucchini, onion and tomato. The trays were filled out with huge heaps of bright-yellow basmati rice and a little tub of fesenjan sauce–toasted ground walnuts cooked down with grated onion and pomegranate molasses. No actual protein, though, so I pan-browned triangles of tofu to go with it. It was still all pretty bland, though, except for the charred tomato and pasilla pepper and onion.

Even though we’re going to have a meat version tonight–presumably better, I hope!–before the Megilla reading, the story of Queen Esther is very specific about one of her virtues. Unlike all the other girls who were hauled up to Ahashverosh’s palace for a year of preparation for a beauty contest (only, as with most, without a desirable prize). Most of the contestants dined on all the delicacies of the palace kitchen, but Esther refused any of the expensive meats and ate chickpeas instead. She didn’t tell anyone she was Jewish, but she didn’t eat the meat, claiming she was in mourning. It may have been a factor in why she was chosen as queen–she wasn’t being a glutton while the getting was good.

In Esther’s time, Ahashverosh had allowed his wicked vizier Haman to convince him to send out a decree allowing anyone to attack the Jews. But once Esther exposed Haman’s plot and her own Jewishness, he couldn’t cancel his own decree, so he sent out a second decree allowing the Jews to arm themselves in their own defense.

The celebration of Purim, while joyous and relieved, maybe a little exaggerated, is always mixed with acknowledgement of poverty and violence around us; this year most notably caused by the horror Putin has committed in Ukraine. The parallels are pretty harsh and very timely; there are always people like Haman and Ahashverosh willing to do harm or make excuses. So I have mixed feelings about meat vs. vegetarian for Purim, and about celebration in the midst of and despite the everpresent harsh realities.

The best I can do is to say that yes, especially now, we need to commemorate and to celebrate the triumph of good over evil–but without losing perspective or forgetting. May we have more people like Esther and Mordechai–be people more like them, people who step up. And in the meantime, remember to give tzedakah and g’milut hasadim–not charity, but the justice of providing for those in need. This is the season for that too.

Back to food and cooking:

One thing I’ve been thinking about since last Purim is how to make a somewhat better-tasting vegetarian Persian grill-style platter at home. I did like the restaurant’s grilled vegetables, just not the broccoli and carrot bits that were completely out of place or the tofu I made as a last-ditch effort.

If you have a microwave and a toaster oven or a nonstick frying pan with a lid, you can do something good and vegetarian fairly quickly and get some of the vibe without a lot of work. And grilling will improve winter tomatoes, onions, zucchini, (full-size, sliced) carrots, cauliflower, whatever you have where you are.

You can make a tray of quick-grilled vegetables as a side dish, or you can take the long, stuffable peppers and put in rice-and-tomato, as for dolmas (stuffed grape leaves), grillable white cheese like panela or queso fresco plus a sprinkle of nigella seed or thyme and some minced onion, or my personal and higher-protein/flavor choice, lentil hashu as for stuffed baby eggplants and mehshi basal (stuffed onions), which are Syrian Jewish, but adaptable and delicious and not too far off. The lentil and rice stuffing is flavored with allspice and cinnamon and it grills up nicely, especially in a nonstick pan with a bit of olive oil to create a light, crispy, char on the surface. It also makes light, delicate felafel-like fritters.

Continue reading

Microwaveable Matzah Balls–Yes We Can!

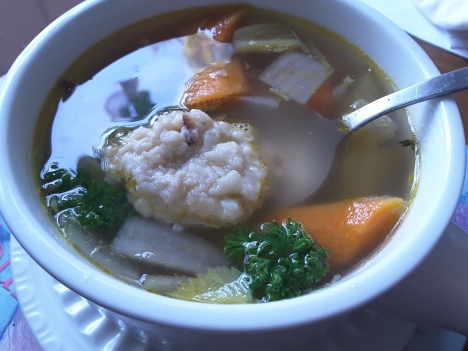
Microwave matzah ball in vegetarian not-chicken soup

Three years ago I tried out a couple of possibilities for making matzah balls in the microwave–mostly because I was cooking for just my husband and myself for the seder and because I hate waiting for a full stockpot to boil. Also just because. And it wasn’t a raving success–more like, “well…it was worth a try.” Or as I put it at the time, I try these things out so you don’t have to.

My conclusion then: you can’t microwave ordinary matzah balls the way you’d think, dolloping the mixture into boiling water and then heating with a lid, as I’d hoped. They’ll just start falling apart in the water and the ones that don’t will be awful and tough in the center and awful and gluey like undercooked oatmeal on the outsides, and in general not good and a complete waste of ingredients and your valuable effort.

At the time I also thought maybe I hadn’t used enough egg to make it work–because I only had one egg in the house for a cup of matzah meal, and the standard recipes for that amount called for two to four.

However, I discovered that a spinach-enhanced version would work okay, at least on a very small-batch basis, if I dolloped the mixture onto a plate and microwaved the dumplings that way, just to seal the surfaces and kind of steam them through to cook the egg and make them hold together, THEN put them in hot soup and let them sit a few minutes to absorb and fluff a little more. And…they were okay. Not fabulous. They still had a few corners on them.

But as a fairly dedicated microwave experimenter–I’m not quite up to claiming “maven” yet, that’s next week–that doesn’t really end the question for me, because I keep thinking, maybe I could possibly change something and make them work out after all? And wouldn’t that be cool? …I’m probably the only person I know who would answer “yes” on that, but too bad. Because, on take 3 1/2 or so, I finally think I’ve got it. And this time my husband actually agreed.

So picture me on Sunday afternoon, the first full day of Passover 5781 (aka 2021). Saturday evening we (meaning, mostly me) did manage to get all the kashering and cleaning and cooking done and ready for the first seder in reasonable time for the two of us, and we skipped soup and matzah balls because really, it was too much right then. Sunday, though, I decided I had time after lunch to make some not-chicken soup in the microwave and then–well, why not?–try a new tack on microwave matzah balls. Yet again.

This time I thought about those tough centers and decided what the matzah needed was a quick fluffing up before adding any other ingredients. I’m going to go out on a limb and say this idea should work decently for standard stovetop matzah balls as well. Might even let you get away with fewer eggs for the recipe and a little less time letting the mixture rest in the fridge.

So here I combined two tricks:

First, I poured boiling water on the matzah crumbs and let it all soak up for 15 minutes or so before adding the egg and oil and flavorings. Second, I used the same dollop-and-nuke-on-a-plate method I’d used last time Continue reading

No, I don’t know what I’m making for Thanksgiving either

–And it’s already after noon! So it’s going to have to be quick. I did manage to figure out a Zoom meeting for later with my family on both coasts–I have the odd feeling of joining the 21st century a beat or so late while they all roll their eyes, but still. They’re used to me being late to the table, and always last-minute. If you are too, I have some reasonable (and a few not-so-reasonable) microwaveable options below.

This year, we’ve watched the spectacle of the election and its many, many, many entertaining lawsuits attempt to distract us from the huge, unfortunately predictable third spike in pandemic numbers all across the nation, and we’re facing facts: our kid is not coming home until finals, our parents on both coasts are being cautious and hunkering down as are we. The upside–we’re not traveling for Thanksgiving, or being required to smile and praise anyone’s turkey or attempt the groaning board. The obvious downside is what the heck do you make when it’s just you?

It’s just me, my husband and the cat, plus all of our family expecting to hear from us remotely so we don’t all feel as isolated as we feel. Which means mostly that we’re going to have to figure out how to Zoom everyone and not get cranberry sauce stuck in the laptop keyboard. And, of course, not reveal the exact state of our livingroom if we can help it.

This is going to require reserves of stagecraft, because when you’re stuck home with your husband and the cat instead of getting to dress up, sip champagne and hug all the people you haven’t seen in a year, the last thing you really want to have to do, besides cook all day, is straighten the livingroom for company.

The most important things, the essential things about Thanksgiving that I actually look forward to have nothing to do with the menu and everything to do with the experience (once we’ve recovered from schlepping halfway up California anyhow).

First is the getting together with family and friends–we’re Zooming and calling today and tomorrow, best we can.

Second is the sense of celebration–but how do you do that for yourself at home? My favorite part of Thanksgiving at my in-laws’, who are great hosts and savvy party people, is the way they welcome everyone into the house mid-afternoon, a couple of hours before the late-afternoon dinner. They set out cheeses, crackers, olives and nuts, raw vegetables with dip, and glasses–and break open a bottle of champagne for toasting. Sparkling apple juice for the kids, if they’re not already running through the house to the backyard for games.

I do have a frozen kosher turkey breast somewhere at the back of the freezer, but for just us, without our daughter home, it’s going to be microwave-assisted pan-grilled salmon, which I admit is kind of prosaic but still, after much testing, clearly the best indoor way to make it.

On the other hand, having fish rather than meat allows me to think, I can haz cheese platter? (the cat approves).

We never really do appetizers or cheese boards just for ourselves at home; that would probably be a good way to feel like it’s at least slightly partyish and worth celebrating something. Get out a nice bottle of wine and some glasses–I think I actually have a decent under-$20 bottle of Piper Sonoma champagne somewhere in the wilds, good enough for toasting, even though I still usually prefer reds and still whites.

Actually, if you’re home alone or with just your immediate family, that’s probably going to be a better way to make it feel like Thanksgiving than all the huge big-cooking thing. And put some sunshine on the plate too–good green (and/or purple) salads, a bowl of tangerines and apples that people can snag, something fresh.

In any case, if you’re really stuck for ideas, check out my mostly-microwaveable Slow Food Fast Thanksgiving Guide.

And I’d like to add two more mostly-microwaveable items to that list, because for just us, I’ve decided to snag a box of globe artichokes at my local Trader Joe’s and also a bag of wild rice for a pilaf with some chopped apple, onion, mushrooms and pecans or walnuts, and raisins or other dried fruit.

Artichokes I’ve already steamed successfully in the microwave in years past, but I don’t think I’ve ever posted the method here. It’s pretty straightforward and similar to my usual method for steaming broccoli or brussels sprouts or other cruciferous greens, just a few minutes longer per pound because they’re whole, they’re tough, and they contain less of their own water.

The wild rice I’m trying in a microwave for the first time–going by my brown rice experiments, I’m going to hot-soak it for a bit to crack the outer husks, then microwave it in earnest for a few minutes at a time, letting it sit and soak up the hot water for a while undisturbed before stirring and testing and deciding if it needs more time. Hopefully it won’t get mushy. It’s already after 1 pm so I’m going to break off with just this and then go microwave some cranberries, wash a few glasses, clean off the table (got to look better than it really is), and get dressed for company, at least sort of–I have a family to Zoom!

A toast to all of you–Happy Thanksgiving, make sure to give to your local food bank and homeless shelter this season, because even small amounts help, and may we all have a safe and better year.

Whole Artichokes in the Microwave

  1. Trim the thorny, tough outer leaves and the stems off a couple of large or a bowlful of baby whole artichokes. Open the centers carefully–there may still be a few thorns inside–and use a spoon to scoop out and discard all the dandelion-like fuzz and trim off any thorns at the top of the soft inner “heart” leaves.
  2. Squeeze some lemon juice on and inside, plop the artichokes in a microwaveable container with about 1/4-1/2 inch (~1 cm.) of water in the bottom, add the lemon half if it’s washed and organic, or just squeeze a little more juice into the water. Put on a lid and microwave on HIGH for about 7 minutes, then let sit a few minutes. 
  3. Test for doneness by pulling off one base leaf (should come away very easily) and/or poking gently through the bottom of one of them with a sharp knife to test if it’s tender enough. Add another minute or so if they’re not there yet.
  4. If you have more than one layer of artichokes in the bowl or container, the ones at the bottom may be less cooked than those at the top, so you may want to bring those up before adding any additional cooking time, or remove the fully cooked ones and then microwave the less-done ones a minute or so more with the lid on.

Serve with basic lemon-butter sauce that my husband prefers because his mother made it that way (melt a little butter, squeeze in some lemon juice, scoop out any seeds that fall in) or the more exciting tzatziki-type sauce I like better with artichokes: nonfat plain Greek yogurt, a dab of garlic, a drizzle of olive oil plus a squeeze of lemon juice, and a little thyme, dill and mint or basil chopped and mixed in, cracked black pepper optional.

Saving Summer, 2020-style: Peaches and Pasta Yet Again

While I was stuck for what to post this summer without ranting too badly, I noticed readers are still searching for some of my inexplicably most popular older posts–how to ripen uncooperative peaches, and how to cook pasta in the microwave. I’m grateful you all are still out there, and I hope some of this helps or at the very least piques your imagination for what’s possible.

Usually I think these unconventional methods are mostly my own odd, quirky ideas about how to cook without turning on a hot stove in 100-degree heat and how not to throw out fresh produce if you can rescue it somehow.

These are no longer fringe questions now that the pandemic has hit so hard. We don’t want to waste money and food or make more shopping trips than we have to. And of course, the 100+ degree weather has suddenly hit hard in the West.  So for the first time in a while, I find I actually have a few new things to say about both pasta and peaches, before I move on to some slightly more warped but fun ideas in the next overdue post…

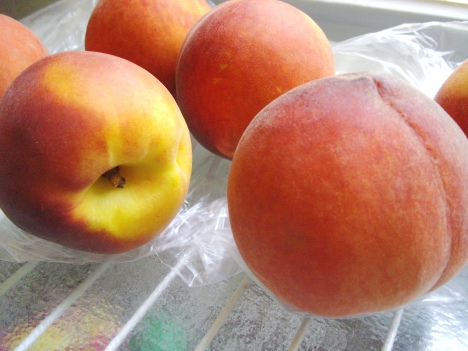
peaches ripening on counter


Peaches first (since it seems like the more upsetting food for most of us):

Well, I really thought I was going to post here that I have finally come up with a fast and easy way to “ripen” uncooperative, spongy or bland peaches to edibility without cooking them, but it turns out I already did it 3 years ago. Sometimes I post improvements to older posts and assume people can find them easily and tell that the revisions are better, but obviously not, so I’m going to have to go back to the original peach post from about 10 years ago, which suggested ways to cook peaches in a microwave, and point people forward to the method I use now, which sometimes improves blah peaches enough to be able to eat them raw and like them. It also works well for other kinds of mediocre fruit (see under, strawberries) that need a boost to taste like better versions of themselves.

For those of you who don’t want to poke around, this is basically it:

Peach fix 3.0

Wash, pit and cut up the peaches. Sprinkle on a spoonful of sugar and a small pinch or two (a little goes a long way) of citric acid powder and maybe a spoonful drizzle of water, stir a bit and let it sit for several minutes. They should taste better and be at least somewhat juicy and tart, and maybe start taking some rosy color and flavor from the skin as well.

Notes:

  • Citric acid is also called “sour salt” or “limon con sal” or “rock lemon” even though it’s not actually made from lemons, just tastes a little like them, and it doesn’t contain any salt. My Armenian corner grocery sells it along with other bags of bulk spices, and Rokeach brand citric acid shakers used to be available in the kosher food aisle of the supermarket. Don’t pay a lot for it, wherever you buy it–citric acid should be inexpensive and an ounce or two will go a pretty long way.
  • Lemon juice should also work if you can’t find citric acid powder locally or online.  But if you have it, citric acid keeps the peaches tasting like peaches, not like peaches with lemon added.
  • If you have a whole bag of such flavorless peaches to rescue, more than you can actually eat in one go once they’ve sat and macerated a while (“macerating” is just the sweet version of marinating), you can keep them in the fridge in a snaplock container for several days without worrying about spoilage because the citric acid is also a preservative.

Of course, while I was still dawdling over this post last month, wondering if this was more important than my other overdue ideas, the FDA suddenly issued a recall of bagged yellow peaches in at least 12 states for salmonella contamination, and I even got a robocall from the Ralph’s/Kroger supermarket chain offering a full refund if I’d bought their peaches lately (I hadn’t). So I don’t know if this is going to help a lot right now, but maybe the next time you’re in a quandary about bland, spongy peaches and they’re not under a recall, you’ll have at least one more trick up your sleeve. Might work for reviving frozen peaches too.

OK, now the pasta:

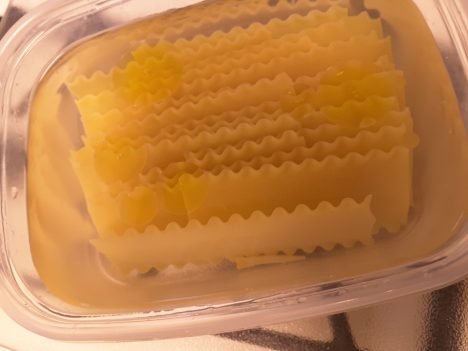
microwaving lasagne noodles  

Pasta 2020: Lasagne noodles in the microwave

Yes, I know. This is exactly what it looks like. But I finally figured this one out after how many years? too many. You can boil lasagne noodles in the microwave and keep them from sticking together horribly with a fairly simple trick–well, two. And incidentally, I also learned that lasagne, which is plural, refers to the noodles themselves, lasagna is singular and means the whole layered casserole…I’m still going to mix them up, I’m pretty sure of it. Continue reading

Passover mid-week: what’s for lunch?

With the best will in the world, there is only so much matzah anyone really wants to eat in a day. Even whole wheat. Yes, it’s crunchy. No, you don’t have to run the toaster oven. Yes, you should eat something else, and not just macaroons or gefilte fish from a jar. Or more hard-boiled eggs. Yeesh. Something lighter, please.

Salad

If you can get tomatoes of worth yet (it’s been a pretty long winter across much of the US), cut up some tomatoes and cucumbers, some red bell pepper, splash a bit of olive oil and vinegar on, maybe some Greek yogurt, some dill or basil, a bit of scallion and some feta or an olive, If good salad veg is scant but you can get cabbage, shred it and toss with some fresh or dried dill, thyme or oregano, maybe mint, oil and vinegar, a bit of lemon juice if you’ve got it, a couple of Greek-style olives. Or make a mix of oranges–slice them and serve with vinaigrette and lettuce or chopped cabbage, maybe a scallion and an olive or so, to brighten the last of winter and the first of spring.

Microwave melts and other vegetable and cheese combos

My standard eggplant microwave “melt” combo, with peppers and/or artichoke hearts and mozzarella/feta sandwiched between two slices of microwave-steamed eggplant. Salsa or shakshouka or even plain tomato sauce if you’ve got it, but jazz it up with hot pepper flakes and/or smoked paprika, or if you don’t have sauce then at least some hot pepper flakes, paprika, and basil or oregano–something.

Fish

Tuna salad is pretty classic, obviously, even though if you keep kosher it means scouting out kosher-for-Passover mayonnaise, making your own, or using plain yogurt instead (my current preference; my experience making mayo from scratch is more vast than I care to admit, and I don’t even like the stuff).

But if you have leftover cooked fish, especially tilapia or salmon, or you’re willing to cook a pound of it specifically for a batch of quick fake-smoked-whitefish-style fish spread, go ahead and microwave it a couple of minutes until cooked through, then drain off the liquid and mix with fat-free plain (!!!) Greek yogurt (add cautiously by spoonfuls so you don’t get too much and make it gloppy), plus or minus tehina if you eat it at Passover and like it, plus some lemon juice and grated or finely chopped onion or scallion, a bit of garlic and dill, and either a couple of drops of liquid smoke or a good dash of smoked paprika, with salt just to taste at the very end. Let it chill and it’ll solidify a bit overnight in the fridge. Good again with Greek olives and some salad (and okay, a little–but only a little–matzah). If you’re going for a meat meal and want to keep it nondairy, do a little more lemon juice and some olive oil as the binder and leave out the yogurt.

Fake-smoked tilapia salad on matzah

Fish Salad Rellenos?

But you can take it further, as I discovered. I’ve never actually loved gefilte fish, and even though Joan Nathan swears that fresh homemade gefilte fish is much better, I have chosen all these years not to believe her because it’s a big to-do and an even bigger mess, plus all the matzah meal and eggs mixed in–it’s basically a fish meatloaf full of stretchers. No. In my book, if you can get real fish, you should eat real fish as a main course and treat it with respect.

Leftovers, maybe, if you don’t just want to eat them straight–but not with yet more matzah and eggs. For crying out loud.

And all leftovers have to be good enough to eat on their own merits. Whatever you do to them should improve them or at least not degrade them.

I live in warm–sometimes way too warm–territory near Los Angeles, so the Armenian and Latino corner greengrocers always have good veg for cheap. Both are into peppers of varying shapes, sizes, colors and burn factor, a plus in my book. Passover can really use a hit of ta’am (flavor) and some vegetabalia to go with it.

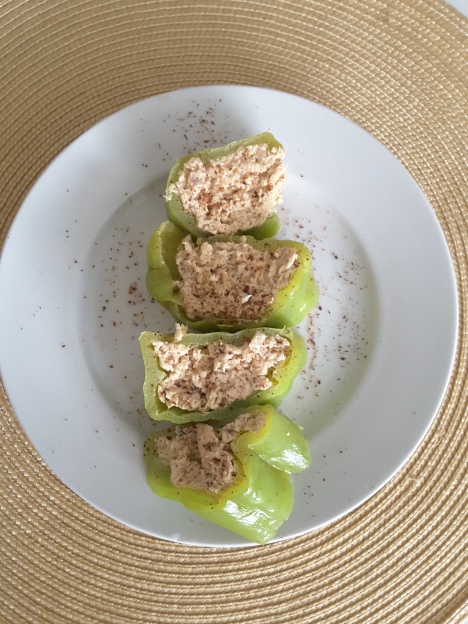
A bag of Hungarian peppers–pale green, mostly-mild, thin-walled, good for quick-pickling–was going for 50 cents a pound this week, and they’re long like Anaheims but nice and boxy at the stem end, not flat, so they’re easy to core and stuff without parcooking first. Fill them with the fish salad, I discovered, and you can microwave them a couple of minutes on an open plate or in a snaplock container with a lid until the peppers are cooked just to tenderness on both sides. I sliced one of them crosswise into inch-thick pieces and got this:

salmon-stuffed peppers

A decorative sprinkle of smoked paprika over it and not only was it good for a hot lunch, it would also be a quick and pretty southwestern take on gefilte fish as an appetizer, one or two slices per person, without all the traditional filler or grating and boiling and carp in the bathtub and so on, but with some actual flavor and freshness.

B’te’avon (bon appétit, mangia bene, eat nice) and Chag Sameach (happy Passover)!

Chocolate Quickie: Unromantic but Reliable

It’s Valentine’s Day again–midweek, busy, too many items still on the list from last week to want a lot of fuss–or even be able to guarantee that my husband and I will both get home a reasonable time for dinner in a reasonable frame of mind to celebrate romance by cooking, or eating, something fancy. Last night I spied way too many people at the Trader Joe’s heaving large bars of chocolate and multiple bouquets of hothouse roses toward the cash registers. That’s okay–I’m not raining on anyone’s actual romance, but I have to admit I’m not feelin’ the official holiday symbols this week. Chocolate is good, don’t get me wrong. Flowers are pretty but require a vase and a pair of shears–usually right when I’m trying to cook dinner.

Last year we actually managed éclairs, and it was fun if a bit much–even though I managed to strip it down considerably with the microwave. Microwaveable ganache truffles are also easy, quick and fun if you’ve got the time to feed them to someone you love.

But with a kid who’s now waiting for college acceptances (and us parents anxiously figuring out both taxes and how to get around the outrageous Estimated Family Contribution)–well, we could all use a smallish midweek-style treat that doesn’t involve even that much effort to make–or work off afterward.

Lately I’ve been digging around in my cooking “blank books” from the last couple of decades. Part diary, part notes to self with or without illustrations in scratchy pen and occasional bragging, political satire, or outright swearing as the situation demands–when you’re writing cooking instructions for yourself, why not? I started these books long before the era of the blog, and hunting through them takes me back to what I was doing at the time.

Half the recipes I came up with are from before I figured out how to work a microwave, but I seem to have gone overboard as soon as I got enough of an introduction. One of the more unusual finds that worked really well a couple of years ago in a birthday dessert emergency (why do I tend to have these?) was a small but rich-tasting dessert halfway between cheesecake and flourless chocolate cake. The best parts:

  1. A limited and very simple ingredient list and
  2. You microwave it in 3 minutes. Seriously. Also,
  3. It’s small, and there are no leftovers. Sometimes that’s a plus.

This would probably be a decent rescue option if you had to make dessert with whatever’s in the cupboard and the fridge, and you’d left things till the last minute…or even a little later than that. As slapdash as this quickie is, it’s got big, big advantages over anything storebought–time, taste AND chocolate. Also, modest calorie and carb counts.

Not everyone has a grocery that carries labaneh, which is kind of a Middle Eastern cross between sour cream and yogurt cheese. Nowadays, though, a lot of mainstream supermarkets are carrying plain Greek yogurt, which also works pretty well, even nonfat. And not every doctor approves of cheesecake in any quantity, much less huge. Damn, as I’ve said before, my cholesterol-packin’ genes (also jeans, but that’s another matter). The completely nonfat version of this dessert works fine and tastes good too, now that I’ve retried it, and all the ingredients are real.

So–whomp the ingredients together in a bowl, nuke it about 3 minutes, cool it, stick it in the fridge. Serve it with raspberries, peaches, cherries, whatever goes with chocolate in your book. Or jam (raspberry, apricot or sour cherry would be great on this, and so would marmalade…).

Chocolate Quickie

Serves 3-4 in smallish wedges if you don’t care how it looks–otherwise (probably smarter) pour it into small single-serving ceramic cups before microwaving. If you double the ingredients, it’ll need another minute or so in the microwave. Definitely serve with fruit.

  • 4 T cocoa powder (20 g by weight; 8 g carb)
  • 4 T sugar (60 g, all of it carb)
  • 1 lg egg
  • 1/2 c. (112 g by weight) labaneh, preferably 1/2 the fat, or else fat-free or 2% plain Greek yogurt. (about 3-5 g carb for any of them; about 7 g saturated fat and 10 g total fat for the full-fat labaneh, much less for the yogurt)
  • 1/4 c. water (yes, really. It’s 60 grams or mL if you’re weighing it out)

Whisk everything together until smooth in a microwaveable ceramic dish (big soupbowl is fine), or else mix and then pour into small microwaveable coffee or flan cups for individual servings (more attractive and probably less prone to serving mishaps where it falls apart when you cut it and lift it out). Microwave uncovered on HIGH 3 minutes for the big bowl, maybe 2 minutes for the individual cups, checking progress and adding extra time in 20-second increments just as needed so you don’t overdo it. When it’s done it’ll be a little dry around the edges and just pulling away from the bowl or edges of the cups. Cool to room temperature, cover and chill until it’s time to serve. Cut in wedges with a sharp knife if you went with the single bowl version. A pie server would probably help it keep its shape long enough to dish up.

Variations–add some grated orange peel or marmalade to the mixture; add a spoonful of almond extract, vanilla, amaretto, or hazelnut liqueur; add espresso instead of water…?

Carb counts: about 17 g apiece for 4 servings, 23 g each for 3 servings, all of it in the form of sugars.

Microwave Tricks: Black Beans

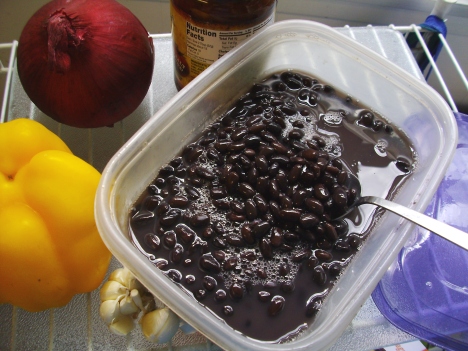
microwaved black beans

Cooking seasonally is a tricky thing–especially if your season currently includes hurricanes or extreme heat. Pasadena has finally cooled down to 80s/90s with a bit of cloud cover, but last week’s 105-degree afternoons were a serious challenge. It was so bad the only time to go out for a walk was about 5:30 in the morning. Hard to think school has been in session for a month, it’s already September, and Rosh Hashanah is a week and a half away. Running the oven is, to put it bluntly, not an option, and the stove top isn’t much better in my small and easily overheated galley kitchen.

Microwaving is a powerful way to cut the time and pain (and airconditioning bills) for bulk cooking of things like vegetables, rice, pasta…and dried beans, which are much cheaper and more versatile (and much lower in sodium) than canned. Make a bean stew or chili and you can zap a portion of it at will later in the week. Plus bean salads can be served cold–a plus for weeks like the ones we’ve had recently.

But for microwaving, you usually have to adjust whatever method is spelled out in a recipe to your oven, your containers, your food quantities. Microwave times are sensitive to all of those factors, plus how much water you have (water’s the main molecule microwave radiation acts on) and whether or not you’ve got a lid.

Most people don’t try to make changes based on their first-run results and most cookbooks never really explain how to make useful adjustments. Predictably, most microwave cookbooks end up in the Last Chance bin at your local Friends of the Library booksale.

It’s a shame, because once you’ve got your timing and so on down, you can repeat it with reliable results.

Over the years I’ve posted basic heat-to-simmer-and-let-sit-to-absorb microwave methods for cooking split peas, chickpeas, lentils and other bulk dried beans. Lentils and split peas always did work out well without needing to soak them first–they tend to be easier to cook quickly by standard stovetop boiling too. Chickpeas work okay if you presoak them or hot-soak in the microwave (heat briefly in water just to cover, let stand 15 minutes or so and let them swell up) before the main cooking, and adding a dash of baking soda to the soak water really helps. Same with gigantes (giant favas)–which I’ve now decided cook better with the skins left on, same as if you were boiling them, and they’re certainly a lot quicker and easier to peel afterward–also more fun.

But some beans just seem to toughen if you don’t presoak overnight or if you microwave them too long. Black beans and kidney beans have given me more trouble than they seem to be worth–and I’m a bit reluctant to post this because it’s fussier than I like to admit even after adjusting the method successfully. Microwaving isn’t supposed to take more time and fuss than straight boiling on a stove, or working with a pressure cooker, if you have and trust yourself with one.

But this is a good illustration of how to use a microwave as a workaround when you don’t, and it shows you how you might think about making adjustments based on what the food is doing or not doing.

I microwave because I want something relatively safe, that doesn’t heat up the kitchen, and that turns itself off when done because, let’s face it, I’d rather be reading or writing than waiting for a pot of water to boil or jumping up at the whistle to avert an explosion. And I want the beans properly cooked and tender in less total microwave time at the least and without having to boil them afterward on the stove. I’ve done that before and I’ll probably do again if it ever cools down enough, but I’d rather not have to. The prior microwaving steps still shorten the stovetop time to maybe half an hour, but really, I’d rather it were all microwave, no fuss (I can dream, can’t I?)

So after a rethink of my previous methods, I’ve made some changes to the way I cook black beans from scratch by microwave. It also works for things like brown rice, steelcut oats, and other tough, uncut, unpeeled whole grains like farro or pearl barley when you’ve forgotten to put them up for soaking overnight, and at least for the rice it’s quicker than the 45 minutes or so of my previous brown rice method–maybe 20-30 minutes for a pound or two of brown rice. For the beans, maybe an hour of time total, with sitting and rechecking. Maybe less if your beans are fresh enough and/or you remembered to soak them overnight first.

Cracking the method

It starts with the water. I had been covering a pound of dried beans (or brown rice) with more than an inch of water and heating it all, or else heating that much water by itself (more than a quart) and then tipping in the rinsed beans to soak for a bit. But since the water molecules are what the microwave heats up first for preference, the more water you have, the longer it takes for the Continue reading

Microwave Tricks: Quick-Pickled Peppers

Microwave Hungarian pickled peppers

This is what happens when I get to the corner grocery or (more occasionally) the farmer’s market at the end of the day: I’ve already got a basket full of stuff, ripe, bursting with aromas it would take most supermarket produce days, weeks or forever to achieve. But there in the last-chance corner is a bag of very pale green, very contorted Hungarian peppers, about 10-15 of them for a last-chance dollar. They’re in good shape, maybe one or two has a couple of minor wrinkles, but that’s it. I can’t resist.

At first I thought I’d use them to stuff with corn kernels and feta and scallions, which I haven’t done for a while. But when I got them home, they were obviously too twisted to stuff, and very thin-walled at that. And unlike Anaheim or pasilla chiles, not really spicy enough to set off the corn. What then?

I’ve been feeling my nonexistent Italian and Greek roots lately, so I thought, pepperoncini? Well, why not? I did pickled green tomatoes last year, and it was incredibly easy (except for finding the green unripe tomatoes, which even my local Armenian corner store doesn’t provide often, and especially not at the height of the summer Fresno tomato frenzy).

But I didn’t want to wait two whole days for the peppers to ferment. And I didn’t want them quite as salty as actual pickles. So I decided to microwave-marinate them the way I make marinated artichoke hearts.

Yes, you can always just buy a jar of pepperoncini. My greengrocer definitely has them. But if you have the fresh peppers and they’re dirt cheap and you just want them right now, not necessarily every day for the next three months, microwaving them takes all of five minutes, and the result is surprisingly good.

It also brings out the full flavor of the peppers quickly–even a hint of spice, though they’re still not hot, and you can limit the salt to your own taste. Continue reading

Green Beans Get Serious

If you’ve gone to the supermarket the last couple of weeks, and seen huge haystacks of green beans on sale for under a dollar a pound, you might be wondering to yourself how much green bean casserole can any one family take? Pretty bad that Thanksgiving only has one sanctioned green bean recipe, and that no one can think of anything better to do with them over the holidays.

Not that I’m against plain and simple green beans, as long as they’re actually still green. Fresh, lightly steamed or microwaved or stir-fried, not boiled to death. Although frankly, I often prefer them raw and fresh as something to just wash and nosh, like carrot sticks or celery.

Even frozen green beans are fine if you treat them gently and cook them a bit less than you would fresh ones–the freezing and thawing break down all vegetables slightly, and you don’t want them to go to mush or turn brown.

Just not the dank, slimy brown horrors that emerged from a can every once in a while when I was a kid, and which my mother insisted, against all reason, had once been something living. Canned green beans are the zombies of the green bean world.

But with a bounty of cheap greens in winter, what to do with them is a pretty good question, and one that begs a three-minute solution, especially when most green vegetables are getting harder to come by. You want to stock up but you don’t want to be eating the same old, same old for a month.

My best solution for a quick green bean dish–other than the grab-and-go raw snack vegetable business above–is of course to wash and trim the tough ends from a bunch of green beans (I usually grab about a pound at a time). Stick them in a covered container or between two microwaveable stoneware or Corelle dinner plates with a drizzle of water (anything from a couple of tablespoons up to about a quarter-inch in depth) .

Three minutes on HIGH should cook a pound of rinsed and trimmed green beans to that crisp-tender ideal where they’re still green and just cooked but still have a bit of bite to them. Basically like blanched or steamed, but without the big stockpot of boiling water (which I hate to wait for and which seems a waste), the strainer, or the ice water bath (another wasted bowl).

And you can do it right before dinner as a last-minute thought, just enough for that meal so they stay green. Drain and serve them ASAP for best results. Don’t give ’em a chance to go brown.

If you want to keep them green for later, microwave them a little less, maybe 1.5-2.5 minutes per pound, just until they begin to turn jewel green, rinse them under a cold tap as soon as they’re done, drain and chill. Do not add anything acidic to them until just before you serve them so they don’t turn olive-brown.

Yes, it’s pretty plain–which is handy if you want it versatile. You can serve them hot with a mustard garlic vinaigrette or other salad-type dressing to dip into or drizzle over them. Or the richer (but not saturated-fat) sauces, tehina with lemon and garlic (and either water or plain yogurt), or Asian peanut sauce with chile, garlic and ginger are also good.

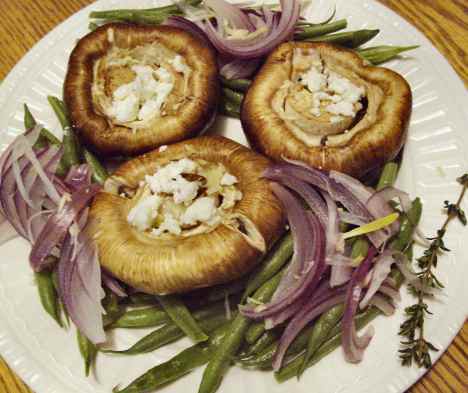
If you want something a little fancier-looking and vaguely French (we’re going for “day in Monet’s Garden,” not “tacky tourist café with haricots verts side dish that turns out to be nothing more than buttered overcooked green beans”) you can arrange the green beans in a covered stoneware platter or bowl, with thinly sliced onions and a bit of thyme and minced garlic strewn around to get a fairly nice-looking and savory microwave-to-table kind of dish that still only takes a few minutes to throw together and zap to perfection.

greenbeanswithstuffedcriminimushrooms

Slice some mushrooms over the green beans or nestle mushroom Continue reading