• Enter your email address to subscribe to this blog and receive notifications of new posts by email.

    Join 237 other subscribers
  • Noshing on

    raw blueberry pie with microwaveable filling and graham cracker crust

    This mostly-raw blueberry pie is a snap to make and very versatile--the filling microwaves in a few minutes, and you don't even have to bake the zippy gingered graham cracker crust--perfect for a hot Fourth of July and all summer long.

  • Recent Posts

  • Contents

  • Archives

  • Now Reading

  • See also my Book Reviews

  • Copyright 2008-2022Slow Food Fast. All writing and images on this blog unless otherwise attributed or set in quotes are the sole property of Slow Food Fast. Please contact DebbieN via the comments form for permissions before reprinting or reproducing any of the material on this blog.

  • ADS AND AFFILIATE LINKS

  • I may post affiliate links to books and movies that I personally review and recommend. Currently I favor Alibris and Vroman's, our terrific and venerable (now past the century mark!) independent bookstore in Pasadena. Or go to your local library--and make sure to support them with actual donations, not just overdue fines (ahem!), because your state probably has cut their budget and hours. Again.

  • In keeping with the disclaimer below, I DO NOT endorse, profit from, or recommend any medications, health treatments, commercial diet plans, supplements or any other such products.

  • DISCLAIMER

  • SlowFoodFast sometimes addresses general public health topics related to nutrition, heart disease, blood pressure, and diabetes. Because this is a blog with a personal point of view, my health and food politics entries often include my opinions on the trends I see, and I try to be as blatant as possible about that. None of these articles should be construed as specific medical advice for an individual case. I do try to keep to findings from well-vetted research sources and large, well-controlled studies, and I try not to sensationalize the science (though if they actually come up with a real cure for Type I diabetes in the next couple of years, I'm gonna be dancing in the streets with a hat that would put Carmen Miranda to shame. Consider yourself warned).

Microwave Tricks: Ungrilling Corn on the Cob

The last time I wrote about buying fresh corn more or less in season, my daughter was seven years old, green of hand and shin from a day camp project, and eager for me to do the handling so she could inspect each ear without touching them herself or turning them green. Now she’s a camp counselor at a nature center and almost done with college. So it’s been a while.

I wouldn’t normally think I had much to say about corn on the cob–I like it in a limited way, and actually I prefer to use the kernels for microwave chiles rellenos, but my husband and daughter both go for it, so usually when the price has finally dropped under 50 cents an ear (signalling “corn season” prices in the LA area) I buy it mostly for them, and I cook it as simply and quickly as possible, steaming it in the microwave. Because no matter what else may be true, when there’s corn in LA, it’s pretty hot out and the last thing I want to do is heat up my little galley kitchen.

Which turns out to be the deciding factor for this post. Temperatures around the southwest are edging up over 100–as expected; but at this point the northeast has also been in the 90s, and Portland, Oregon, has hit 116, hot enough to cook mussels in the harbor. It’s insane.

But microwaving corn isn’t just a survival tactic or a contingency plan.

My daughter was recently home for two weeks before going back to New York and lamented that my corn is “so much better” and tastes fresher than most of her friends and my in-laws make it. My in-laws are all hands-on denizens of Northern Califoodia, and a typical Fourth of July weekend sees barbecueing with many homemade sauces and bastes and corn roasted in the husk and so on.

So I was surprised–pleased, because my daughter has a better palate than I do, and she tends toward snark around me. But surprised, because she apparently meant it. Not being a huge corn fanatic, I think, “it’s just corn in the microwave, big deal.” Certainly, microwaving is much less glamorous and won’t result in attractive grill marks on the corn, much less the irreplaceable smokiness. So why would it be better?

My husband grew up for a while in Southern Illinois, corn country, and says the best corn he ever ate was when his family visited friends on a local farm. The hosts brought a stockpot of water out to the field between rows, set it boiling on a brazier, and instead of picking the corn, they just bent the nearest stalks directly into the pot for a few minutes, just enough so that the ears in the pot were cooked through and juicy, not enough to let them overcook with shriveled kernels or turn sicky-sweet and starchy like canned corn.

So that’s the ideal, rustic way to make perfect, exquisitely fresh corn on the cob. Ironically, a microwave can get you fairly close with supermarket corn that is obviously not still growing on the stalk for ultimate freshness, and you don’t have to visit southern Illinois farm country in the middle of the summer (which I have done, once, and it was really, really hot and stifling in my uncle’s childhood home). Or schlep pots of water out to the field in the middle of said summer and wait for them to boil.

Microwave-steaming is very different from stovetop methods like boiling, blanching or steaming. It’s not just the way it heats food–acting preferentially on the water molecules in or around the food–but how the food comes out as a result. If you do it right–just a little water, not a swamp, and put a lid on the container–a few minutes on high power will steam things like broccoli or asparagus to fork-tender while preserving the bright jewel green color and fresh taste you might expect from a stirfry that barely cooks the vegetables at all. Stovetop steaming to that color without going over into olivey, sulfurous territory would take longer and give you less tender broccoli as well, and boiling–don’t get me started. Moreover, you can keep the microwaved broccoli green and fresh-tasting longer if you microwave it just to the point you want or a little before and then pour off the drizzle of hot water and open the lid a bit. Even a head of broccoli that’s going bronzy-yellow after a week-plus in the fridge will generally perk up and be edible, not sulfurous-tasting, if you microwave-steam the florets instead of trying to deal with them some longer way.

Much the same can be said for corn on the cob. Microwave-steaming with only a little water and a lid cooks the cobs pretty fast, because the microwave energy heats the water inside the kernels as well as the water you added to the container, so it steams the corn from two directions at once.

Quantity and Layout

This method is pretty easy as long as you keep a couple of key factors in mind, namely how much food you’re trying to cook at once and how you lay it out in the container.

Raw corn cobs, shucked, rinsed and broken in half for microwaving

You wouldn’t want to try this for 20 ears of corn at a time, because the more food you microwave, the more energy and time it takes to get it all cooked, and it will cook less evenly and not be worth it. But for five or six people, you could probably do ok in one or two batches depending on what containers you have.

The other main thing about steaming ears of corn in the microwave is that you want them to cook as quickly and evenly as possible, just until they are cooked, which means you need to expose as much of the surface area of each cob as possible to the steam and, at the same time, to the microwave energy. So ideally you want them standing upright or at least diagonal, not lying flat on the bottom of the container or on each other if you can help it. You want the steam to circulate throughout the container, and you want the lid to keep it in and keep it focused on the corn.

A couple of ears left whole–lifting them up diagonally in the container helps them steam evenly.

For my containers, which tend to be 2.5 qt or liter snaplock boxes about 5 inches high, I break off the narrow “handle” and snap the ears in half after shucking them and rinsing off the last of the cornsilk threads. My hands are fairly strong so I just do it by hand, but you can also use a sharp knife to cut through the middle of each cob without too much sawing–the newer santoku-type knives or a microserrated paring knife would work pretty well. I can fit 3-4 ears’ worth of corn halves into one container, and I’ve done up to 8 ears of corn using two old-Pyrex mixing bowls, one over the other as a lid for a sort-of spherical container, so probably if I tried I could fit 6-7 whole ears into two large snaplocks, one used upside down as the lid. But I suppose your ability to try tall microwave containers and tall food in general depends on the size and height of your microwave.

The setup for 6 half-ears of corn

In any case, once you have the ears or half-ears arranged as best you can, you want to drizzle about 1/4 to 1/2 inch of water–no more–into the bottom of the container, and then put a lid on fairly well sealed so that when the microwave heats the water molecules, most of the steam stays in the container and doesn’t escape. If you’re resting one snaplock box on top of the other for a taller container, the seal won’t be tight but it should still keep most of the steam in where it can go to work on the corn.

For 3-4 ears’ worth of corn, I usually microwave on HIGH for 5-6 minutes and then let it sit a few more minutes to continue steaming inside the sealed container. Usually that’s enough to get it cooked all the way around the cob without starting to wilt or wrinkle the kernels. For more corn, you’ll need more time, maybe 8-9 minutes for 6-7 ears, whether broken into halves or kept whole. Obviously check progress after letting it steam on its own for a bit, and add a minute or two extra of microwave time if you need it. When the corn is just cooked, the cobs should be steaming hot (I hope this is obvious), the kernels should no longer be hard or opaque and chalky-looking, the way raw corn kernels are, but slightly translucent, and they should give a little when you press lightly against them with your finger.

If you have to lay the ears flat to fit a shallower container, the top part of each cob is going to cook more than the underside, and the underside will still be visibly raw after several minutes. Try to keep to one layer of corn so they don’t block each other from the microwave energy and make sure to stop the microwave in the middle of the cooking time and roll the ears over so the less-cooked bottom halves get some steam. Maybe also raise the container up off the turntable an inch or so by setting it on top of an overturned microwaveable saucer, bowl or shallow snaplock box to let more of the microwave radiation reach the bottom.

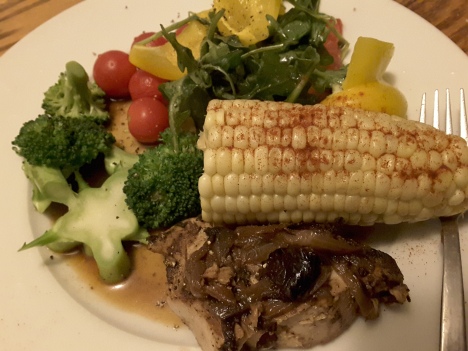
When the ears are done, carefully open a corner of the lid away from your face and drain the hot liquid out. Serve with whatever you like on corn–my current preference is a sprinkle of smoked paprika or chipotle salsa, ideally with a squeeze of fresh lime–all the best of barbecue without the grill, the grease, the heat, the wait, or the cleanup. You can reheat any leftover ears in the same microwave-steam setup but for just a minute or so, or cut the kernels off for a stir-fry with mushrooms and onions or as a stuffing for mild or slightly hot peppers–microwave all the way if it’s really hot out.

Mangia bene, b’te’avon, eat nice and keep as cool as you can.

microwave-steamed corn

Microwave-Pickled Eggplant for Felafel

What goes into a classic felafel pita? Tomato/cucumber diced salad, yes. Chopped or shredded cabbage or Greek-style lahanosalata–maybe. Hummus and tehina–of course.  Dab of z’khug, harissa, salat turqi and other medium-hot red pepper condiments, up to you. Olives? if Greek-style and not the black rubbery cheap flavorless American ones from a can. “Chipsim” (aka, chips or French fries)–not my thing but okay as long as they’re fresh and crisp, not soggy or lukewarm.  Hilbe–a sour fenugreek-based sauce something like mustard dressing.

And pickled eggplants. The true pickles for felafel, if you ask me. You can probably find them in cans in Arab and Armenian groceries or online, but they’re pretty full-on brined and have a lot of the same deficits of both commercial cucumber-type pickles and canned vegetables. Lot of salt, a bit metallic from the cans, and a little less than fresh. Plus with cans, you have to either use them up all in one go (at your huge felafel party) or else store the unused pickles in a fresh nonreactive container in the fridge. Which isn’t necessarily that big a sacrifice, if you’re really into them, have a lot of takers to share them with, and/or are planning to eat leftover felafel for the rest of the week (month?) But fresh-made eggplant pickles are a lot better if you just want them for a meal or two, or you want to control the salt level so you don’t wake up the next day with swollen ankles and fingers like cucumbers.

Classic pickles are made with the little finger-sized eggplants like the ones I used for Syrian stuffed eggplants a few years ago or else with long, thin eggplants sliced crosswise. But regular large ones will also work, cut into bite-size pieces.

If you have fresh eggplants of whatever size, you can pickle them in one of two ways, depending on your patience level. The first is your basic half-sour pickles fermented in a couple of days to a week in a mason or canning jar on a counter–much the same as for half-sour kosher dill pickles or pickled green tomatoes but maybe without the dill. When I lived in Israel back in the ’80s, I was surprised to see jars of eggplant fingers pickling on many people’s home kitchen counters. It seemed so Mediterranean-idyllic to me, coming straight out of a mainstream college town in the days before wholesale foodieism. For eggplant, as for the green tomatoes and cucumbers, use a standard salt and distilled vinegar brine that you’ve boiled and cooled, and pour it over the eggplant chunks and flavorings in the jar. Instead of dill, throw some well-scrubbed organic lemon slices and small whole dried hot peppers into the jar with the halved garlic cloves and whole coriander seed, pack the raw eggplant slices in tightly, and pour the brine over before capping the jar and letting it sit to ferment a couple of days. You’re not going to process these in a hot water bath, so keep them in the fridge and use them within a week or so.

However…there is a much faster way to get to pickled eggplant heaven in about 5 minutes–microwave marinating. If you just want a few right now, you want eggplant pickles that taste fresher and have lower salt, or you’ve never tasted them before and you’re not sure what you’ll think of them, a microwave will get you a reasonably small taster batch in about 5 minutes flat, and you can make them in a snaplock container that goes straight to the fridge once it’s cooled down. The taste and texture are both surprisingly authentic, based on my last two tries.

Why would you bother pickling an eggplant instead of cooking it, anyway? Well…I had a big eggplant that I hadn’t gotten around to using for a week. It was developing soft brown spots in places and I wasn’t sure was really going to make it much longer if I didn’t get on and do something with it, but I thought it was probably now too tough for straight eating–eggplants get tougher and sometimes more bitter inside as they age. So I cut off the spots on the peel and started slicing the rest into small wedges to see if I could do a quick version of eggplant pickles in the microwave and get somewhere close.

I’ve done it before with mild hot peppers (and occasionally, accidentally, with peppers that turned out not to be mild) and sometime this past year I tried it with a couple of green tomatoes too, despite having made pretty good deli-style pickled green tomatoes the official way a few years ago. The microwave tomatoes came out basically identical to the two-day jar-fermented version, which surprised me. So I can say with confidence that this microwave method seems mostly good.

But here’s the tricky bit.

When you microwave in a brine, you have to work out how soft or crisp you want the vegetables to be, and play around with the microwaving times and what you put in when so that you cook the vegetables just enough and let the brine penetrate, but not so much as to end up with limp mush. The hot vinegar and/or lemon juice will also “cook” and discolor some vegetables more than others. Commercial operations offset these and other problems by adding sodium metabisulfite, alum, and other tricky preservatives and texturizers at various stages, but they’re not easy to obtain for home use and can be dangerous if mishandled. I’m pretty sure they don’t actually improve the taste.

It’s both easier and a lot safer–not to mention cheaper–to play around a bit and figure out a microwave method that gets you where you want to be or at least close. Because you can. Of course you can.

Here are a couple of strategies for microwave-pickling depending on the kind of vegetable you have and what texture you’re aiming for, and then we’ll look at what I did with the eggplant slices.

Microwave Marinating Combinations

Do you want to microwave the veg and brine ingredients together, all in one step, and let the brine cook the vegetable? That works well for things like marinated artichoke hearts or sweet and sour red cabbage. You could do that as a first try and see if you like the texture, adding a bit of time if it’s not cooked enough for you or cutting back the next time if the veg is too soft. Easy enough.

But you can also adjust which part cooks more, the veg or the brine. You know at some point you’re going to have vegetables in a container with brine and a lid, but the order and degree of cooking are up to you.

Continue reading

Microwave Tricks: Felafel

In my last post, around Passover, I made (finally) successful microwave matzah balls more or less the same way I make microwave-to-frying-pan felafel, but then I realized I’ve never actually posted on how to make microwave-assisted felafel or why you might want to. So before getting into what I was hoping would be a nice quick extra, the eggplant pickles you need for a great streetside felafel pita (next post), I decided I should really put in a word for microwave-assisted felafel.

Felafel stands were few and far between in most of the US even before the pandemic hit, and most people still don’t make their own felafel at home, even from the available box mixes, because deep fat frying is expensive on oil and frankly kind of a pain.

If you’ve never eaten felafel, they’re kind of a crunchy, spicy fried vegetarian meatball made with chickpeas, favas, or a combination. At Israel’s felafel stands, Jewish or Arab, you get them served in a pita pocket and ask for whichever additions you want from a huge selection: finely chopped tomato/cucumber salad, tehina and hummus, harissa or z’khug, sour/spicy mustardlike sauces like hilbe (fenugreek-based) or amba (mango-based), sour pickles (the aforementioned eggplant pickle is my favorite and therefore obviously the best), sometimes they even squeeze in a couple of french fries, which I really don’t get, but to each their own, which is the point. All that ends up overstuffed precariously into the pita with the three to five felafel. As with a food truck burrito, there’s an art to dealing with it: you try hard to eat it before it falls apart and do your best not to drip all the different simultaneous sauces on your clothes.

The home version is a little easier, once the felafel are cooked, anyhow, but probably a little less exciting.

You might think that with all the toppings, the felafel would somehow get lost in the mix. But the felafel themselves are actually mission-critical. Especially at home, where you’re, as my mother would say, “Not a Restaurant” and not offering every possible permutation and topping ever, so the felafel are going to stand out more. They actually have to be good or it’s not a party.

Box mixes (Near East, Sadaf, etc.) tend to lean heavily on salt instead of more complex flavorings and they’re often pretty dry because people don’t let them hydrate and absorb water well enough before frying, so they’re never going to be great unless you doctor them with some extra fresh ingredients, and by that time you might as well make a really good felafel mix from scratch, which is what we’re doing today. It’s not actually much more work, it tastes a lot better, and the cooking, especially if you take advantage of a microwave, is lighter, easier and less dangerous as well.

GOOD felafel (I’m about to get seriously opinionated here–take it or leave it):

To get the best out of felafel, classic or microwaveable, what you’re aiming for is a crunchy browned ungreasy outside and a fluffy, cooked-through-but-tender-and-moist inside. And preferably flavored with something better and fresher than the usual box mix bare minimum dusting of faded cumin and garlic powder overcome by a ton of salt. And the main thing, which Whole Foods still doesn’t get–felafel must be served hot and crisp. Not refrigerated and thus leaden in the salad bar. And not dried out and tough to swallow–you don’t want to be biting into a golf ball.

So step one is to make your own felafel mix in a food processor or blender with a couple of cups of drained chickpeas plus fresh ingredients to taste.

Israeli chefs insist on raw soaked chickpeas for the classic deepfrying version of felafel–but this may not be so good if you’re microwaving, because they may not cook through well enough. I find that well-drained home-cooked chickpeas (I’m using my updated microwave black bean method these days) or well-rinsed and drained canned chickpeas work fine, and for that matter, so does chickpea flour made up to a thick paste with water and left to sit a while before blending in the other ingredients. I’ve even made pretty decent microwave-to-frying-pan felafel using leftover thick-from-scratch hummus as a base (note: NOT commercial supermarket hummus, which is too thin and too oily, with too little actual chickpea content, plus the taste is kind of shvach).

The all-important other ingredients are spices (cumin and garlic at a minimum) for flavor, a little flour for backbone, a dash of baking soda for fluff, plus–and this is where fresh beats the box–fresh vegetables and herbs for flavor, moisture, body, and general lightness of being. Onions and a good handful of parsley or cilantro–cilantro for preference–are typical but you can also sub in a chunk of cauliflower or zucchini in the food processor for maybe up to a quarter of the chickpeas and it’ll help keep the moisture. Other spices you might not have thought of but which give a more authentic and aromatic touch (in subtle pinch-not-spoonful amounts) include allspice, coriander, and caraway. Any of these in small amounts blends well with the cumin and garlic and elevates felafel above the standard box-mix “salt bomb” style.

When you’re happy with the mixture, process the whole deal until it’s a coarsely ground mixture that holds together with the chickpeas, onion and herbs in bits the size of toast crumbs or so, not too lumpy but also not too smooth or pasty (unless of course you went with chickpea flour or hummus as a base, but the added veg will still give it a little texture).

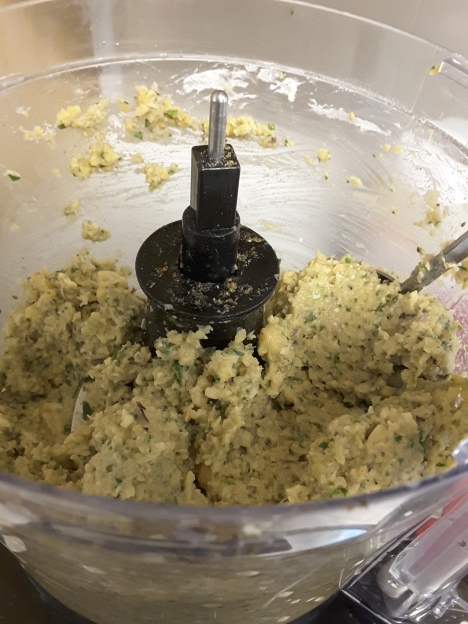
felafel mix ground up medium-fine with a bit of texture

As with the matzah ball mixture from April, when you microwave, you want a little more moisture in the felafel mix to start with because the microwave tends to dehydrate foods. You want the mixture ground fairly fine, capable of Continue reading

Microwave Wild Rice Pilaf

Thursday was kind of rushed–we started the morning late and kept being slow until it was nearly 2:30 and time to Zoom our family. But I managed to get a few Thanksgiving-type things going in the microwave for dinner before that and even managed to post about them at an almost-civilized length instead of going off on more tangents than anyone really wants to read even under current conditions. Artichokes–no big deal. Cranberry sauce, even less. Wild rice, though.

Wild rice, rinsed and ready to add water and microwave. Not very friendly-looking, is it?

Any grain with a tough husk takes a longish time to cook conventionally on a stovetop compared with something like white rice or rolled oats. And wild rice is tough enough that the Trader Joe’s package directions strongly recommend soaking the stuff in a bowl of water in the fridge overnight before attempting to boil it. A good suggestion that would help for microwaving too–a fine suggestion, if only we had started with things the day before. Not all that helpful when you need it the same day.

Microwaving works for brown rice, another long-cook whole grain, so it should (and in fact did) work for wild rice too. But it’s not quite the brief one-step kind of technique it is for white basmati rice. More a “nuke a few minutes to a simmer, let it sit 10 or so minutes to absorb hot liquid, stir, nuke a few more minutes and go away again, stir and check…..” kind of thing, similar to the way I cook beans, chickpeas and lentils, but with fewer rounds of cooking. I don’t know, it didn’t seem like a nuisance to me because I was doing two or three other things while it sat (one of those was sipping champagne while noshing with my husband on a few decorator cheeses and nuts and chatting with my in-laws and my daughter over Zoom). So I wasn’t in an overwhelming rush.

And it came out pretty nicely, so I’m posting it now. I would in fact do this again, because it came out pretty much as well as the original with a lot less work.

When I was younger and well before I had a child (who is now old enough to cook with her housemates, and did), I would make this pilaf in an electric wok with a lid, frying the onions and mushrooms first with the herbs, then adding the wild rice and some pearl barley and broth, bringing it to a boil and turning it down to simmer with a lid for however long, checking once in a while and stirring in the fruits and nuts and adding a little broth or water as needed. Similar idea to the microwaving, but on a stove or any heat element, you need to stay a lot more present. Microwaving lets you go away–it can stop itself and sit for a while without things drying out and scorching.

Continue reading

Rethinking “pantry staples”

Whenever I see the words, “pantry staples,” I immediately hear that line–the only one I can remember–from Saturday Night Live alumna Julia Sweeney’s one-woman show God said, Ha!, from the late 1980s or thereabouts. Sweeney’s midwestern mother comes to visit and pokes around in her New York City kitchen cabinets, then asks, “Where’re yer mixes, hon?” And Sweeney realizes how much living in New York has changed her–she no longer buys box mixes for anything because all her standards are higher.

Likewise, I’ve been thinking lately that it might be a good idea to redefine pantry staples as something more useful and better-suited to a heart-healthy, inexpensive and vegetabalia-filled diet than the usual stale set of dried-out spices, indestructible and tasteless boxes of mac ‘n’ cheese and Hamburger Helper,  bouillon cubes and Ritz crackers.

For people whose cooking experience and time are limited, or who grew up in the Pop-tart generation (what I’m calling most of my contemporaries from the ’70s and ’80s schoolyards), well, we’re all in our 50s and 60s now and our doctors are always telling us to lose weight, eat more vegetables,  get more fiber, cut back on takeout, etc. etc. And it’s now looking like we may get that extra incentive.

Food blog readers are a little more likely to shop like they mean it, but in practice, a lot of the otherwise bright and well-educated people I know are still either stuck in the where-are-your-mixes mindset or else buy unnecessarily expensive designer ingredients that aren’t flexible for day-to-day cooking–which in fact they don’t really do. Actually, none of them seem to cook much at all anymore.

The mixes crowd relies on drive-thrus for refueling on the way to the kids’ soccer practices. No veg. The foodies’ pantries contain 29 or so designer vinegars, but their actual dietary staples are Amy’s™ frozen vegetarian (but high-sodium) prepared meals and/or takeout containers from the Whole Foods deli counter, supplemented with wheatgrass-and-spirulina juice drinks, smart waters, kale chips, a snack baggie of dried goji berries, and those microwaveable frozen brown rice bowls-for-one that cost more than a two-pound bag of actual brown rice. Not much fresh veg there either.

To say this isn’t how we mean to eat is an understatement. But getting from our current conventions to a better daily diet is going to take some rethinking.

Or, of course, a crisis like the one we’ve got now.

If you’ve  been out panic-shopping for toilet paper this week anywhere in the US (and apparently in a lot of other countries as well) and come to a stunned halt at the sight of a completely empty aisle in the supermarket or big-box store, you’re hardly alone.

For the past week, panic has hit the US full-blast and people are trying to think ahead a little in case things don’t actually get better by next week. Last week I was still thinking “climate change” and how to reduce the amount of plastic we go through weekly and check the bargain bins as part of my weekly shopping to reduce food waste. The last few weeks have been full of good citrus finds–mandarins, grapefruit, a bag of cara cara oranges at a dollar apiece–a small, cheering upside to counter all the many, many downsides of the news.

And now this–my daughter just came home for spring break, her college is going online-only for the rest of the semester, she’s worked very hard for several months only to have everything suddenly upended, and she might be home with us more than for the expected week depending on how things continue. I might want her here rather than in upstate New York, just in case she’s got a better chance of getting food, supplies, and medical treatment. Even though the first day home was the usual vacation stake-out-the-exact-middle-of-the-couch-and-watch-movies.

So. Now it’s “what’s the best thing to stock up on if we needed to get through a couple of weeks without much available at the stores?” You can’t do a ton at once unless you have a big budget and a big storage area–an extra freezer?–but you can probably figure that most of us could make smarter choices if we have to.

I’m not sure the mother-daughter team just ahead of me at Trader Joe’s was doing that on Friday, even though they had corralled two extremely full shopping carts for the task (and mistakenly hijacked someone else’s cart for rebagging before they realized it wasn’t their stuff). A lot of frozen stuff, a lot of canned stuff, a lot of bottles of wine and several of something harder.

Maybe that’s a good way to cope, if you can drink? Priorities!

Me? about 5 pounds of frozen fish, two big cartons of plain yogurt, two cartons of eggs, 3 pounds of cheese, some for freezing for later, some spinach and a pound of almonds and two pounds of sunflower seeds. And tofu. And three big cans of unsalted tomatoes. Three pounds of carrots. Two pounds of whole-wheat spaghetti. And–mostly for encouragement–a big 17-oz bar of TJ’s 72% chocolate. Feel like it might be important, somehow. And it’s just hard enough to break up that we won’t scarf it. As I say, priorities.

I have dried lentils and chickpeas and rice; I already have a ton of cheap, hardy veg in the fridge, a big Kroger/Ralph’s bargain can of coffee that’s not bad if you grind it finer, and milk and so on.  And two bags of flour and one new bag of sugar. And two big cans of pumpkin. And spices and teabags and oil and wine. If we really have to, I suppose we could probably get through a couple of weeks if we’re careful. Now if I only felt safer.

Probably doesn’t help that it’s raining a lot and that I just did our taxes. And that our local NPR station has ditched its half-yearly fundraising campaign to the web so they can bring us uninterrupted wall-to-wall coverage of COVID-19 and All the Resident’s Follies (and follicles) at a 24/7 kind of level. All, and I do mean all, day long. All weekend long. I may ask them to return the donations I already gave them if they don’t give it a rest–or at least give me a rest.

I could only take a few minutes at a time while I was out running chores, and I barked horribly at my husband tonight to please, please spare me for at least 10 minutes and stop reading all the “latest” updates aloud from his smartphone while I was making dinner.

I could already recite every major news point myself without a TelePromptEr–unlike certain puffed-up White House windbags. So. Nothing new there.

I have officially hit my limit. At least for tonight.

I have shopped. I have cleaned. I have cooked. I have washed sheets and towels. I have called my sister and calmed my daughter and switched temporarily to cloth napkins in case we need to reserve the paper we have. I have skulked around the backlot of Target before they opened this morning to witness a line of at least 80 people hoping to snag the limited daily resupply of TP. The Stones couldn’t hope to do better this week–probably because their concerts are cancelled too.

So maybe it’s time to redefine pantry staples as reliable foods you keep on hand and use regularly to help you achieve a balanced real-food, DASH-style diet at home without a major production and daily shopping for specialty ingredients. To my mind, this means starting with the building blocks of the major food groups: lean and relatively unprocessed proteins, nonstarchy vegetables, starchy vegetables and whole grains, beans and legumes,  fruits and either low-fat dairy or calcium-containing nondairy equivalents.

Trying to set up your kitchen to follow a DASH-style diet without going broke  Whole Foods-style is a major shift for a lot of people–especially the call for eating more vegetables, which is the number one thing that seems to have gone missing. Everybody I know–including some dedicated vegetarians who don’t even blink at the prices for tiny packets of prepared seitan and tempeh meat substitutes–is used to protesting that buying fresh vegetables and cooking them every night would be too expensive and too much trouble.

But in fact, even at the major chain supermarkets, regular bulk vegetables are, pound for pound, cheaper than almost anything that comes in a box or jar or can, and they pack a lot more nutritional value without all the detriments of salt, fats, corn syrup, starch thickeners, artificial flavors and colors, preservatives and other unpronounceable additives.

And frankly, fresh veg and most ordinary fruit is still not out of stock at most supermarkets. It’s easy to find, reasonably easy to wash, cut up and microwave or steam or throw into a frying pan or stockpot or slow-cooker. It’s nutritious. It’s filling. It’s low-calorie and versatile. And it’s a good way to stretch the meat, the eggs, the beans and rice that have been snatched up ahead of it. And we have the time and the need for variety.

Be safe, be well, wash hands and do pick up some bulk veg and fruit if you’re shopping for food–and pick up one or two items to contribute to your local food pantry if you can. Check in on your neighbors and family.

Finally–if you have even a little time and room to try gardening, even in washed-out yogurt containers, it’s surprisingly satisfying to grow herbs and a few vegetables here and there. Save and plant a few seeds from things like peppers or beans or tomatoes or squash from the supermarket when you cook, and try peeling and potting the little shoots from the inner root stumps of bok choy and onions too. It’s a much better kind of thing to propagate than what we’re seeing in the headlines.


Why you shouldn’t buy precut veg

I know perfectly well that I’m preachy about buying bulk produce because it’s cheaper by far, the supposed “convenience” of precut amounts to less than a minute’s time difference in many cases, and the fiddly little precut plastic bags are a lot less fresh. But the current recall for a number of precut packaged veg products at Trader Joe’sand elsewhere reminded me of something my mother (who cooks reluctantly, very reluctantly) used to point out when I was a kid.

She would wash everything well under the tap and then (in a rare show of good lab technique) trim the cut ends off further because, as she pointed out, a lot of the produce is cut out in the field, where dirt and pesticides abound. People harvesting out in the field are not washing their hands or their knives every few minutes, nor are they in a position to wash the produce well before cutting it off the stalk or vine. It wouldn’t really improve things that much if they did.

The fancy precut veg producers are doing the washing and cutting up under less dusty conditions, but they’re actually creating more risk of contamination. Every time you cut into a vegetable, you’re exposing an inside surface. That’s usually fine when you’re cooking or serving it right afterward. But let it sit around, especially in a plastic bag, under dubious refrigeration, for several days, (how many more questionable conditions can I pile on here)–as the precut prepackaged veg does in the supermarket, and you’re pretty much begging for something to go wrong. The peel is there for a reason–it seals and filters out a lot of the bacteria and fungi that are always around in the soil, the air, the water, your hands.

Usually when fruit and vegetables are hand-harvested with a knife, it’s on an inedible stem or stalk, and if left in the open air, the cut will dry and more or less seal over–think how cauliflower and celery stumps look, or the dryish root ends of broccoli or cut asparagus. Not particularly appetizing, and generally that’s the bit you’d discard. The rest of the vegetable stays pretty fresh for several days–it’s essentially still alive (sometimes, as with bok choy, even still growing new shoots from the cut stump), so the plant’s own internal chemistry provides another natural hedge against outside bacteria.

But when it’s bagged and cut in small pieces, all the exposed surfaces provide a lot more opportunity for contamination and the plastic bag lets whatever moisture is lost collect on the outside of the pieces. Not good. So the less your vegetables and fruits are cut up before you buy them, the fewer chances to contaminate the inside parts of the vegetables.

Take two on pears

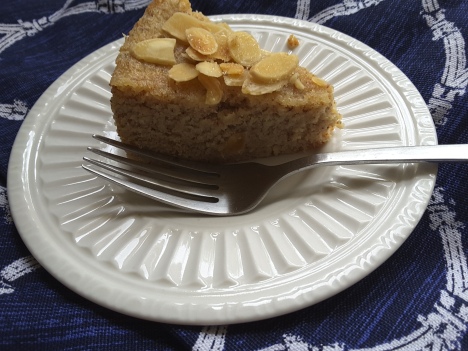
pear almond torte

When pears are good, at the peak of ripeness and aromaticity, they’re very very good, and biting into one will see the juice roll down your chin. When they’re not at their peak, or even when they’re frankly over the hill, you can still use them to advantage.

Slightly underripe pears slice thin and stay crisp in salads or on a cheese platter, something like jicama or underripe watermelon. They’re just barely sweet, not unctuous enough to upset the balance with a sharp vinaigrette or an aged cheese.

Ripe pears can substitute well in a variety of desserts for either apples (when still firm) or bananas (when very ripe, or even overripe and getting mushy).

And they lend a note of European sophistication to many desserts (and salads, and even main dishes) thanks to a dry aromatic twist to their sweetness–not exactly bitterness, more like something that plays well with the bitter notes of almonds, hazelnuts, bittersweet chocolate and dry red wine. These are flavors that don’t mesh as well with most apples due to their more overt sweetness and higher acidity, and probably not so well with bananas either due to the novocaine factor. (Although I’ve never actually tried to pair bananas with cabernet, I can just imagine it. Not promising.)

So even if you’re not a big fan of raw pears, the occasional bargain bag may be worth considering for desserts. If you can get them organic at a decent price, do, because pears are on the “dirty dozen” list for absorbing pesticides. Trader Joe’s sells bags of 6-8 small to medium (3.5-4 oz.) organic pears for about $3 at this writing. But what if, as happens occasionally, the child who insisted she wanted them instead of apples yet again has eaten two, and the rest have sat neglected in the fridge for long enough to turn?

Overripe pears don’t look very nice on the outside and may have gone bland and/or brown, but they’ve still got what it takes if you peel them and cut away actual bad spots. If they’re only a little overripe and still flavorful, use them for a sorbet or microwave them for a minute or so to turn them “micro-poached.” If they’re really soft and going brown, peel and core them, remove all the brown bits and then mash or blend them as you would ripe bananas to give body and moisture to a cake or torte.

Here are two easy microwaveable desserts that use ripe to overripe pears and are Passover-worthy but can work anytime.

microwaved pear with chocolate

Micro-Poached Pears with Chocolate

This one’s very fast and impromptu–make just one pear or a few at a time and add a little time just as needed.

It can be hard to find chocolate that’s labeled kosher for Passover. Depending on your level of observance, consult the Orthodox Union’s Passover Guide, which changes year to year but  lists brands with kosher certification or acceptability even without a mark. If you eat kitniyot (beans, legumes, corn and peas, some spices, seeds and nuts) you can probably eat most chocolate that contains soy lecithin and vanilla. If not, look for the specially marked Elite chocolate bars that are kosher certified for Passover–for the Orthodox Union in the US, it’s the regular OU symbol (a capital U in a circle) but with a capital P superscript at the right. Other kosher certification at the Orthodox level is most likely to be the Hebrew letter kaf and/or a paragraph of Hebrew text naming the certifying rabbinical authority and location, sometimes with a circular seal containing the text (usually this is if it’s an Israeli product). There may be other certified or acceptable chocolates made with vanilla beans rather than extract (or without vanilla at all) and without lecithin–some of the high-end organic brands, for example.

  • Ripe to very ripe pears
  • Dark chocolate, your preference for cocoa percentage, brand, etc.
  • optional: turbinado or regular granulated sugar, cinnamon, powdered ginger etc. for sprinkling (check the OU site if you need to; regular granulated sugar is certified as-is but brown sugars aren’t always, and ground spices need to be certified for Passover)

Wash the pears, split in half and trim out the seed core and stem threads.

Lay the halves face up on a dish or plate that can go in the microwave. Place a square of chocolate on each half about where the core was.

Microwave 1-2 minutes per pear, just until the chocolate starts to melt and bubble and the pears are tender. Sprinkle with turbinado or other sugar and spices as desired before or after microwaving.

Eat with a knife and fork–add blackberries or a dollop of yogurt on the side if you want. Let it cool a little before digging in–I’m never that good and the roof of my mouth sometimes suffers for it.

Making the best of bad pears

The second recipe is yesterday’s riff on the Banana Ginger Almond Torte (from the I can haz cake?! Passover breakfast menu scheme…) crossed with my lightened-up version of Nigella Lawson’s “Damp Apple Almond Cake.”

five overripe pearstrimmed pears

Only, obviously, I had 5 small way-overripe pears to deal with. Brownish to quite brown on the outsides. But good enough inside to yield about 1 to 1 1/2 cups of pear once they were trimmed. And the result was seriously delicious.

pear almond torte slice

Continue reading

Frozen sliced nectarines

frozen nectarine slices

This, forgive me, was the least bad of a selection of really lame post title attempts to figure out what the heck to call this–starting with “peach pops,” which is not just awful but misleading. And kitschy. “Peach pops” implies that you’ve blended some artificially flavored peach iced tea mix with some horrid oversweetened commercial sludge parading as yogurt and frozen it in a pool partyesque popsicle mold–each pop with its own color wand– and posed the result on a slab of watermelon or something. Kind of a Woman’s Day, Family Circle, Real Simple, etc., cover shot.

Anyone who knows me or has ever looked at the photos on this blog realizes I’m not naturally good at cute food, to say nothing of garnishes. Occasionally I try, but I’m definitely not neat. Worse, when it’s hot I’m [even more] cranky and self-righteous about looks not being everything. And even when it’s not broiling out I really detest all the condescending pinkness and tealness attendant on women’s homemaker magazine covers.

So this is not about peach pops. It’s about frozen sliced nectarines–real ones, even. And nothing but.

I’m all too aware that many readers are still suffering blah, spongy peaches this summer, and I still don’t have any good answers for you, other than the ones I came up with when I wrote the original post about it: pick only peaches that have a good smell and are not rock-hard when you buy them, try ripening them in a window for a couple of days, maybe in a paper bag, and if that doesn’t work, cut up the parts that are semi-okay and microwave them with some sugar and lemon juice and be willing to eat them cooked.

Here in Southern California, for a wonder, our US-grown peaches and nectarines are finally pretty decent. And decadent when fully ripe. Improbable as it would have seemed to me a few years ago, when I couldn’t get decent peaches or nectarines for love or money, I now have the opposite problem–too many all at once. It’s a problem I can happily deal with.

Freezing slices of nectarine, as the very uninspiring but at least unkitschy title implies, is probably too simple an idea to even consider a recipe. (See the photo above if you doubt me–this is not a glamorous-looking or stylish item as shown.) Granted, frozen bananas are pretty simple and they count as a recipe, especially if you stick a popsicle stick in them and cover them in chocolate. And then roll them in crushed roasted peanuts. Or coconut. Or pretzel dust. Or crushed peppermints. Or whatever.

But nectarines 1. don’t go with chocolate (per Alice Medrich in Bittersweet, and I agree) and 2. don’t have the classic shape for a popsicle-ish dessert the way bananas do. The best you can do if you’re eating nectarines frozen is probably to turn them into some kind of sorbet or granita, which might look prettier but  defeats the purpose of not fussing because it’s too hot outside.

So they won’t win James Beard awards, they won’t make the cover of your favorite foodie magazine. There’s no garnish unless you’re the garnish type, they don’t require a fancy blender or freezing mold (although you could…) and you don’t have to stick a popsicle stick or toothpick or anything into the slices–unless you want to. They just taste good. Is that enough justification for a food blog post? Not sure anymore. But I hope so.

It started in June, right before we were about to go east for a week and I had way too much produce in the fridge. I ended up throwing a lot of stuff in the freezer in microwave containers or ziplock bags and hoping for the best–bunches of herbs, a pound or so of blueberries, some lemons. And several nectarines, which I washed and sliced up first.

I’d never frozen fruit by itself before, and unfortunately at some point in my ambitious youth I had read how to do it properly, Continue reading

Artichoke-olive spanakopita for a party crowd

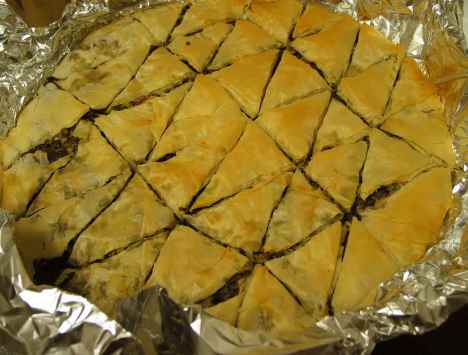
Artichoke and olive spanakopita tastes authentic even though it's completely nondairy. The party round is pretty quick to put together, too.

Artichoke and olive spanakopita tastes authentic,  even though it’s completely nondairy by request–which makes it a good vegan choice too. And it’s easy to put together.

Last night we went to a big New Year’s Eve party–a rarity for us; we’re usually with family one coast or the other. Of course, getting to go to a party means rushing around the house a few hours ahead to find an outfit that fits, is clean, looks about right, doesn’t require very high heels or an engineering degree to figure out how to put it on. Luckily most of our friends are low-key that way.

The party was potluck–the hosts provided a couple of solid main dishes and we and the other guests brought the side dishes and accoutrements. A pretty good division of labor, I think. So I offered to bring spanakopita, which is pretty easy. Or at least, I figured out an easier way last week to get the spinach squeezed out than by doing three pounds of spinach handful by painful handful, and it was pretty good for the Chanukah party, so why not do it again?

But our hosts’ family, all five of them, have a cluster of serious food allergies–primarily eggs and dairy, but a couple of other odd ones like cinnamon as well, and not all of the allergies match up from person to person. It’s a testament to their bravery and sociability (which I admire and wish I had greater stores of) that they throw big parties and let other people bring food.

I decided to do spanakopita anyway and just leave out the dairy–butter isn’t a big deal if you have olive oil for the fillo leaves, and I don’t make it with eggs in the filling. So far, so good. But what should I substitute for the feta? Feta’s usually a big part of the show.

Tofu might have been easy, and it’s a protein source, but one of the kids can’t do soy, and it doesn’t really taste right. Nuts–don’t know. Nondairy cheese substitutes–I haven’t tasted these myself and they have so many ingredients plus loads of salt that it wasn’t worth chancing without consulting the family.

My best options to add to the spinach came down to:

1. Greek olives, pitted and chopped–right on the saltiness, but maybe odd-looking. No one else I know has ever paired up spinach filling with olives.

2. Cooked and drained mushrooms–I would do this, but my daughter confesses she doesn’t like them when I make spinach quiche. And she does like my spanakopita. So…

3. Marinated artichoke hearts–they have a little saltiness, but mostly lemon and garlic, which is just about right. And artichoke hearts pair pretty nicely with spinach and are a familiar enough combination that most people will probably be okay with them. You just have to remember to drain them well so they don’t make everything soggy.

I thought I’d go with the artichoke hearts alone, but after tasting the spinach and artichoke heart filling, adding more lemon and garlic (because you can never have enough) and herbs and scallions, I decided what the heck and threw in a handful of Alfonso olives I had in the fridge–12 big purple, winy olives, pitted and slivered, did not look weird after all and they gave just enough distinctive tang and salt for the big salad bowl worth of filling to satisfy without overpowering it.

I figure, when you try something new or off-beat with a substitution, you have to test-taste to know if it’s worth doing again or recommending to anyone else. Maybe no one will agree with you, or maybe they will, but if you don’t like the result to start with, you’ll feel bad serving it up. Or maybe you’re made of tougher stuff than I am and it depends on who you’re serving it to and what have they done for you lately?

So anyway, if you can’t have feta or other dairy, this is definitely a good way to go. The olives and marinated artichoke hearts are authentically Greek enough not to taste or feel like fakey or second-rate substitutions. The spanakopita ended up tasting pretty good, and got eaten up amid some serious competition.

Also, I’ve decided this is also a good time for a slideshow. For a while now I’ve been meaning to do a step-by-step post on setting up a round tray of spanakopita or baklava, because I think it’s simpler and quicker than a plain rectangular casserole, and it looks more impressive and party-ready too. So I took some pictures as I went along (note to self: wipe olive oil thumbprints off camera grip), Continue reading

A salad in winter: counterintuitive comfort food

box of winter salad

If you skip the lettuce and choose more robust vegetables, you can make a big box of salad in minutes and keep it crisp several days in the fridge.

It’s gotten cold here. Ok, so no one else is pitying us; we had 80-plus degree weather only last week, but now there’s a very dry, sunny cold spell setting in, it’s in the 50s daytime, 40s at night, and Southern California doesn’t do insulation that well. Or ski jackets. Or wool.

On the upside, it’s been cold enough so that I can run the oven and bake–a rarity in Pasadena this year. [OK again: prepare for a couple of digressions from the main topic]

I made a big round spanakopita for a Chanukah party, quick pizzas for my daughter and her friends and calzones for me and my husband, rosemary and sesame bread, and rye bread–which is still in the attempt stage; I didn’t have a properly developed sour and wasn’t scrupulous about weighing out and getting the hydration and gluten ratios right and all that the first time around, and it collapsed in the oven…

I’m determined to get the sour and the rise textures right, so now I’m following the Inside the Jewish Bakery instructions more closely, having met and been impressed by one of the authors. It’s a matter of some urgency: my grandmothers are no longer alive to schlep good deli or bread out here on a visit, Trader Joe’s has broken ties with the really good bakery that made serious “pain miche” half-rounds that tasted like kornbroyt, none of the commercial rye breads in SoCal (or most of the country) are anything more than tanned white bread, and I’m desperate for the real thing–tough, chewy, tangy, caraway-laden, with a serious crust. Before my genes start going beige and I start deciding Bing Crosby was a really good singer.

[True unexpected fact here: a church choir director I know says that because of all the practice sessions, she and all her colleagues get serious carol fatigue by about two weeks before Christmas every year. I thought it was just me avoiding the mall, but no.]

In the meantime, I’ve been thinking about comfort food, because winter cold brings on the desire for heavier dishes–stews, starches, cheeses, meat and potatoes, and more starches, and the winter holidays bring their own calorie-laden version of cheer to the table with abundant puff pastry, eggnog, latkes (potato pancakes), sufganiot (jelly doughnuts), cookies, fruitcake, and all the rest of it.

Not too many people think about salad as a comfort food this time of year. Potato salad, maybe.

And yet…it’s really not very comfortable to find you’ve gained five or ten pounds in a month when you didn’t mean to, and New Year’s is coming with an actual dress-up-like-a-grownup-with-a-life party invitation. If I’ve managed not to succumb to the excess so far this year, it’s only because I’ve been cautious-to-paranoid about eating latkes and sufganiot last week and even my typical penchant for cheese and dark chocolate (not together!) has me thinking twice. I don’t know about you, but I can’t afford to regain the weight I lost last year–even though it was “only” ten pounds, it was hard enough, and like many people, I could use another ten down before spring without having to work too hard.

So salad is what I have in mind at the moment. Yes, there will also be stew–this week, spicy vegetarian eggplant and chickpea stew, because I made a vat of it and stuck it in the fridge. Very hearty, filling, warming, and all that winter-holiday-recipe-talk, yet not very devastating diet-wise, and doesn’t make you feel like you need another nap pronto. Plus once it’s made, it’s really fast to reheat in the microwave. As I discovered yesterday, a mug (nuked less than 2 minutes and eaten on the run) can power me through a rushed non-cook evening–something I don’t do often or well–of ferrying my kid to the movies at the mall with her friends. During the very unpleasant after-Christmas sales season. What can I say–when put to the test, it was faster than fast food and twice as effective.

If only salad were like that [finally back on topic]. I’m not generally a cook-for-the-month kind of person, but it seems to me that if a restaurant salad bar can get away with making blah bulk salads that sit out for hours, surely I can do a bulk salad that looks and tastes lively and stores nicely for a couple of days in the fridge without going bad. Chop once, eat twice, right? Continue reading