This mostly-raw blueberry pie is a snap to make and very versatile--the filling microwaves in a few minutes, and you don't even have to bake the zippy gingered graham cracker crust--perfect for a hot Fourth of July and all summer long.
Copyright 2008-2024Slow Food Fast. All writing and images on this blog unless otherwise attributed or set in quotes are the sole property of Slow Food Fast. Please contact DebbieN via the comments form for permissions before reprinting or reproducing any of the material on this blog.
ADS AND AFFILIATE LINKS
I may post affiliate links to books and movies that I personally review and recommend. Currently I favor Alibris and Vroman's, our terrific and venerable (now past the century mark!) independent bookstore in Pasadena. Or go to your local library--and make sure to support them with actual donations, not just overdue fines (ahem!), because your state probably has cut their budget and hours. Again.
In keeping with the disclaimer below, I DO NOT endorse, profit from, or recommend any medications, health treatments, commercial diet plans, supplements or any other such products.
DISCLAIMER
SlowFoodFast sometimes addresses general public health topics related to nutrition, heart disease, blood pressure, and diabetes. Because this is a blog with a personal point of view, my health and food politics entries often include my opinions on the trends I see, and I try to be as blatant as possible about that. None of these articles should be construed as specific medical advice for an individual case. I do try to keep to findings from well-vetted research sources and large, well-controlled studies, and I try not to sensationalize the science (though if they actually come up with a real cure for Type I diabetes in the next couple of years, I'm gonna be dancing in the streets with a hat that would put Carmen Miranda to shame. Consider yourself warned).
The last time I wrote about buying fresh corn more or less in season, my daughter was seven years old, green of hand and shin from a day camp project, and eager for me to do the handling so she could inspect each ear without touching them herself or turning them green. Now she’s a camp counselor at a nature center and almost done with college. So it’s been a while.
I wouldn’t normally think I had much to say about corn on the cob–I like it in a limited way, and actually I prefer to use the kernels for microwave chiles rellenos, but my husband and daughter both go for it, so usually when the price has finally dropped under 50 cents an ear (signalling “corn season” prices in the LA area) I buy it mostly for them, and I cook it as simply and quickly as possible, steaming it in the microwave. Because no matter what else may be true, when there’s corn in LA, it’s pretty hot out and the last thing I want to do is heat up my little galley kitchen.
Which turns out to be the deciding factor for this post. Temperatures around the southwest are edging up over 100–as expected; but at this point the northeast has also been in the 90s, and Portland, Oregon, has hit 116, hot enough to cook mussels in the harbor. It’s insane.
But microwaving corn isn’t just a survival tactic or a contingency plan.
My daughter was recently home for two weeks before going back to New York and lamented that my corn is “so much better” and tastes fresher than most of her friends and my in-laws make it. My in-laws are all hands-on denizens of Northern Califoodia, and a typical Fourth of July weekend sees barbecueing with many homemade sauces and bastes and corn roasted in the husk and so on.
So I was surprised–pleased, because my daughter has a better palate than I do, and she tends toward snark around me. But surprised, because she apparently meant it. Not being a huge corn fanatic, I think, “it’s just corn in the microwave, big deal.” Certainly, microwaving is much less glamorous and won’t result in attractive grill marks on the corn, much less the irreplaceable smokiness. So why would it be better?
My husband grew up for a while in Southern Illinois, corn country, and says the best corn he ever ate was when his family visited friends on a local farm. The hosts brought a stockpot of water out to the field between rows, set it boiling on a brazier, and instead of picking the corn, they just bent the nearest stalks directly into the pot for a few minutes, just enough so that the ears in the pot were cooked through and juicy, not enough to let them overcook with shriveled kernels or turn sicky-sweet and starchy like canned corn.
So that’s the ideal, rustic way to make perfect, exquisitely fresh corn on the cob. Ironically, a microwave can get you fairly close with supermarket corn that is obviously not still growing on the stalk for ultimate freshness, and you don’t have to visit southern Illinois farm country in the middle of the summer (which I have done, once, and it was really, really hot and stifling in my uncle’s childhood home). Or schlep pots of water out to the field in the middle of said summer and wait for them to boil.
Microwave-steaming is very different from stovetop methods like boiling, blanching or steaming. It’s not just the way it heats food–acting preferentially on the water molecules in or around the food–but how the food comes out as a result. If you do it right–just a little water, not a swamp, and put a lid on the container–a few minutes on high power will steam things like broccoli or asparagus to fork-tender while preserving the bright jewel green color and fresh taste you might expect from a stirfry that barely cooks the vegetables at all. Stovetop steaming to that color without going over into olivey, sulfurous territory would take longer and give you less tender broccoli as well, and boiling–don’t get me started. Moreover, you can keep the microwaved broccoli green and fresh-tasting longer if you microwave it just to the point you want or a little before and then pour off the drizzle of hot water and open the lid a bit. Even a head of broccoli that’s going bronzy-yellow after a week-plus in the fridge will generally perk up and be edible, not sulfurous-tasting, if you microwave-steam the florets instead of trying to deal with them some longer way.
Much the same can be said for corn on the cob. Microwave-steaming with only a little water and a lid cooks the cobs pretty fast, because the microwave energy heats the water inside the kernels as well as the water you added to the container, so it steams the corn from two directions at once.
Quantity and Layout
This method is pretty easy as long as you keep a couple of key factors in mind, namely how much food you’re trying to cook at once and how you lay it out in the container.
Raw corn cobs, shucked, rinsed and broken in half for microwaving
You wouldn’t want to try this for 20 ears of corn at a time, because the more food you microwave, the more energy and time it takes to get it all cooked, and it will cook less evenly and not be worth it. But for five or six people, you could probably do ok in one or two batches depending on what containers you have.
The other main thing about steaming ears of corn in the microwave is that you want them to cook as quickly and evenly as possible, just until they are cooked, which means you need to expose as much of the surface area of each cob as possible to the steam and, at the same time, to the microwave energy. So ideally you want them standing upright or at least diagonal, not lying flat on the bottom of the container or on each other if you can help it. You want the steam to circulate throughout the container, and you want the lid to keep it in and keep it focused on the corn.
A couple of ears left whole–lifting them up diagonally in the container helps them steam evenly.
For my containers, which tend to be 2.5 qt or liter snaplock boxes about 5 inches high, I break off the narrow “handle” and snap the ears in half after shucking them and rinsing off the last of the cornsilk threads. My hands are fairly strong so I just do it by hand, but you can also use a sharp knife to cut through the middle of each cob without too much sawing–the newer santoku-type knives or a microserrated paring knife would work pretty well. I can fit 3-4 ears’ worth of corn halves into one container, and I’ve done up to 8 ears of corn using two old-Pyrex mixing bowls, one over the other as a lid for a sort-of spherical container, so probably if I tried I could fit 6-7 whole ears into two large snaplocks, one used upside down as the lid. But I suppose your ability to try tall microwave containers and tall food in general depends on the size and height of your microwave.
The setup for 6 half-ears of corn
In any case, once you have the ears or half-ears arranged as best you can, you want to drizzle about 1/4 to 1/2 inch of water–no more–into the bottom of the container, and then put a lid on fairly well sealed so that when the microwave heats the water molecules, most of the steam stays in the container and doesn’t escape. If you’re resting one snaplock box on top of the other for a taller container, the seal won’t be tight but it should still keep most of the steam in where it can go to work on the corn.
For 3-4 ears’ worth of corn, I usually microwave on HIGH for 5-6 minutes and then let it sit a few more minutes to continue steaming inside the sealed container. Usually that’s enough to get it cooked all the way around the cob without starting to wilt or wrinkle the kernels. For more corn, you’ll need more time, maybe 8-9 minutes for 6-7 ears, whether broken into halves or kept whole. Obviously check progress after letting it steam on its own for a bit, and add a minute or two extra of microwave time if you need it. When the corn is just cooked, the cobs should be steaming hot (I hope this is obvious), the kernels should no longer be hard or opaque and chalky-looking, the way raw corn kernels are, but slightly translucent, and they should give a little when you press lightly against them with your finger.
If you have to lay the ears flat to fit a shallower container, the top part of each cob is going to cook more than the underside, and the underside will still be visibly raw after several minutes. Try to keep to one layer of corn so they don’t block each other from the microwave energy and make sure to stop the microwave in the middle of the cooking time and roll the ears over so the less-cooked bottom halves get some steam. Maybe also raise the container up off the turntable an inch or so by setting it on top of an overturned microwaveable saucer, bowl or shallow snaplock box to let more of the microwave radiation reach the bottom.
When the ears are done, carefully open a corner of the lid away from your face and drain the hot liquid out. Serve with whatever you like on corn–my current preference is a sprinkle of smoked paprika or chipotle salsa, ideally with a squeeze of fresh lime–all the best of barbecue without the grill, the grease, the heat, the wait, or the cleanup. You can reheat any leftover ears in the same microwave-steam setup but for just a minute or so, or cut the kernels off for a stir-fry with mushrooms and onions or as a stuffing for mild or slightly hot peppers–microwave all the way if it’s really hot out.
Mangia bene, b’te’avon, eat nice and keep as cool as you can.
What goes into a classic felafel pita? Tomato/cucumber diced salad, yes. Chopped or shredded cabbage or Greek-style lahanosalata–maybe. Hummus and tehina–of course. Dab of z’khug, harissa, salat turqi and other medium-hot red pepper condiments, up to you. Olives? if Greek-style and not the black rubbery cheap flavorless American ones from a can. “Chipsim” (aka, chips or French fries)–not my thing but okay as long as they’re fresh and crisp, not soggy or lukewarm. Hilbe–a sour fenugreek-based sauce something like mustard dressing.
And pickled eggplants. The true pickles for felafel, if you ask me. You can probably find them in cans in Arab and Armenian groceries or online, but they’re pretty full-on brined and have a lot of the same deficits of both commercial cucumber-type pickles and canned vegetables. Lot of salt, a bit metallic from the cans, and a little less than fresh. Plus with cans, you have to either use them up all in one go (at your huge felafel party) or else store the unused pickles in a fresh nonreactive container in the fridge. Which isn’t necessarily that big a sacrifice, if you’re really into them, have a lot of takers to share them with, and/or are planning to eat leftover felafel for the rest of the week (month?) But fresh-made eggplant pickles are a lot better if you just want them for a meal or two, or you want to control the salt level so you don’t wake up the next day with swollen ankles and fingers like cucumbers.
Classic pickles are made with the little finger-sized eggplants like the ones I used for Syrian stuffed eggplants a few years ago or else with long, thin eggplants sliced crosswise. But regular large ones will also work, cut into bite-size pieces.
If you have fresh eggplants of whatever size, you can pickle them in one of two ways, depending on your patience level. The first is your basic half-sour pickles fermented in a couple of days to a week in a mason or canning jar on a counter–much the same as for half-sour kosher dill pickles or pickled green tomatoes but maybe without the dill. When I lived in Israel back in the ’80s, I was surprised to see jars of eggplant fingers pickling on many people’s home kitchen counters. It seemed so Mediterranean-idyllic to me, coming straight out of a mainstream college town in the days before wholesale foodieism. For eggplant, as for the green tomatoes and cucumbers, use a standard salt and distilled vinegar brine that you’ve boiled and cooled, and pour it over the eggplant chunks and flavorings in the jar. Instead of dill, throw some well-scrubbed organic lemon slices and small whole dried hot peppers into the jar with the halved garlic cloves and whole coriander seed, pack the raw eggplant slices in tightly, and pour the brine over before capping the jar and letting it sit to ferment a couple of days. You’re not going to process these in a hot water bath, so keep them in the fridge and use them within a week or so.
However…there is a much faster way to get to pickled eggplant heaven in about 5 minutes–microwave marinating. If you just want a few right now, you want eggplant pickles that taste fresher and have lower salt, or you’ve never tasted them before and you’re not sure what you’ll think of them, a microwave will get you a reasonably small taster batch in about 5 minutes flat, and you can make them in a snaplock container that goes straight to the fridge once it’s cooled down. The taste and texture are both surprisingly authentic, based on my last two tries.
Why would you bother pickling an eggplant instead of cooking it, anyway? Well…I had a big eggplant that I hadn’t gotten around to using for a week. It was developing soft brown spots in places and I wasn’t sure was really going to make it much longer if I didn’t get on and do something with it, but I thought it was probably now too tough for straight eating–eggplants get tougher and sometimes more bitter inside as they age. So I cut off the spots on the peel and started slicing the rest into small wedges to see if I could do a quick version of eggplant pickles in the microwave and get somewhere close.
I’ve done it before with mild hot peppers (and occasionally, accidentally, with peppers that turned out not to be mild) and sometime this past year I tried it with a couple of green tomatoes too, despite having made pretty good deli-style pickled green tomatoes the official way a few years ago. The microwave tomatoes came out basically identical to the two-day jar-fermented version, which surprised me. So I can say with confidence that this microwave method seems mostly good.
But here’s the tricky bit.
When you microwave in a brine, you have to work out how soft or crisp you want the vegetables to be, and play around with the microwaving times and what you put in when so that you cook the vegetables just enough and let the brine penetrate, but not so much as to end up with limp mush. The hot vinegar and/or lemon juice will also “cook” and discolor some vegetables more than others. Commercial operations offset these and other problems by adding sodium metabisulfite, alum, and other tricky preservatives and texturizers at various stages, but they’re not easy to obtain for home use and can be dangerous if mishandled. I’m pretty sure they don’t actually improve the taste.
It’s both easier and a lot safer–not to mention cheaper–to play around a bit and figure out a microwave method that gets you where you want to be or at least close. Because you can. Of course you can.
Here are a couple of strategies for microwave-pickling depending on the kind of vegetable you have and what texture you’re aiming for, and then we’ll look at what I did with the eggplant slices.
Microwave Marinating Combinations
Do you want to microwave the veg and brine ingredients together, all in one step, and let the brine cook the vegetable? That works well for things like marinated artichoke hearts or sweet and sour red cabbage. You could do that as a first try and see if you like the texture, adding a bit of time if it’s not cooked enough for you or cutting back the next time if the veg is too soft. Easy enough.
But you can also adjust which part cooks more, the veg or the brine. You know at some point you’re going to have vegetables in a container with brine and a lid, but the order and degree of cooking are up to you.
In my last post, around Passover, I made (finally) successful microwave matzah balls more or less the same way I make microwave-to-frying-pan felafel, but then I realized I’ve never actually posted on how to make microwave-assisted felafel or why you might want to. So before getting into what I was hoping would be a nice quick extra, the eggplant pickles you need for a great streetside felafel pita (next post), I decided I should really put in a word for microwave-assisted felafel.
Felafel stands were few and far between in most of the US even before the pandemic hit, and most people still don’t make their own felafel at home, even from the available box mixes, because deep fat frying is expensive on oil and frankly kind of a pain.
If you’ve never eaten felafel, they’re kind of a crunchy, spicy fried vegetarian meatball made with chickpeas, favas, or a combination. At Israel’s felafel stands, Jewish or Arab, you get them served in a pita pocket and ask for whichever additions you want from a huge selection: finely chopped tomato/cucumber salad, tehina and hummus, harissa or z’khug, sour/spicy mustardlike sauces like hilbe (fenugreek-based) or amba (mango-based), sour pickles (the aforementioned eggplant pickle is my favorite and therefore obviously the best), sometimes they even squeeze in a couple of french fries, which I really don’t get, but to each their own, which is the point. All that ends up overstuffed precariously into the pita with the three to five felafel. As with a food truck burrito, there’s an art to dealing with it: you try hard to eat it before it falls apart and do your best not to drip all the different simultaneous sauces on your clothes.
The home version is a little easier, once the felafel are cooked, anyhow, but probably a little less exciting.
You might think that with all the toppings, the felafel would somehow get lost in the mix. But the felafel themselves are actually mission-critical. Especially at home, where you’re, as my mother would say, “Not a Restaurant” and not offering every possible permutation and topping ever, so the felafel are going to stand out more. They actually have to be good or it’s not a party.
Box mixes (Near East, Sadaf, etc.) tend to lean heavily on salt instead of more complex flavorings and they’re often pretty dry because people don’t let them hydrate and absorb water well enough before frying, so they’re never going to be great unless you doctor them with some extra fresh ingredients, and by that time you might as well make a really good felafel mix from scratch, which is what we’re doing today. It’s not actually much more work, it tastes a lot better, and the cooking, especially if you take advantage of a microwave, is lighter, easier and less dangerous as well.
GOOD felafel (I’m about to get seriously opinionated here–take it or leave it):
To get the best out of felafel, classic or microwaveable, what you’re aiming for is a crunchy browned ungreasy outside and a fluffy, cooked-through-but-tender-and-moist inside. And preferably flavored with something better and fresher than the usual box mix bare minimum dusting of faded cumin and garlic powder overcome by a ton of salt. And the main thing, which Whole Foods still doesn’t get–felafel must be served hotand crisp. Not refrigerated and thus leaden in the salad bar. And not dried out and tough to swallow–you don’t want to be biting into a golf ball.
So step one is to make your own felafel mix in a food processor or blender with a couple of cups of drained chickpeas plus fresh ingredients to taste.
Israeli chefs insist on raw soaked chickpeas for the classic deepfrying version of felafel–but this may not be so good if you’re microwaving, because they may not cook through well enough. I find that well-drained home-cooked chickpeas (I’m using my updated microwave black bean method these days) or well-rinsed and drained canned chickpeas work fine, and for that matter, so does chickpea flour made up to a thick paste with water and left to sit a while before blending in the other ingredients. I’ve even made pretty decent microwave-to-frying-pan felafel using leftover thick-from-scratch hummus as a base (note: NOT commercial supermarket hummus, which is too thin and too oily, with too little actual chickpea content, plus the taste is kind of shvach).
The all-important other ingredients are spices (cumin and garlic at a minimum) for flavor, a little flour for backbone, a dash of baking soda for fluff, plus–and this is where fresh beats the box–fresh vegetables and herbs for flavor, moisture, body, and general lightness of being. Onions and a good handful of parsley or cilantro–cilantro for preference–are typical but you can also sub in a chunk of cauliflower or zucchini in the food processor for maybe up to a quarter of the chickpeas and it’ll help keep the moisture. Other spices you might not have thought of but which give a more authentic and aromatic touch (in subtle pinch-not-spoonful amounts) include allspice, coriander, and caraway. Any of these in small amounts blends well with the cumin and garlic and elevates felafel above the standard box-mix “salt bomb” style.
When you’re happy with the mixture, process the whole deal until it’s a coarsely ground mixture that holds together with the chickpeas, onion and herbs in bits the size of toast crumbs or so, not too lumpy but also not too smooth or pasty (unless of course you went with chickpea flour or hummus as a base, but the added veg will still give it a little texture).
As with the matzah ball mixture from April, when you microwave, you want a little more moisture in the felafel mix to start with because the microwave tends to dehydrate foods. You want the mixture ground fairly fine, capable of Continue reading →
Not really macaroons–or even macarons. These are basically coconut-almond meringues.
Newsflash: I didn’t buy any macaroons this year for Passover. They’re…ok, in very limited quantities, preferably with actual fruit to lighten things up. But they’re so heavy and doughy and overly, throat-burningly sweet, and the cans from the major manufacturers–Manischewitz, Gefen, etc. etc.–all basically taste identical. Worse, they’re designed to feed a whole seder table with in-laws and more in a regular year. This year, with only two 3-D people at our table and not kibbitzing on Zoom, they would just hang around the table all week whether you really want any more or not.
I have made my own coconut macaroons once or twice before, and they came out lighter and better and different, not so packed-down. So this evening before supper I decided to try again. I needed something desserty and light and slightly impressive, at least to myself.
Why? Why in mid-Passover? Because.
Because I signed up for a COVID vaccine today. It’s April 1st, the first day I’ve become eligible in California…and within minutes, my HMO assigned me a slot for tomorrow. Tomorrow! My first reaction was “Ack! Tomorrow?! Wait, I just clicked to see what was listed on that date… I was hoping maybe next week or so, to give me a chance to get used to the idea!”
…I know perfectly well that I am lucky not to have to scramble for a shot, and that there is no real alternative if we want to get through this pandemic and end it. I also know perfectly well that I’m less nervous and more adamant about much less effective vaccines like the annual flu shot. Anything that’s 90+ percent effective is almost unheard-of and nearly a miracle. But a few minutes to get used to the idea would really help…well, I decided, that could start right after hocking my husband to get on and sign up quickly before all of next week’s spots get snatched up. And he did.
So once I calmed down again, because I knew I was being more apprehensive than the situation deserved, I decided to calm down further by trying to make something just tricky enough to keep me focused and not thinking about the shot. Also something that wouldn’t make huge amounts or take a lot of time.
And here’s what came of it–better than I expected. These lightened-up coconut…you can’t really call them macaroons. They’re closer to “macarons,” only with coconut instead of almond meal. Basically, coconut meringues.
Actually, I’ve seen an awful lot of meringues on Passover recipe rosters this year–pavlovas, coffee-tinged meringues, berry swirl meringues, plain ones…all kinds.
But I didn’t really think this was going to be one of them. The first time I made this kind of recipe, it came out like a slightly lighter, sweet-but-not-achingly-sweet version of a coconut macaroon with toasted almond chunks embedded in it. Pretty good, but it turned out tricky to reproduce. The last time I tried it, something weird happened when I folded the coconut into the beaten egg whites and they collapsed. I think it’s because I tried to rehydrate the coconut shreds before adding them. Or maybe I added the sugar all at once and then tried to beat it. Not certain…see, though, this is why this project was going to be slightly tricky and keep me occupied.
Three years ago I tried out a couple of possibilities for making matzah balls in the microwave–mostly because I was cooking for just my husband and myself for the seder and because I hate waiting for a full stockpot to boil. Also just because. And it wasn’t a raving success–more like, “well…it was worth a try.” Or as I put it at the time, I try these things out so you don’t have to.
My conclusion then: you can’t microwave ordinary matzah balls the way you’d think, dolloping the mixture into boiling water and then heating with a lid, as I’d hoped. They’ll just start falling apart in the water and the ones that don’t will be awful and tough in the center and awful and gluey like undercooked oatmeal on the outsides, and in general not good and a complete waste of ingredients and your valuable effort.
At the time I also thought maybe I hadn’t used enough egg to make it work–because I only had one egg in the house for a cup of matzah meal, and the standard recipes for that amount called for two to four.
However, I discovered that a spinach-enhanced version would work okay, at least on a very small-batch basis, if I dolloped the mixture onto a plate and microwaved the dumplings that way, just to seal the surfaces and kind of steam them through to cook the egg and make them hold together, THEN put them in hot soup and let them sit a few minutes to absorb and fluff a little more. And…they were okay. Not fabulous. They still had a few corners on them.
But as a fairly dedicated microwave experimenter–I’m not quite up to claiming “maven” yet, that’s next week–that doesn’t really end the question for me, because I keep thinking, maybe I could possibly change something and make them work out after all? And wouldn’t that be cool? …I’m probably the only person I know who would answer “yes” on that, but too bad. Because, on take 3 1/2 or so, I finally think I’ve got it. And this time my husband actually agreed.
So picture me on Sunday afternoon, the first full day of Passover 5781 (aka 2021). Saturday evening we (meaning, mostly me) did manage to get all the kashering and cleaning and cooking done and ready for the first seder in reasonable time for the two of us, and we skipped soup and matzah balls because really, it was too much right then. Sunday, though, I decided I had time after lunch to make some not-chicken soup in the microwave and then–well, why not?–try a new tack on microwave matzah balls. Yet again.
This time I thought about those tough centers and decided what the matzah needed was a quick fluffing up before adding any other ingredients. I’m going to go out on a limb and say this idea should work decently for standard stovetop matzah balls as well. Might even let you get away with fewer eggs for the recipe and a little less time letting the mixture rest in the fridge.
So here I combined two tricks:
First, I poured boiling water on the matzah crumbs and let it all soak up for 15 minutes or so before adding the egg and oil and flavorings. Second, I used the same dollop-and-nuke-on-a-plate method I’d used last time Continue reading →
(What? no pictures of apples? How could this be?!! Somehow I’ve never taken any during Passover–maybe Tuesday…)
I know, I know, it’s already Friday afternoon, Passover starts tomorrow night after sundown, and have I cleaned out my fridge? Have I found the all-important kosher-enough-for-me chocolate and kosher-enough-for-anyone cocoa powder? Um…no. I did just bake the remaining bowl of dough (why? why?) for dinner tonight and breakfast tomorrow. I kashered the oven afterward, if that’s any comfort. But really. I’ve been hating the idea of kashering for Passover this year more than usual, and that’s saying something. I hate it every year, especially the fridge. And all the boiling. And trying to remember which frying pan was going to be okay for dairy.
It’s just me and my husband this time, again, not even our daughter this year except by Zoom–and due to March Madness, she reports that the typical sports stupids on Syracuse’s campus have been partying maskless AGAIN, like it’s a big surprise that COVID is still around and still actually matters more than the coach’s son’s basketball talents. The distanced seder she was going to is not happening, or at least not for her. The lady in charge is sending her a Pesach kit so she can be a party of one at home–we’ll Zoom with her a couple of hours before we start and so she doesn’t have to be starting at 10 at night to be with us. But oy.
Passover ideas on this site
So I’m obviously not feeling all that brilliant and I don’t have a lot of new great ideas other than the ones I always have, to make best use of a microwave where you can–mostly for fresh vegetables–and to keep the matzah modest and out where you can identify it easily as matzah, not all kinds of dubious baked “treats.” More plain fruit than baked goods–citrus if you still can. Keep the vegetables in the soup, whether chicken or not-chicken. And mostly, don’t forget not to grate raw daikon radish and pour on any vinegar if you can’t find horseradish. That is sage advice, there, the actual one thing I would not do again, ever, so please learn from our hilarious but horrifying experience a few years ago!
I plan to honor my ancestors, including my grandfather whose memoir of escaping the Pale of Settlement I’m re-editing right now, by not wasting food if I can help it and not whining too much for things there just aren’t. Keep it simple, make do, try to make sure other people have food. Keep walking. Improvise.
If you want or need some ideas for microwaveable Passover stuff, look either in the Recipes tab at the top of the page or use the search to find “Passover”. Or in my fabulous “Microwaveable Passover/not-chicken” post from a coupla years ago, which has a roster of links you may or may not enjoy–sort of like second prize in a matzah-crunching competition…
And one more
Meanwhile, one quick, cheap microwaveable idea for the day: microwave applesauce from scratch.
Let’s say you have a couple of apples. Big ones. Maybe with a couple of bruises. And they’ve been sitting in your fridge or in your fruit bowl or (if you’re old-fashioned enough) apple barrel long enough to need using. What can you do with them that doesn’t take more effort than it’s worth? Actually, this is a good time to be using them up instead of tossing them and going back to the store before you really have to.
If you’re not interested in eating them as-is, then at least peel them, core them and cut them up–slices for microwave apple toaster pastry or an apple omelet, dice for throwing into microwave oatmeal, or just whole but peeled for grating…
Grating? yes. I mean, you could get out the food processor if you want, or if you have a lot of apples to do. But if you have a flat or box grater and only one or two apples to use up, it’s probably faster to do it by hand and you don’t have to wash as many utensils afterward. This is what I did on my one night of latke-making during Chanukah this year, because we had no applesauce in the house and I wasn’t about to dash out and buy some. Plus the grater was still handy. It was a seriously nice surprise that it wasn’t a flop.
Microwave Applesauce
Apple(s), washed and peeled–that’s it. Unless you want lemon juice or cinnamon or something–I’d say add that after microwaving, though, because cinnamon contains a compound that’s slightly hyperreactive in the microwave, and depending what and how much stuff you’re adding it to can result in unexpected boilover.
Make the applesauce:
Set the grater in or over a bowl, preferably microwaveable, and grate each peeled apple just about down to the core on one side, give it a quarter-turn and grate it down again, turn and grate the remaining sides and throw away or compost the core. Once you have the gratings in the bowl, stick the pulp in the microwave for about 1.5-2 minutes per cup, just enough to get it cooked through, and voilà! You have fresh (though hot) applesauce and nothing but. Obviously, if your grating bowl’s not microwave-friendly, transfer the stuff to a snaplock or other container that is before you nuke.
Or you could go the other way, especially if you’re making more than 1 or 2 apples’ worth of sauce. Peel and this time core the apples, quarter them, nuke them in a lidded container with a drizzle of water for a few minutes until they’re cooked, then mash them by hand or whiz them in a food processor.
Happy Passover, chag same’ach, stay safe, wear a mask, wash your hands, don’t poke yourself in the eye especially if you’ve been handling horseradish, and eat nice.
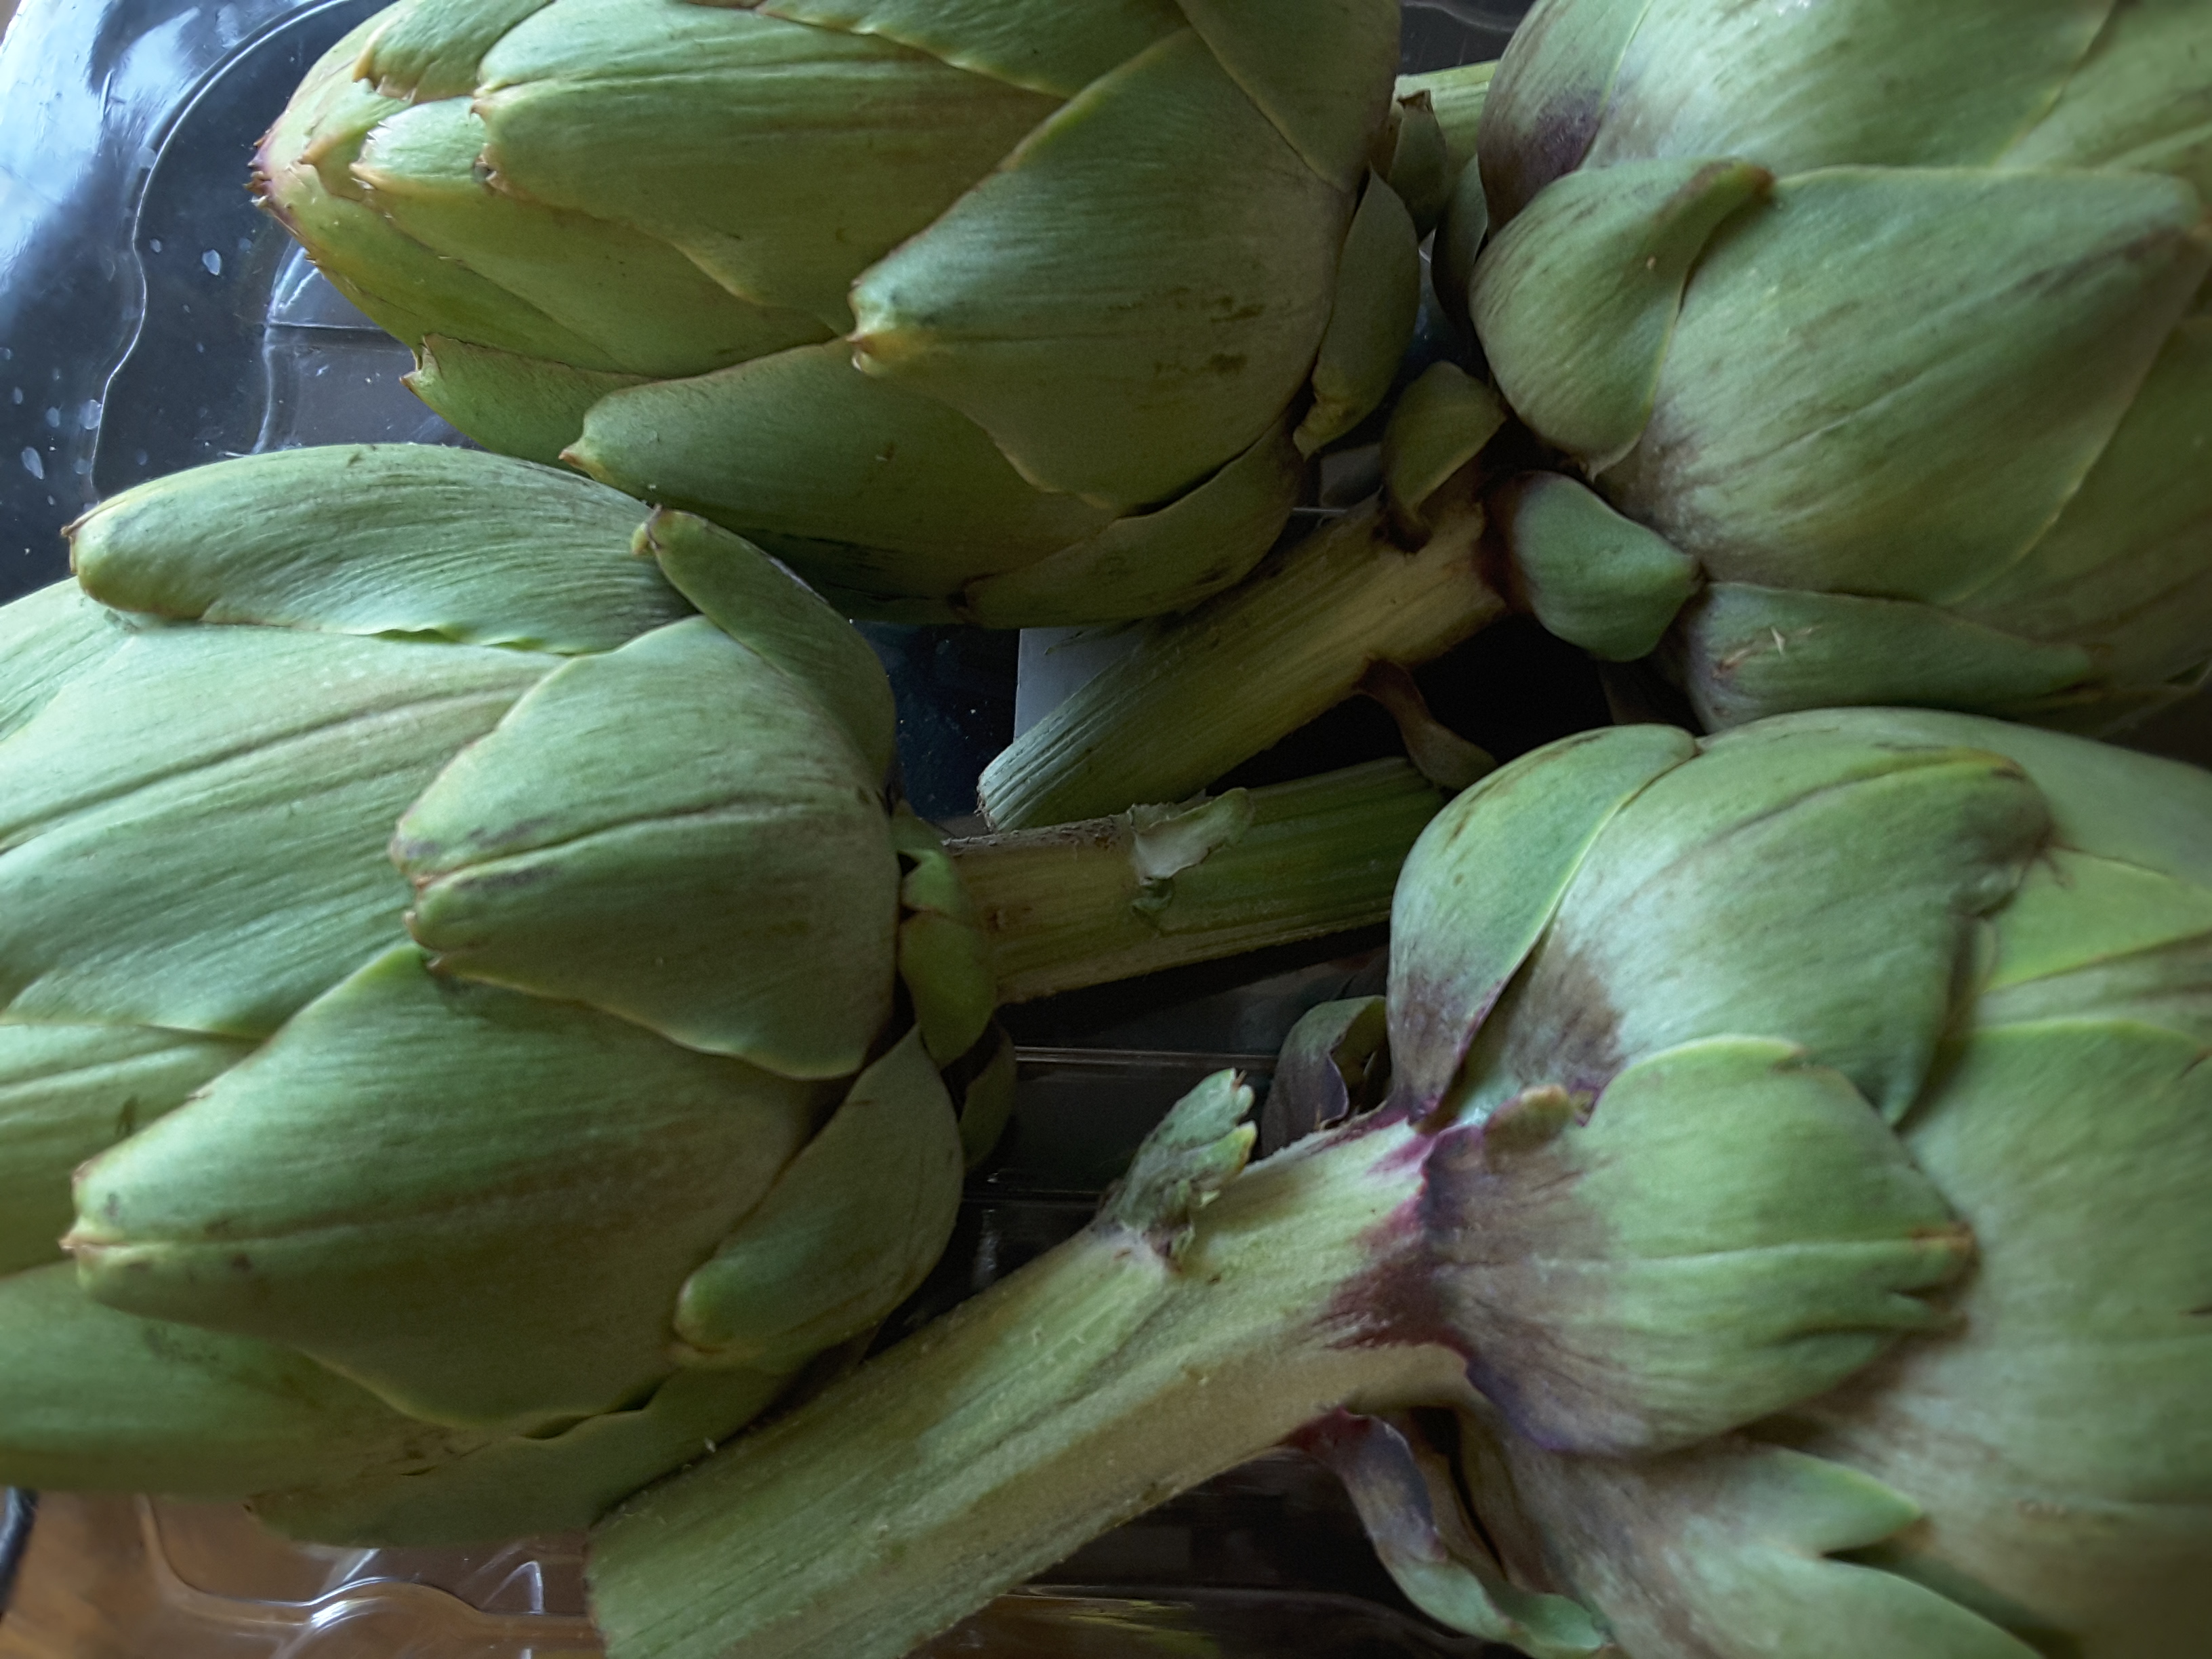
Thursday was kind of rushed–we started the morning late and kept being slow until it was nearly 2:30 and time to Zoom our family. But I managed to get a few Thanksgiving-type things going in the microwave for dinner before that and even managed to post about them at an almost-civilized length instead of going off on more tangents than anyone really wants to read even under current conditions. Artichokes–no big deal. Cranberry sauce, even less. Wild rice, though.
Wild rice, rinsed and ready to add water and microwave. Not very friendly-looking, is it?
Any grain with a tough husk takes a longish time to cook conventionally on a stovetop compared with something like white rice or rolled oats. And wild rice is tough enough that the Trader Joe’s package directions strongly recommend soaking the stuff in a bowl of water in the fridge overnight before attempting to boil it. A good suggestion that would help for microwaving too–a fine suggestion, if only we had started with things the day before. Not all that helpful when you need it the same day.
Microwaving works for brown rice, another long-cook whole grain, so it should (and in fact did) work for wild rice too. But it’s not quite the brief one-step kind of technique it is for white basmati rice. More a “nuke a few minutes to a simmer, let it sit 10 or so minutes to absorb hot liquid, stir, nuke a few more minutes and go away again, stir and check…..” kind of thing, similar to the way I cook beans, chickpeas and lentils, but with fewer rounds of cooking. I don’t know, it didn’t seem like a nuisance to me because I was doing two or three other things while it sat (one of those was sipping champagne while noshing with my husband on a few decorator cheeses and nuts and chatting with my in-laws and my daughter over Zoom). So I wasn’t in an overwhelming rush.
And it came out pretty nicely, so I’m posting it now. I would in fact do this again, because it came out pretty much as well as the original with a lot less work.
When I was younger and well before I had a child (who is now old enough to cook with her housemates, and did), I would make this pilaf in an electric wok with a lid, frying the onions and mushrooms first with the herbs, then adding the wild rice and some pearl barley and broth, bringing it to a boil and turning it down to simmer with a lid for however long, checking once in a while and stirring in the fruits and nuts and adding a little broth or water as needed. Similar idea to the microwaving, but on a stove or any heat element, you need to stay a lot more present. Microwaving lets you go away–it can stop itself and sit for a while without things drying out and scorching.
–And it’s already after noon! So it’s going to have to be quick. I did manage to figure out a Zoom meeting for later with my family on both coasts–I have the odd feeling of joining the 21st century a beat or so late while they all roll their eyes, but still. They’re used to me being late to the table, and always last-minute. If you are too, I have some reasonable (and a few not-so-reasonable) microwaveable options below.
This year, we’ve watched the spectacle of the election and its many, many, many entertaining lawsuits attempt to distract us from the huge, unfortunately predictable third spike in pandemic numbers all across the nation, and we’re facing facts: our kid is not coming home until finals, our parents on both coasts are being cautious and hunkering down as are we. The upside–we’re not traveling for Thanksgiving, or being required to smile and praise anyone’s turkey or attempt the groaning board. The obvious downside is what the heck do you make when it’s just you?
It’s just me, my husband and the cat, plus all of our family expecting to hear from us remotely so we don’t all feel as isolated as we feel. Which means mostly that we’re going to have to figure out how to Zoom everyone and not get cranberry sauce stuck in the laptop keyboard. And, of course, not reveal the exact state of our livingroom if we can help it.
This is going to require reserves of stagecraft, because when you’re stuck home with your husband and the cat instead of getting to dress up, sip champagne and hug all the people you haven’t seen in a year, the last thing you really want to have to do, besides cook all day, is straighten the livingroom for company.
The most important things, the essential things about Thanksgiving that I actually look forward to have nothing to do with the menu and everything to do with the experience (once we’ve recovered from schlepping halfway up California anyhow).
First is the getting together with family and friends–we’re Zooming and calling today and tomorrow, best we can.
Second is the sense of celebration–but how do you do that for yourself at home? My favorite part of Thanksgiving at my in-laws’, who are great hosts and savvy party people, is the way they welcome everyone into the house mid-afternoon, a couple of hours before the late-afternoon dinner. They set out cheeses, crackers, olives and nuts, raw vegetables with dip, and glasses–and break open a bottle of champagne for toasting. Sparkling apple juice for the kids, if they’re not already running through the house to the backyard for games.
I do have a frozen kosher turkey breast somewhere at the back of the freezer, but for just us, without our daughter home, it’s going to be microwave-assisted pan-grilled salmon, which I admit is kind of prosaic but still, after much testing, clearly the best indoor way to make it.
On the other hand, having fish rather than meat allows me to think, I can haz cheese platter?(the cat approves).
We never really do appetizers or cheese boards just for ourselves at home; that would probably be a good way to feel like it’s at least slightly partyish and worth celebrating something. Get out a nice bottle of wine and some glasses–I think I actually have a decent under-$20 bottle of Piper Sonoma champagne somewhere in the wilds, good enough for toasting, even though I still usually prefer reds and still whites.
Actually, if you’re home alone or with just your immediate family, that’s probably going to be a better way to make it feel like Thanksgiving than all the huge big-cooking thing. And put some sunshine on the plate too–good green (and/or purple) salads, a bowl of tangerines and apples that people can snag, something fresh.
And I’d like to add two more mostly-microwaveable items to that list, because for just us, I’ve decided to snag a box of globe artichokes at my local Trader Joe’s and also a bag of wild rice for a pilaf with some chopped apple, onion, mushrooms and pecans or walnuts, and raisins or other dried fruit.
Artichokes I’ve already steamed successfully in the microwave in years past, but I don’t think I’ve ever posted the method here. It’s pretty straightforward and similar to my usual method for steaming broccoli or brussels sprouts or other cruciferous greens, just a few minutes longer per pound because they’re whole, they’re tough, and they contain less of their own water.
The wild rice I’m trying in a microwave for the first time–going by my brown rice experiments, I’m going to hot-soak it for a bit to crack the outer husks, then microwave it in earnest for a few minutes at a time, letting it sit and soak up the hot water for a while undisturbed before stirring and testing and deciding if it needs more time. Hopefully it won’t get mushy. It’s already after 1 pm so I’m going to break off with just this and then go microwave some cranberries, wash a few glasses, clean off the table (got to look better than it really is), and get dressed for company, at least sort of–I have a family to Zoom!
Trim the thorny, tough outer leaves and the stems off a couple of large or a bowlful of baby whole artichokes. Open the centers carefully–there may still be a few thorns inside–and use a spoon to scoop out and discard all the dandelion-like fuzz and trim off any thorns at the top of the soft inner “heart” leaves.
Squeeze some lemon juice on and inside, plop the artichokes in a microwaveable container with about 1/4-1/2 inch (~1 cm.) of water in the bottom, add the lemon half if it’s washed and organic, or just squeeze a little more juice into the water. Put on a lid and microwave on HIGH for about 7 minutes, then let sit a few minutes.
Test for doneness by pulling off one base leaf (should come away very easily) and/or poking gently through the bottom of one of them with a sharp knife to test if it’s tender enough. Add another minute or so if they’re not there yet.
If you have more than one layer of artichokes in the bowl or container, the ones at the bottom may be less cooked than those at the top, so you may want to bring those up before adding any additional cooking time, or remove the fully cooked ones and then microwave the less-done ones a minute or so more with the lid on.
Serve with basic lemon-butter sauce that my husband prefers because his mother made it that way (melt a little butter, squeeze in some lemon juice, scoop out any seeds that fall in) or the more exciting tzatziki-type sauce I like better with artichokes: nonfat plain Greek yogurt, a dab of garlic, a drizzle of olive oil plus a squeeze of lemon juice, and a little thyme, dill and mint or basil chopped and mixed in, cracked black pepper optional.
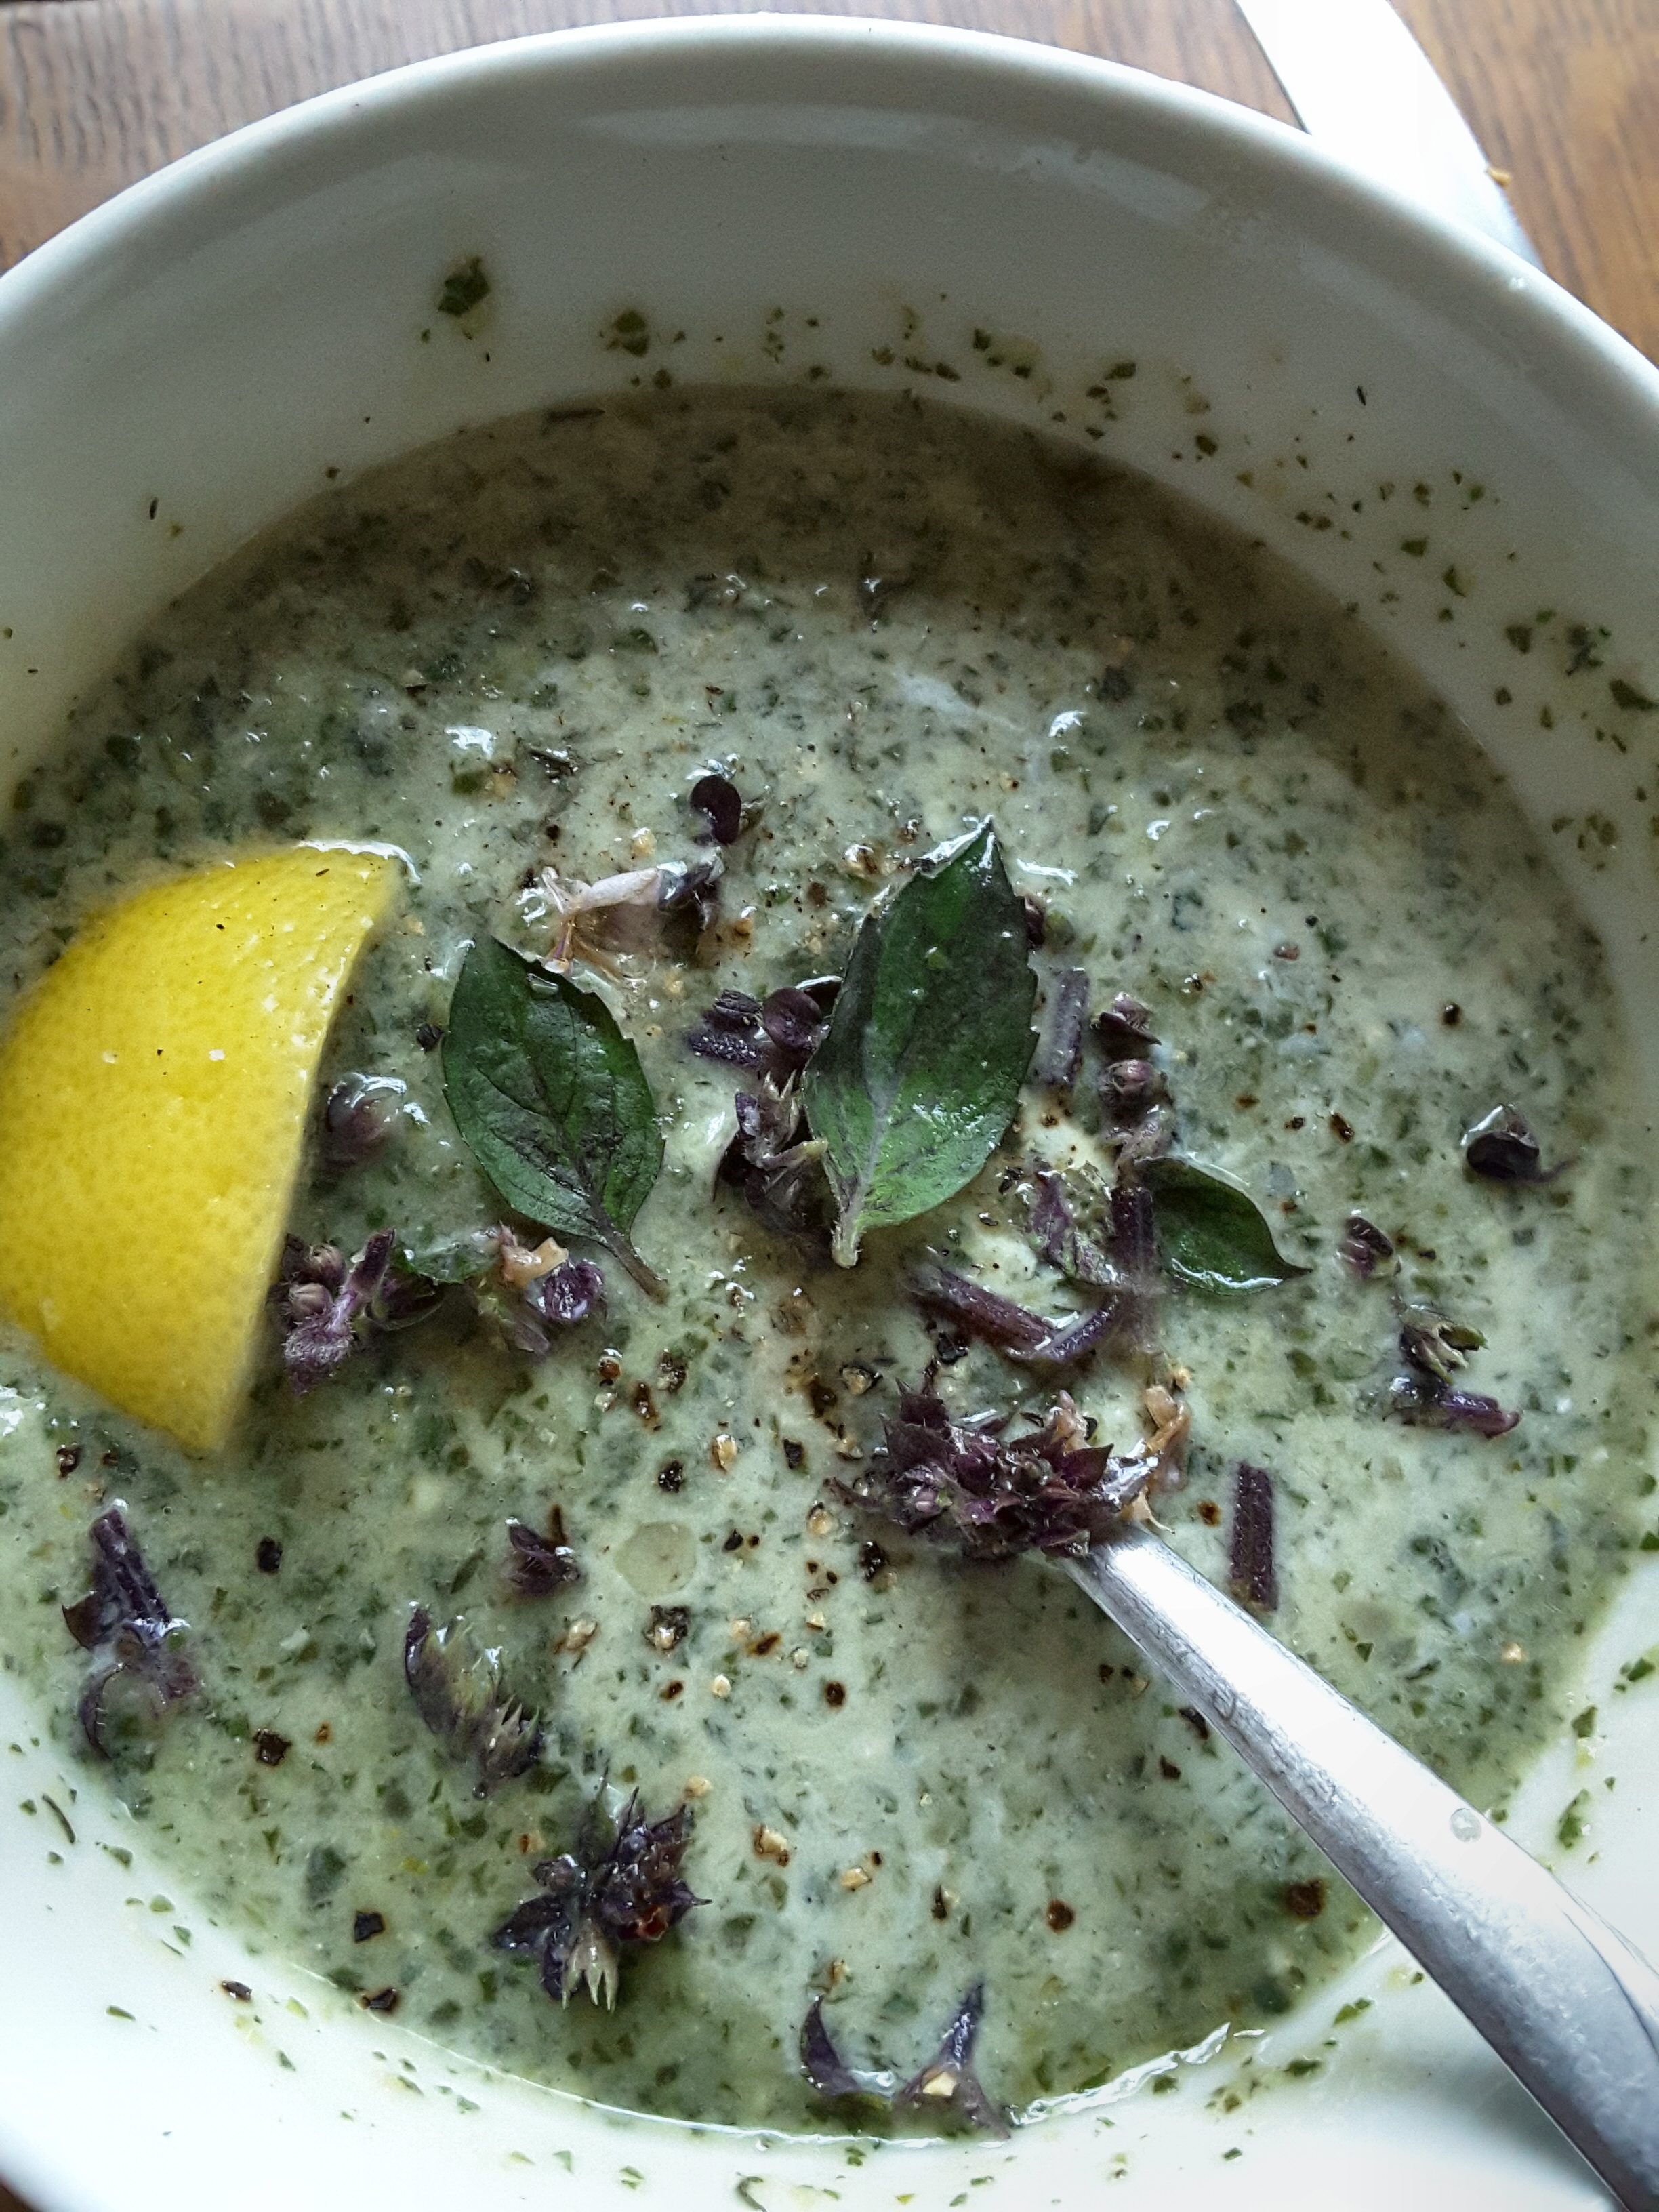
Purslane plus purple basil flowers for that Crème-de-X factor
Sargent’s infamous ballroom portrait of Madame X is today’s inspiration for a soup that, like his subject, breaks a few stodgy rules and dares to produce an elegant but fresher, bolder, more nutritious–and certainly lighter–version of a classic French soup in a few minutes flat. It’s smooth but svelte. And it still keeps you in suspense.
So before we get to today’s featured mystery vegetable (herb? green? Let’s settle on green)–let’s talk about breaking the rules.
Most classic veloutés–vegetable-based cream soups–rely on thorough boiling-into-submission of the vegetables, generally mostly potatoes, to soften them for blending, which used to be done by hand through a mesh sieve back in Madame X’s and John Singer Sargent’s day. They also add a heavy dose of cream to mask any individual or strong flavors so nobody could possibly get upset that they can actually taste the vegetables.
All that cooking softens things but also breaks down most of the vitamins. Reliance on potatoes for bulk makes things starchier and blander as it crowds out the greens as the main ingredient. And I don’t have to tell you what I think about cream–you’re free to disagree but I take statins for a reason, and I’m an inveterate cheese freak. Also chocolate.
So I say save the high-ticket calories for something that packs a bigger punch tastewise even in small, expensive, memorable bites–goat cheese, bittersweet chocolate ganache. Not soup. Make it count.
Method counts too. The modernized French restaurant-approved cookbook methods for veloutés and blended soups in general are stupid, cumbersome and unsafe. There’s no good enough excuse anymore for telling inexperienced cooks–or any cooks–to boil up a vat of something and then try to pour it into a food processor or blender hot–very dangerous, and not the edge we’re seeking here. Scald marks are not chic. Nor is hot flying soup all over the kitchen walls.
In today’s world, you have a blender or food processor AND you probably have a microwave, no matter how many TV chefs may rail against it. You can do this smarter and safer and lighter and faster.
Common sense says blend your veg of choice first, then heat it. If it isn’t soft enough raw to blend smooth before cooking, steam it through first with minimal water and a lid in the microwave for a couple of minutes or, failing that, in a nonstick frying pan or stockpot with a drizzle of water, maybe a quarter-inch off the bottom of the container or pan, and a lid, also for a few minutes. Take it off the heat, pulse a few times in your blender or food processor without most of the liquid to get it started, then add cold liquid gradually as it blends further until it gets to the consistency you’re aiming for. You’re a lot less likely to generate big steam and pop the lid that way.
Then pour it into a microwaveable container with a lid to cook or reheat the soup in a few minutes without destroying every possible vitamin or losing all the color. You won’t scald yourself and you won’t be furious and frustrated and wishing you’d never heard of it before you even get to taste it (this does happen, you know, and cookbooks never mention it)… You’ll be fabulously unruffled (well…at least for this) and ready to dine when it’s ready to eat.
So, enough with the cooking hock-I-mean-hack. What’s with the purslane? What is purslane, anyway?
Fresh purslane in context
You’ve been wading patiently through my diatribe, and the suspense is killing you (but a nice distraction from worrying about the election totals, yeah?)
Purslane–slightly wilted but still worth cooking. I can sympathize.
Purslane, or verdolagas in Spanish, is a slightly tart fresh herb that tastes like a lemony version of watercress or spinach–sorrel? Texture- and looks-wise, it’s a cross between a fresh green herb like basil and a succulent like…like…well, like a jade plant (despite the fact that jade plants are not edible, I’m pretty sure). That is, the leaves are smallish but sort of fleshier than normal herbs. At least when they’re at their peak freshness. Most people who buy and eat purslane put it into a fresh salad and eat it raw. Some stirfry it or chop it and put it into spinach-type dishes. And it’s pretty nutritious–high in vitamins A and C, potassium and other minerals, surprisingly for a vegetable, highish in omega-3 fatty acids if you’re still into those. Grows pretty much throughout the world.
After a week in the fridge, though, it loses a little of its puff and starts to wilt a bit–is it going bad? can you still do something with it?
My quick-and-dirty printable PDF version of the new Dietary Guidelines, which as of January 2016 were still available only as an online site at https://health.gov/dietaryguidelines/2015/. You can now download the official version there. And it’s probably still a better, less politicized and more reliable version than the newer 2020 version, unfortunately, given the 45th administration’s HHS and USDA directors.
Pyrex Warning
Many of my older posts call for microwaving recipes in Pyrex bowls or pie plates. But my plates are the old Corningware USA ones made of borosilicate or lab-grade glass–feels warmer and “clicks” rather than clanks. The new “Pyrex” plates and casseroles — made outside the US — are generally made of much weaker soda lime (“coke bottle”) glass. That can crack or even explode with any temperature fluctuation (Consumer Reports, Jan. 2011). DON’T USE THEM.Go with microwaveable and oven-safe stoneware instead.
UPDATE 2020–OXO is now making borosilicate glass bakeware for sale in the US–check the use labels.