• Enter your email address to subscribe to this blog and receive notifications of new posts by email.

    Join 241 other subscribers
  • Noshing on

    raw blueberry pie with microwaveable filling and graham cracker crust

    This mostly-raw blueberry pie is a snap to make and very versatile--the filling microwaves in a few minutes, and you don't even have to bake the zippy gingered graham cracker crust--perfect for a hot Fourth of July and all summer long.

  • Recent Posts

  • Contents

  • Archives

  • Now Reading

  • See also my Book Reviews

  • Copyright 2008-2024Slow Food Fast. All writing and images on this blog unless otherwise attributed or set in quotes are the sole property of Slow Food Fast. Please contact DebbieN via the comments form for permissions before reprinting or reproducing any of the material on this blog.

  • ADS AND AFFILIATE LINKS

  • I may post affiliate links to books and movies that I personally review and recommend. Currently I favor Alibris and Vroman's, our terrific and venerable (now past the century mark!) independent bookstore in Pasadena. Or go to your local library--and make sure to support them with actual donations, not just overdue fines (ahem!), because your state probably has cut their budget and hours. Again.

  • In keeping with the disclaimer below, I DO NOT endorse, profit from, or recommend any medications, health treatments, commercial diet plans, supplements or any other such products.

  • DISCLAIMER

  • SlowFoodFast sometimes addresses general public health topics related to nutrition, heart disease, blood pressure, and diabetes. Because this is a blog with a personal point of view, my health and food politics entries often include my opinions on the trends I see, and I try to be as blatant as possible about that. None of these articles should be construed as specific medical advice for an individual case. I do try to keep to findings from well-vetted research sources and large, well-controlled studies, and I try not to sensationalize the science (though if they actually come up with a real cure for Type I diabetes in the next couple of years, I'm gonna be dancing in the streets with a hat that would put Carmen Miranda to shame. Consider yourself warned).

Microwave tricks: keeping cool and colorful

Cold salad vegetables, water and fruit are always a key part of my survival strategy once the weather gets hot–and by hot, I mean by Pasadena standards, 90-plus, which it’s finally started hitting–along with a very large part of the US this week. It’s normal here, even though we had an unusually cool and rainy spring, and up until last week we were just into the 70s most days. Obviously it’s not normal to be pushing 100 degrees over so much of the country.

Even the newspapers that tend to carry all-brown/all-beige food pics along with their recipes are remembering and recommending fewer heavy starches, more vegetables and fruit as a hot-weather strategy.

Most veg and fruit you can just wash and nosh, which is perfect in hot weather. You don’t have to run the dreaded stove, and biting into fresh salad vegetables–tomato, pepper, cucumber, lettuce or cabbage–will actually cool you down. On one road trip a few summers ago I got a lot of eyerolls from my nearest and dearest for packing cucumbers–small ones, but whole–along with the usual sandwiches and water bottles. But when we hit a rest stop halfway to San Jose, they really proved their worth. It was a pleasant surprise that my kid and my husband both said so…

In any case, just wash and nosh the vegetables you can get away with raw, and the ones that do need cooking can go in a microwave for a few minutes so you stay cool in the kitchen.

With that in mind, I have a couple of colorful, cheap and very simple microwaveable tricks for the moment.

Multicolor carrots, no colors touching

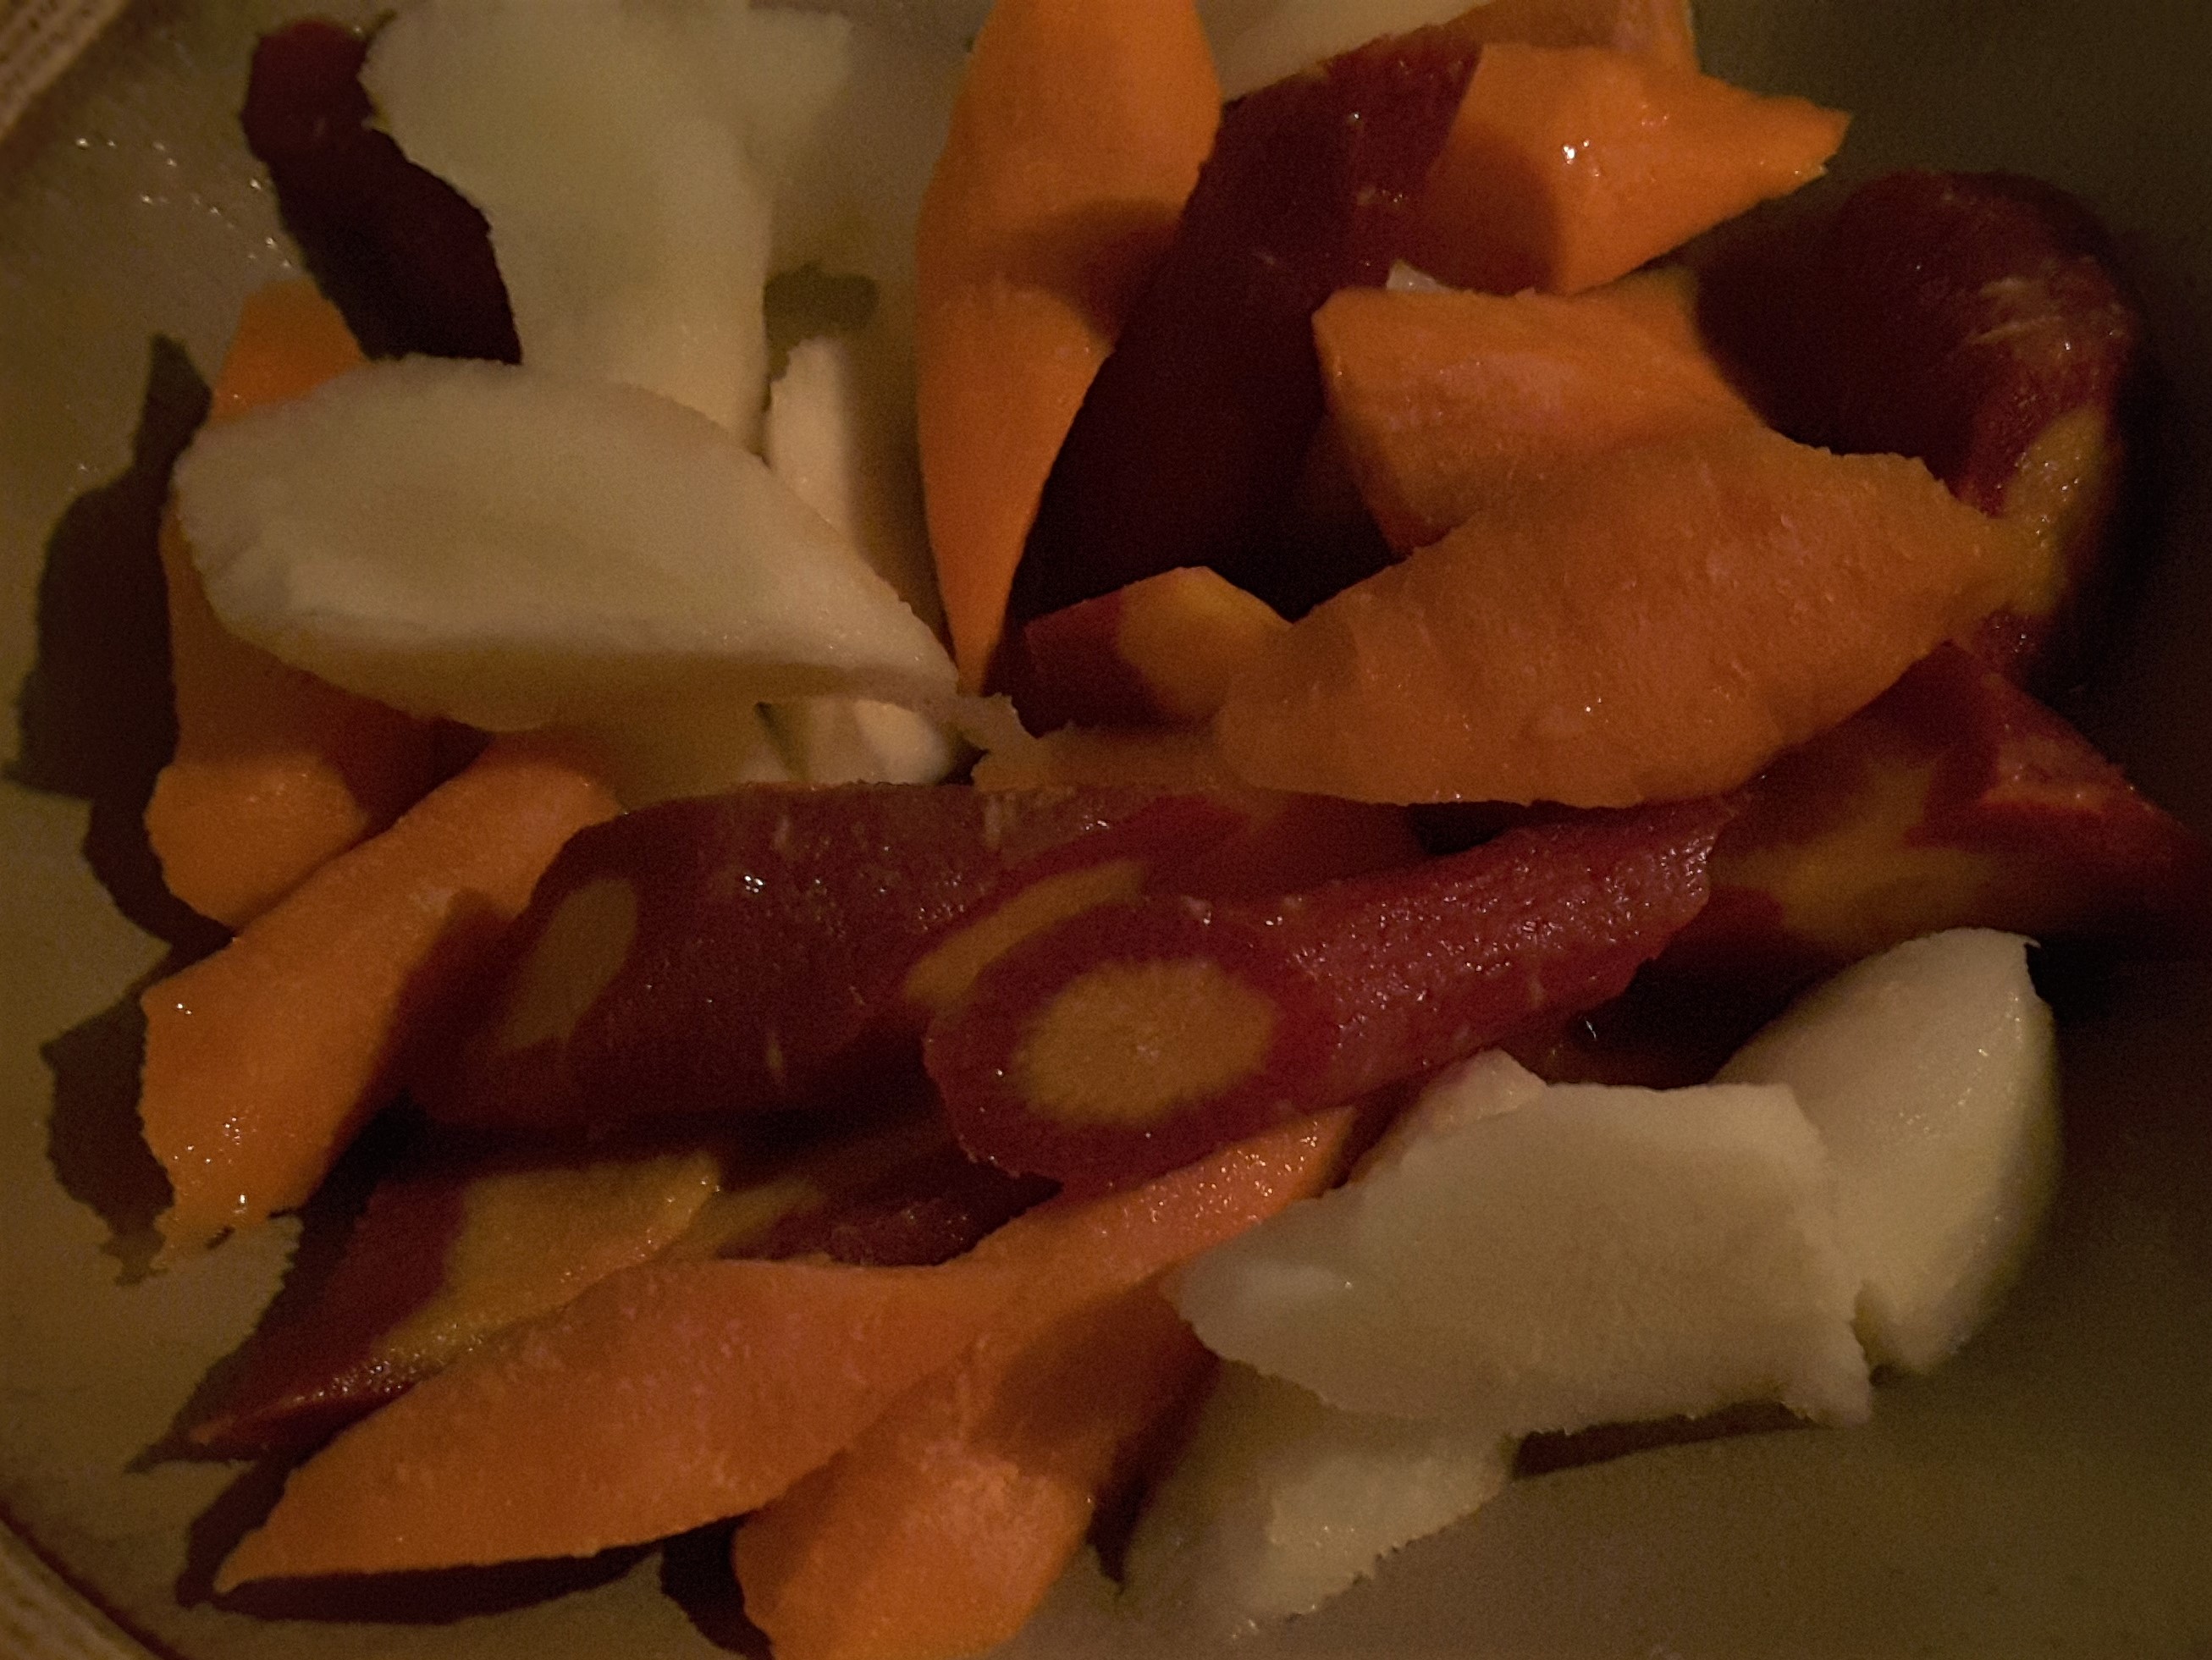
You can now get big 2-lb. bags of multicolor carrots, even organic, for nearly the same price as orange whole carrots even at the big chain supermarkets like Ralph’s/Kroger, so I do. I love the look of the purple-and-gold “black” carrots when I first slice into them, but how do you keep the purple from bleeding onto the white or yellow carrots beside them? I still haven’t figured out how to keep the purple completely purple once they cook, because any acid or heat will turn the purple part maroon, but I have found a way to keep it from bleeding.

Start by grouping each color of cut-up carrots in a separate pile on an open microwaveable dinner plate or casserole dish. Sprinkle lemon juice and a drizzle of olive oil, maybe a grating of ginger if you have some, on each pile and mix it in gently. Then nuke the plate with its different piles of carrots for a minute or two on HIGH to parcook. That sets the colors without cooking the carrots to death. You can cook the carrots longer if you want to, or keep them crisp-tender. Mix the carrot colors together right before serving–they’ll end up looking fun and not tasting overcooked.

With seared salmon, these parcooked carrots are color-set and ready to finish in the microwave

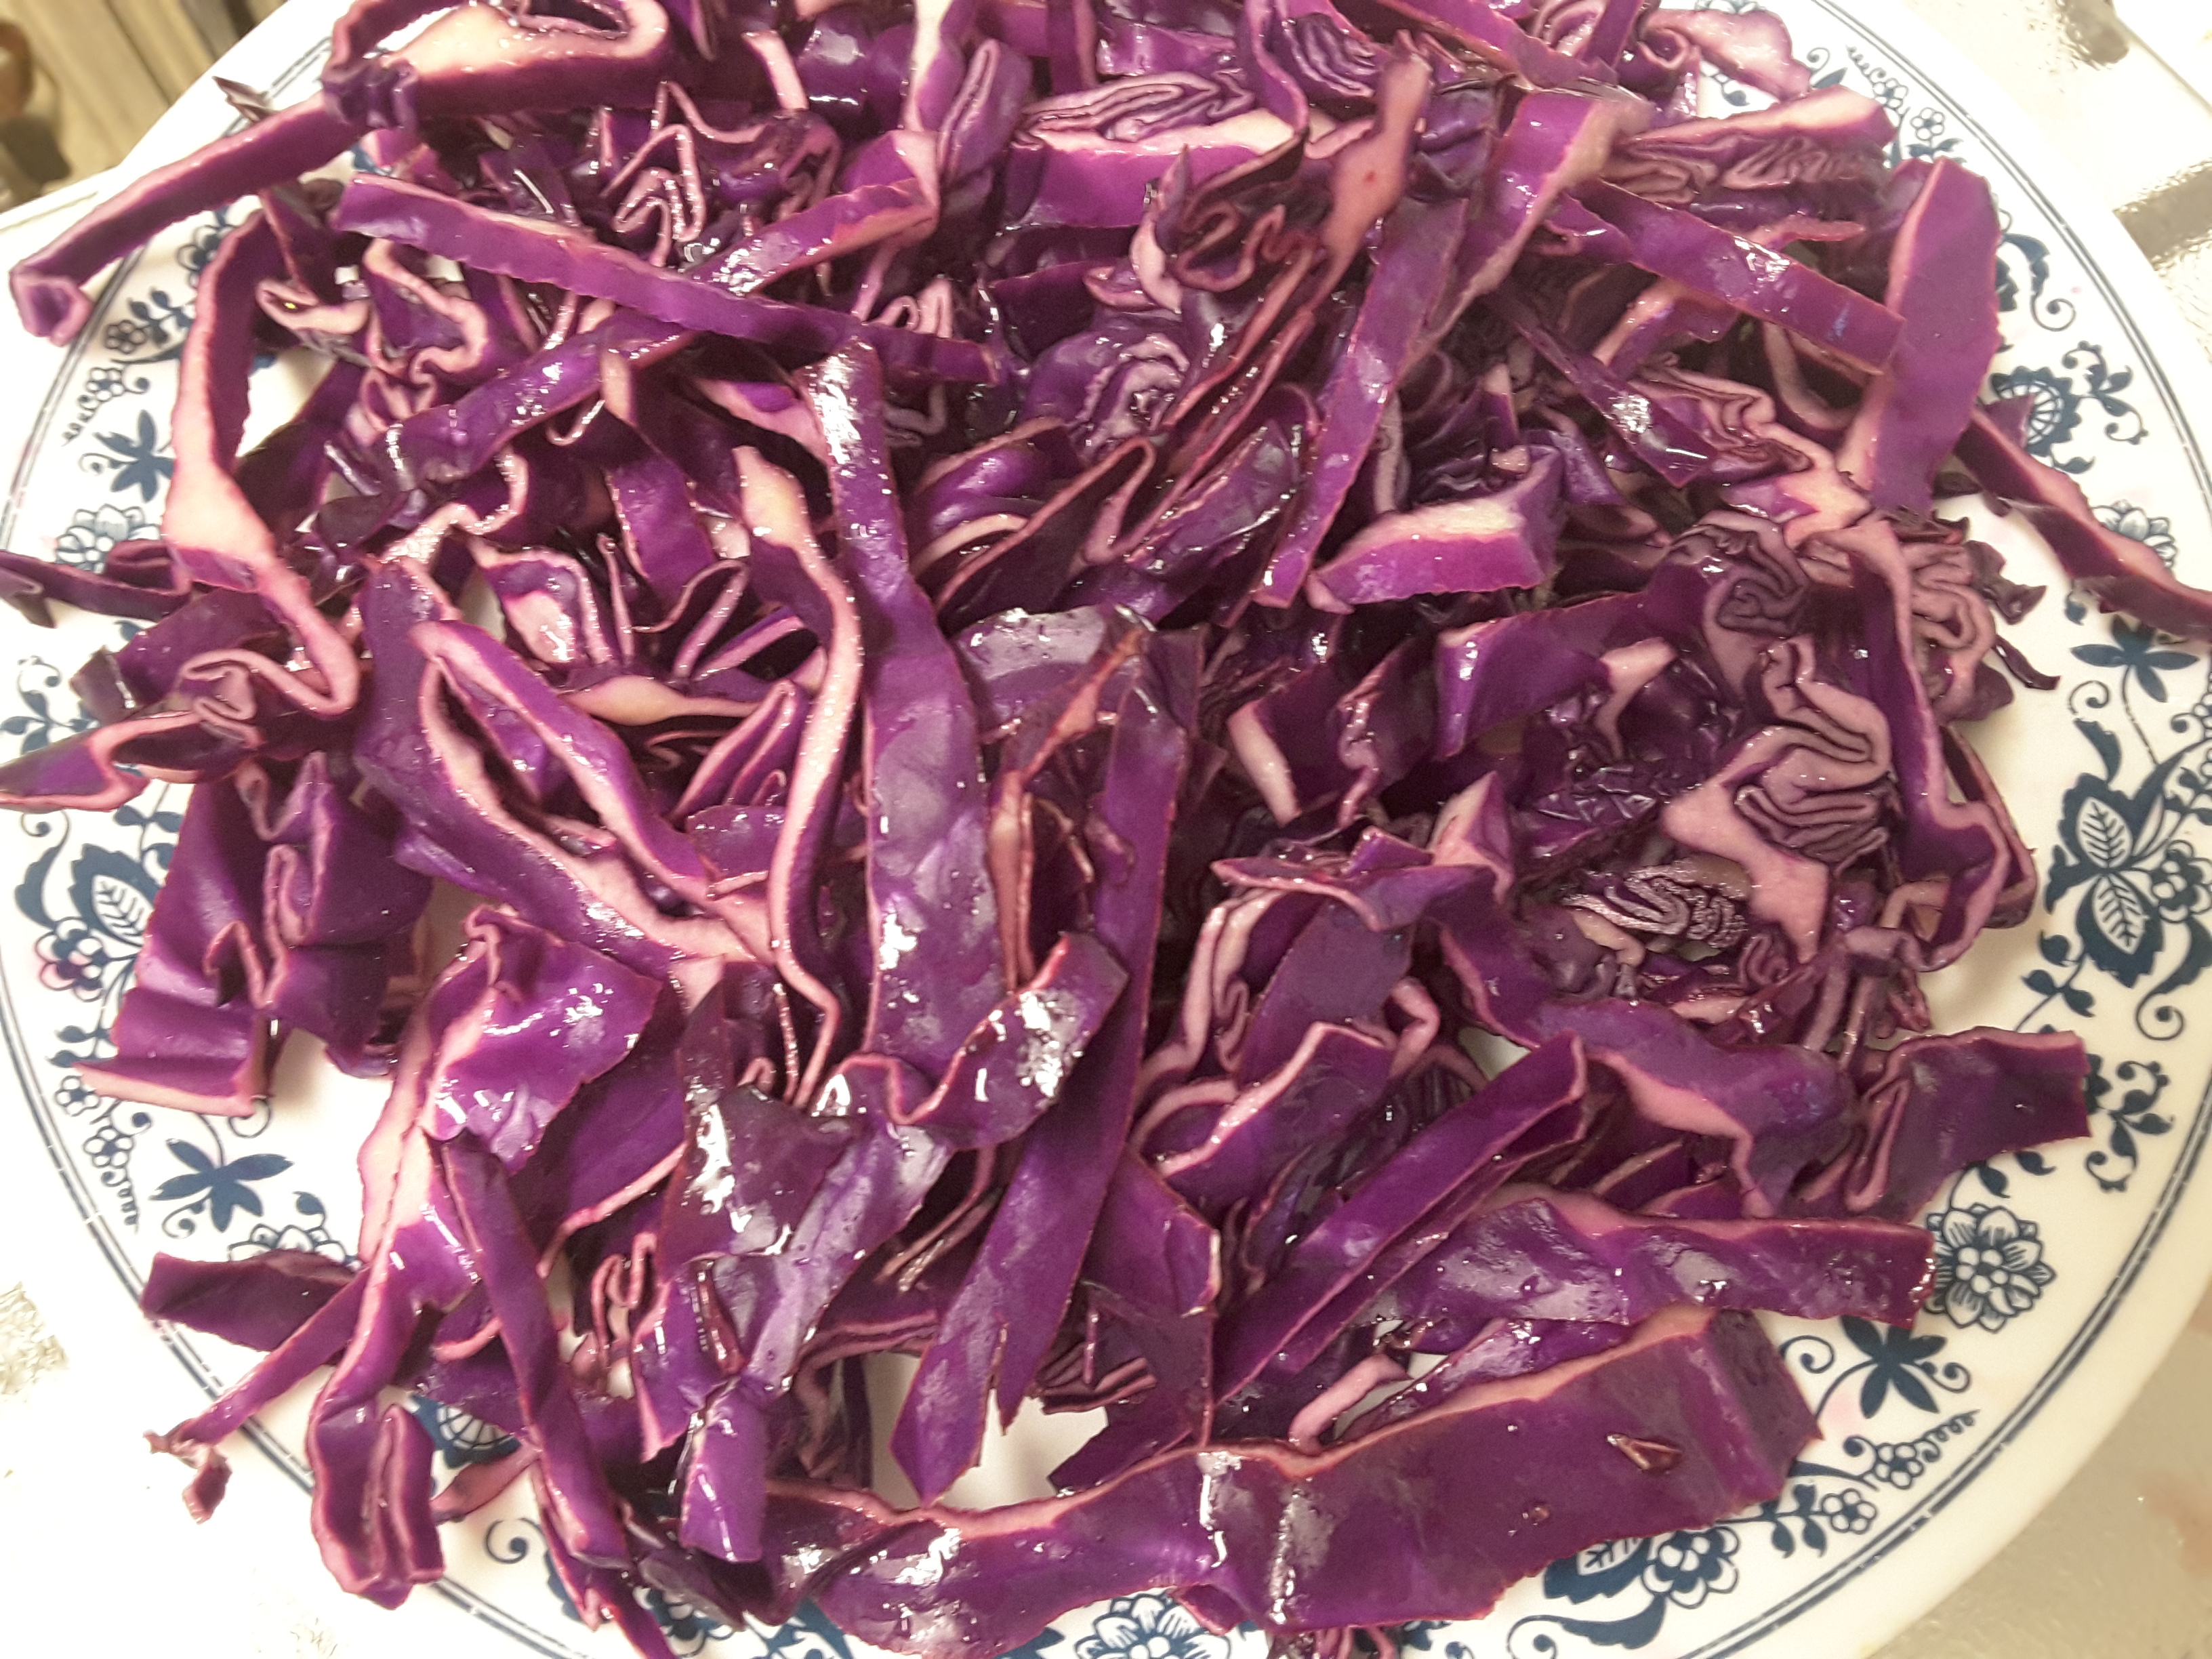
Red Cabbage “Stir-Fry” Salad

Red cabbage, my relatively cheap perennial favorite useful vegetable (other than Fresno tomatoes and bok choy), is a little more cooperative about staying purple as long as you keep it with acidic ingredients. Usually I like red cabbage raw for salads, and occasionally in the winter I cook it in the microwave Swiss/German sweet-and-sour style, but I was in the mood for something more like a pan-browned stir-fry, only without actually bothering to stir-fry.

I had most of a head of red cabbage sitting in the fridge for more than a week, and I knew I had to use it up, probably cooked, though as lightly as I could get away with, because it was just starting to wilt and was no longer entirely crunchy. After seeing an article on charcoal grilling cabbage and romaine wedges as a dramatic 3-smoke-alarm barbecue side dish, I decided to cut it in thin wedges, cook it lightly in the microwave with a little acid to keep it purple and a little oil to keep it from being rubbery, and then decide whether I really wanted to pan-brown it or not.

…I decided to skip the pan-browning and just toss the microwaved cabbage with a few basic stirfry-type flavorings–vinegar, garlic, sesame oil, soy sauce, dab of molasses, hot pepper flakes, basically my version of a jao tze dipping sauce. I ended up with a surprisingly good impromptu hot salad that tastes something like the noodles from pad see ew or the chewy seaweed salad at a sushi restaurant. But bright vivid purple. In any case, it’s delicious, takes less than 5 minutes, and the leftovers are just as good–maybe even better–cold the next day.

The trick for this dish is to keep both the color and the flavor bright while you keep the cabbage from going limp or rubbery. So just as with the multicolor carrots, it’s a two-step microwave. The lemon juice and/or vinegar go on with a little oil first, to keep the purple bright and the cabbage from going rubbery, you nuke it briefly just to set the color and parcook, then mix in the rest of the flavorings and nuke it again briefly to get it to the degree of cooked you prefer.

The amounts here are “use your best judgment”–you can use 1/4, 1/2 or the whole head of cabbage for this, depending how many servings you want to make. I did about 1/4 head of a medium cabbage for 2-3 servings, so the dressing amounts are for that but can stretch a little. Cooking times will vary a little by how much food you have, so if you make half a head or more at a time, check the doneness and stir up the cabbage so any undercooked shreds are on top for additional microwave time.

  • Head of red cabbage, rinsed, 2 outermost leaves peeled off and discarded, and cut in halves, you decide how much you want to chop for this recipe and wrap the rest tightly in plastic in the fridge for your next masterpiece.
  • A spoonful or so of cider or red wine vinegar and/or squeeze of lemon juice, or just enough to turn all the sliced cabbage magenta
  • A small drizzle of olive or salad oil, about 1 T

Flavorings for 1/4 head worth or so of salad (so scale up and adjust to taste)

  • 1/2 t toasted sesame oil
  • 1/2 t. dab of blackstrap molasses or a couple of pinches of sugar, brown or white
  • 1-2 t low-sodium soy sauce
  • small minced clove of garlic (or half a bigger clove)
  • pinch of hot pepper flakes or a few drops sriracha to taste
  • toasted peanuts and/or chopped scallion, optional

Slice the red cabbage into thin (quarter-inch) lengthwise wedges or crosswise shreds. Pile them on a microwaveable plate or bowl large enough to hold them and squeeze on some lemon juice and/or sprinkle on the vinegar, toss them to coat just so that all the purple starts turning brighter magenta. Drizzle on the olive or salad oil, toss again, then microwave uncovered 2-3 minutes (3-4 minutes if more than 1/4 head of cabbage), or until lightly cooked. Mix in everything else but the peanuts and scallions and toss, let sit a few minutes, taste and adjust, nuke 1-2 more minutes depending on your preferences for tender vs. chewy, and top with the peanuts and scallion as desired. Serve hot or cold.

For taste–I prefer mine balanced slightly toward the toasted sesame oil, with undertones from the garlic, vinegar, soy sauce and molasses and just a little latent heat from the chile flakes, but not overtly vinegary, sweet, salty or hot. Your mileage may vary; feel free.

This goes well with any proteins and other vegetables you’d stirfry, grill or dress with soy sauce-type dressings. Steamed or pan-browned tofu, pan-grilled tuna or salmon, chicken or seitan with bok choy, beef with broccoli, broccoli and ginger, etc. Toasted sesame seeds, sunflower seeds, walnuts or almonds would also work in place of peanuts. Thinly sliced raw or barely-nuked carrots too.

And if you run across some bargain-bin snow pea or sugarsnap pea pods, carrots of many colors, or any other vegetable you think goes, snag them, wash and trim them, nuke them very lightly and toss them in.

Be good, eat nice, and stay cool and colorful!

Persian-ish grill ideas for Purim

Lentil-stuffed Anaheim chile with zucchini, tomatoes and red onion in a Persian-style vegetarian platter grilled in the toaster oven.
Microwave-to-toaster-oven version

Last year our synagogue signed up for a catered Persian grill dinner (served takeout-style for pickup) from a restaurant on the West Side of LA, and this year they’re doing it again from a restaurant with kosher meat options. Last year, we weren’t sure so we went with a vegetarian option that turned out to be a little bleak–just grilled but dry unsauced vegetables, including some very-middle-American-style broccoli and babycut carrots that looked like they’d just been thrown in with the more traditional eggplant, pepper, zucchini, onion and tomato. The trays were filled out with huge heaps of bright-yellow basmati rice and a little tub of fesenjan sauce–toasted ground walnuts cooked down with grated onion and pomegranate molasses. No actual protein, though, so I pan-browned triangles of tofu to go with it. It was still all pretty bland, though, except for the charred tomato and pasilla pepper and onion.

Even though we’re going to have a meat version tonight–presumably better, I hope!–before the Megilla reading, the story of Queen Esther is very specific about one of her virtues. Unlike all the other girls who were hauled up to Ahashverosh’s palace for a year of preparation for a beauty contest (only, as with most, without a desirable prize). Most of the contestants dined on all the delicacies of the palace kitchen, but Esther refused any of the expensive meats and ate chickpeas instead. She didn’t tell anyone she was Jewish, but she didn’t eat the meat, claiming she was in mourning. It may have been a factor in why she was chosen as queen–she wasn’t being a glutton while the getting was good.

In Esther’s time, Ahashverosh had allowed his wicked vizier Haman to convince him to send out a decree allowing anyone to attack the Jews. But once Esther exposed Haman’s plot and her own Jewishness, he couldn’t cancel his own decree, so he sent out a second decree allowing the Jews to arm themselves in their own defense.

The celebration of Purim, while joyous and relieved, maybe a little exaggerated, is always mixed with acknowledgement of poverty and violence around us; this year most notably caused by the horror Putin has committed in Ukraine. The parallels are pretty harsh and very timely; there are always people like Haman and Ahashverosh willing to do harm or make excuses. So I have mixed feelings about meat vs. vegetarian for Purim, and about celebration in the midst of and despite the everpresent harsh realities.

The best I can do is to say that yes, especially now, we need to commemorate and to celebrate the triumph of good over evil–but without losing perspective or forgetting. May we have more people like Esther and Mordechai–be people more like them, people who step up. And in the meantime, remember to give tzedakah and g’milut hasadim–not charity, but the justice of providing for those in need. This is the season for that too.

Back to food and cooking:

One thing I’ve been thinking about since last Purim is how to make a somewhat better-tasting vegetarian Persian grill-style platter at home. I did like the restaurant’s grilled vegetables, just not the broccoli and carrot bits that were completely out of place or the tofu I made as a last-ditch effort.

If you have a microwave and a toaster oven or a nonstick frying pan with a lid, you can do something good and vegetarian fairly quickly and get some of the vibe without a lot of work. And grilling will improve winter tomatoes, onions, zucchini, (full-size, sliced) carrots, cauliflower, whatever you have where you are.

You can make a tray of quick-grilled vegetables as a side dish, or you can take the long, stuffable peppers and put in rice-and-tomato, as for dolmas (stuffed grape leaves), grillable white cheese like panela or queso fresco plus a sprinkle of nigella seed or thyme and some minced onion, or my personal and higher-protein/flavor choice, lentil hashu as for stuffed baby eggplants and mehshi basal (stuffed onions), which are Syrian Jewish, but adaptable and delicious and not too far off. The lentil and rice stuffing is flavored with allspice and cinnamon and it grills up nicely, especially in a nonstick pan with a bit of olive oil to create a light, crispy, char on the surface. It also makes light, delicate felafel-like fritters.

Continue reading

AbFab Mousse au Chocolat: lighter, faster, and still incredibly rich

The Daring Duo–back and brasher than ever in an Alexis Bittar jewelry ad from a couple of years ago. I don’t remember which mag I tore it out of, but who cares? It’s Valentine’s Day, Sweetie, so bling it on!

Preface: Usually I’m at least a couple of days late discussing anything related to New Year’s, Valentine’s Day, or pretty much any celebration involving dessert. Partly because the January and February months–and into maybe April–are always the ones where people struggle to recover from the big food holidays. And obviously it’s been harder on most of us to feel buoyant, celebratory or romantic these past two years. But I worked really hard all last fall writing interviews and moderating high-profile author events for a book festival, then doing and redoing flights for my daughter, who graduated early but her travel program fell through at the last minute. This much later I’m still feeling pretty chewed up and in need of a reward… And my husband has a badly mis-scheduled board meeting tonight and thinks he shouldn’t be the first to bail.

So I don’t know about you, but I’ve decided I could use a kick right about now, something uplifting and energizing and frankly decadent, but without having to work hard now or pay the piper afterward. Something like all the Valentine’s Day-themed chocolate mousse recipes everyone’s starting to trot out in food media, only a lot faster, less bloated and more chocolate-powered, and–of course!–made mostly in the microwave. If I get heart palpitations I want it to be from exhilaration, not indigestion or overwork.

Even though it’s already 3:37 pm here and probably too late to help you much if you’re stuck on a Valentine’s Deadline on the east coast. Go with plain 5-minute ganache instead–and some champagne for tonight, and save this one for the weekend instead–if it’s the real deal, your romance or at least the shopping hijinks you want to get up to will still be there.

I actually came up with this recipe way back in August, as a distraction from my book festival duties, but really–who wants to be thinking about chocolate mousse in August? So I decided to save it for now, when it will do the most good. Or bad, because I’ve been good way too long. And then I came across not only Season 1 but also a book of the published original AbFab scripts. It was practically kismet, I’m telling you! So–pardon my excess while I find some bling to get into character...

Folding beaten egg whites into the microwaved chocolate base for a lightened-up chocolate mousse.
Mousse au chocolat, Sweetie! It’s what microwaves are for!

THIS IS NOT your typical Meilleurs Oeuvriers de France high-concept mousse au chocolat. It’s not Hervé This, it’s not Pierre Hermé, it’s not Thomas Keller or Dominique Ancel. It’s not even the utter classic back-of-the-French-chocolate-bar-wrapper version that Dorie Greenspan quotes–and so, for that matter, does Alice Medrich. No name-dropping at all here (who, Moi?). Or at least no hyperlinks.

Just a tribute to a pair of troublemaking women who don’t cook at all, as far as I can tell, and a good thing too. But they aspire to everything this mousse is about–taste, time, fortune and fame, fashion superiority, basic naughtiness, and above all, a good time on a plate with no regrets the next morning.

So this is my take in honor of Absolutely Fabulous. It is very, VERY chocolate. And chic, despite my iffy photography and food styling abilities. And yet reasonably svelte. It will leave you quivering and swooning where you stand. This is what it’s all about, Sweetie.

Despite the fact that there’s no butter. No cream. And no crap. It’s not a heart attack in a tiny coupe (it only tastes like it, and maybe feels like it due to the high chocolate content). It’s not 450 calories and a day’s worth of saturated fat that goes right from your gallbladder to your hips, bypassing the heart as a lost cause.

You will not need to struggle into a larger pair of jeans [Season 1, Episode 2] after eating this, even if you manage to eat an entire quarter of it in one sitting without tottering to the couch and wishing you hadn’t and that you’d listened to me about Less being the New More.

This mousse au chocolat is so intense that even a spoonful or two is Almost a Religious Experience. At least if you’ve been fully vaccinated, you’ve been masking up (fashionably, as in, “LaCroix, Sweetie. La. Croix.“) instead of threatening your local chocolate purveyors and flight attendants, and thus your tastebuds still have their mojo. Because as everyone knows, breathing privileges and, just as important, flying privileges, are key to powershopping [Absolutely Special, aka AbFab in New York].

Once you recover from the chocolate rush, you will fan yourself, sip your bitter demitasse and your bottle of overpriced springwater, and leave the premises refreshed, overhyped and ready to shop for something sparkly as illustrated above–either completely garish, overpriced and pulled right from the runways with the tags still on…or, and we hope this is you, effortlessly elegant and sleek and elusively cool and yet still somehow totally rock ‘n’ roll, depending on whether you’re identifying with your inner Eddie or your inner Pats at the moment.

You will feel entitled, because the heady combination of making something like this mousse au chocolat mostly in the microwave, eating a petite portion in tiny refined bites and still being overwhelmed by the utter chocolatude of it all, without fearing the scale or the mirror the next morning, is the holy grail for those of us who worry secretly that we can’t really have it all.

Pardon me, I think Bvlgari is calling my name…

PS–EULA/legal disclaimer: the Management takes no responsibility for the shocking next-day surprise jewelry / footwear / custom marble courtyard sculpture bills you may have racked up in the heat of the moment. Or the return shipping and restock fees thereof.

PPS~~ ~~ THE ACTUAL FINE PRINT, ahem! ~~ ~~

Now…I did claim in the headline that this recipe is “faster” as well as lighter. And that’s…almost true. The key question is, compared to what? Because however you make chocolate mousse, you will have to give it several hours and preferably overnight in the fridge to set up properly. The only ones that set up in much less time contain either enough hard fats to solidify in an hour or so, which they will also do to your arteries, or else enough questionable fillers and thickeners to turn what should be an ethereal chocolate experience into dull, heavy American commercial chocolate pudding.

Part of the intrigue of chocolate mousse is the depth of flavor, but the other part is the texture. Getting it right is a little, though only a little, tricky to achieve with a significantly lighter reduced-fat, reduced-waistline version like this one.

My first attempt was almost right, and definitely fast, and really, really, really–I thought it would rock the first time out of the gate. It almost did. And of course I wish it had, because it would have been completely revolutionary.

I started with microwave ganache, amped up with cocoa powder to sub in for some of the bar chocolate–easy enough. Then I pivoted to microwave custard, easy and superfast, by dropping the egg yolks into the hot ganache and whisking and renuking immediately. So far, so good–thick, rich, smelling beautiful, and with the heat you’re reasonably well covered on the matter of egg safety. Do the same by folding in the beaten egg whites into the hot custard, I thought, waiting a minute and then rapid-cooling in an ice bath, and maybe you don’t have to use prepasteurized egg whites, which are more expensive, or else make a Swiss meringue. About five minutes from start to finish, no chaser, no waste, would be–Absolutely Fabulous. Wouldn’t it? and only two bowls plus the ice bath and a whisk.

I even went so far as to grate a bit of organic orange peel into the egg whites at the last. The dream and the taste–both divine.

The setup in the fridge wasn’t quite there, though, even the next day. It came out a little looser than I wanted, and the ethereal quality of chocolate mousse went slightly missing. Folding stiff egg whites into freshly hot custard had probably killed any risk of salmonella, but it also deflated the structure considerably after a while. It wasn’t completely stable in the fridge–so I froze it for a gelato, which was pretty good, actually, but it wasn’t mousse.

My second try was fussier–I did the near-Swiss meringue method Alice Medrich has used for pasteurizing egg whites, beating them with a spoonful of water and an extra tablespoon of sugar in a bowl over a skillet of simmering water to sterilize and stabilize them, and I also added a spoonful of cornstarch to the chocolate mixture–I know! not traditional!–but I had to test and find out. Would it work or would it end up tasting and textured like chocolate pudding?

This time the mousse stayed puffed beyond a doubt, and the next morning it had firmed up just enough to scoop and stay scooped. It was definitely chocolate mousse, though, not chocolate pudding–the bit of cornstarch hadn’t overdone it. A small test sample–the size of an egg, or maybe something you’d serve in shotglasses at a buffet–was really enough, too. Every millimeter of it was so intensely chocolate that it actually took me a few minutes to finish it in tiny, gelato spoon-style tastes, and I wasn’t automatically reaching for more. A little, or at least a little at a time, goes a very long way here–good news on the svelte front–and makes a big impression in a small cup, especially at the end of a meal.

Continue reading

Last-minute Thanksgiving 2021

Good reasonably fast bread makes for a better cheese plate–so I tell myself…

I’m always, always late to the table, I know it. Yes, it is sort of too late to do much more than give you the link to my Slow Food Fast Thanksgiving guide from a few years ago plus the few new ones from last year, and recommend “Thanksgiving” in the search box if you’re stuck for microwaveable but good ideas.

Last year was the first on-our-own-but-Zooming-it Thanksgiving and this is our second, and Chanukah starts Sunday evening. Maybe I’ll have something exciting and original by then.

Despite all that, I do have a few things I’ve been meaning to share but haven’t had time to post. The past few months seem to have sped up on me because my daughter’s aiming to graduate early this year, and because I’ve been helping host the still mostly-online Jewish Book Festival for our region and that means interviewing authors–some really eminent ones–for our local Federation magazine and moderating online for two of the events. So my “skill set,” both technical and staging, has had to rev up in a big way…

But Thanksgiving…I am doing most or at least some of the same menu I put together for “just us” last year–artichokes in the microwave, wild rice pilaf, salmon, broccoli, salad, pumpkin pie, cranberry sauce, and maybe some mushroom caps. All of it is good and almost all, everything but the salad, is microwaveable at least for part of it, and there will be good leftovers for lunch this weekend. So–not much new.

The things I did last year that I didn’t manage to post include a relatively quick whole wheat olive-rosemary faux-sourdough bread, which came out really well and I’m doing again, and the cheese plate à deux that manages to be interesting without breaking the bank…

These things may not come in time for today, depending where you are and how impatient or well-stocked, but they could come in handy in the next few weeks.

Whole wheat rapid faux sourdough with mix-ins

I usually keep a bowl of dough in the fridge for things like pita and calzone and it lasts me about a week. I’ve done proper sourdough rye and kornbroyt with medium success, and a yogurt-based 3-hour “faux” sourdough that wasn’t too bad, but lately I’ve decided that I can get a decent mildly sourdough flavor simpler and nondairy by just stirring a capful of apple cider vinegar into the flour as I’m making a regular yeast dough.

For this whole wheat bread, I’m doing a smaller ball of dough than my usual salad bowl worth–I want it quicker and it’s really just for this, so. I took a chunk of the regular dough since I had some in the fridge, maybe a heaping tablespoon or so, softened and pulled it apart with a fork in half a cup of warm water, sprinkled on about a cup each of whole wheat and regular bread/AP flour, less than half a teaspoon of salt, and a small capful of cider vinegar, and started stirring. I heated up another half a coffee mug of water a few seconds in the microwave, just to “finger-warm,” and added just enough to the bowl to get it to make a reasonable dough, kneaded it until smooth, drizzled on olive oil, covered the bowl and set it in a colander over a stockpot filled with hot tap water–and put a lid over it to shut out light. Hopefully it’s rising as we speak.

Olive rosemary bread in progress, as of Thanksgiving 2020–from the outcome, I’d say at least double the olives and throw in some chopped walnuts as well to get a more generous, nicer-looking distribution.

You can go a couple of different ways with mix-ins. Last year I chopped some Greek olives and minced a sprig or two of rosemary from the bush in the backyard, and when the dough was risen, I rolled it out into a rectangle and sprinkled everything on, rolled it up, let it rise again covered for 40 minutes or so while I heated the oven to 420F, and then threw a mugful of water into the oven and baked the bread for about an hour–it was a bigger loaf than I’m doing today, so I expect this one to take less time.

This year I’ll probably do the same but throw in a few chopped walnuts and maybe hot-soaked raisins as well. You could do raisins instead of olives if you prefer, nuts or no nuts, or just rosemary and thyme or sage if you want an herb bread.

Cheese plate with slight microwave assist (because, of course…)

The Ralph’s/Kroger in my neighborhood put in a fancy cheese counter two years ago, trying to rival Whole Foods and more or less doing a decent job of it. The Ralph’s cheeses are all stocked by Murray’s, which is headquartered in (I think?) the Hudson Valley in New York.

Now, that of course doesn’t sound incredibly affordable and the regular prices aren’t terrible but they’re still $10-25 a pound, which is a lot. However, the cheese counter always has a few “under $5” baskets out to attract those of us who don’t have champagne budgets or big parties to stock but are still sort of cheese freakish.

$20 cheese plate! Notes: 1. The Stepladder Creamery wedge, at $7, is the most expensive one here and full price; it’s still relatively inexpensive, wonderful and flavorful even in slivers, and produced by the dairy where my niece is a goat herd manager up near San Simeon. The other wedges are all over 5 ounces–the Ralph’s/Kroger/Murray’s Cheeses goat cheddar with vegetarian rennet at the lower left, contrary to what the upside down label says, is actually over 9 ounces, not the “0.22 lb” (3.5 oz) on the label. The full prices for the other two from Trader Joe’s: 3.60 for 5 ounces of stilton; 4.66 for 8 ounces of camembert, both vegetarian rennet.

And sometimes they’re actually big wedges, 6-8 ounces, that are nearing their sell-by date, or maybe they’re just not moving, so they discount and you can get a major bargain on things like Humboldt Fog or Cambozola, a stilton, or an aged goatsmilk cheddar or asiago-style cheese like Ewephoria. (Of course, occasionally you can find seriously discounted Limburger going for 75 cents a tightly-wrapped chunk, because they really, really want you to take it off their hands).

Continue reading

Microwave Tricks: Ungrilling Corn on the Cob

The last time I wrote about buying fresh corn more or less in season, my daughter was seven years old, green of hand and shin from a day camp project, and eager for me to do the handling so she could inspect each ear without touching them herself or turning them green. Now she’s a camp counselor at a nature center and almost done with college. So it’s been a while.

I wouldn’t normally think I had much to say about corn on the cob–I like it in a limited way, and actually I prefer to use the kernels for microwave chiles rellenos, but my husband and daughter both go for it, so usually when the price has finally dropped under 50 cents an ear (signalling “corn season” prices in the LA area) I buy it mostly for them, and I cook it as simply and quickly as possible, steaming it in the microwave. Because no matter what else may be true, when there’s corn in LA, it’s pretty hot out and the last thing I want to do is heat up my little galley kitchen.

Which turns out to be the deciding factor for this post. Temperatures around the southwest are edging up over 100–as expected; but at this point the northeast has also been in the 90s, and Portland, Oregon, has hit 116, hot enough to cook mussels in the harbor. It’s insane.

But microwaving corn isn’t just a survival tactic or a contingency plan.

My daughter was recently home for two weeks before going back to New York and lamented that my corn is “so much better” and tastes fresher than most of her friends and my in-laws make it. My in-laws are all hands-on denizens of Northern Califoodia, and a typical Fourth of July weekend sees barbecueing with many homemade sauces and bastes and corn roasted in the husk and so on.

So I was surprised–pleased, because my daughter has a better palate than I do, and she tends toward snark around me. But surprised, because she apparently meant it. Not being a huge corn fanatic, I think, “it’s just corn in the microwave, big deal.” Certainly, microwaving is much less glamorous and won’t result in attractive grill marks on the corn, much less the irreplaceable smokiness. So why would it be better?

My husband grew up for a while in Southern Illinois, corn country, and says the best corn he ever ate was when his family visited friends on a local farm. The hosts brought a stockpot of water out to the field between rows, set it boiling on a brazier, and instead of picking the corn, they just bent the nearest stalks directly into the pot for a few minutes, just enough so that the ears in the pot were cooked through and juicy, not enough to let them overcook with shriveled kernels or turn sicky-sweet and starchy like canned corn.

So that’s the ideal, rustic way to make perfect, exquisitely fresh corn on the cob. Ironically, a microwave can get you fairly close with supermarket corn that is obviously not still growing on the stalk for ultimate freshness, and you don’t have to visit southern Illinois farm country in the middle of the summer (which I have done, once, and it was really, really hot and stifling in my uncle’s childhood home). Or schlep pots of water out to the field in the middle of said summer and wait for them to boil.

Microwave-steaming is very different from stovetop methods like boiling, blanching or steaming. It’s not just the way it heats food–acting preferentially on the water molecules in or around the food–but how the food comes out as a result. If you do it right–just a little water, not a swamp, and put a lid on the container–a few minutes on high power will steam things like broccoli or asparagus to fork-tender while preserving the bright jewel green color and fresh taste you might expect from a stirfry that barely cooks the vegetables at all. Stovetop steaming to that color without going over into olivey, sulfurous territory would take longer and give you less tender broccoli as well, and boiling–don’t get me started. Moreover, you can keep the microwaved broccoli green and fresh-tasting longer if you microwave it just to the point you want or a little before and then pour off the drizzle of hot water and open the lid a bit. Even a head of broccoli that’s going bronzy-yellow after a week-plus in the fridge will generally perk up and be edible, not sulfurous-tasting, if you microwave-steam the florets instead of trying to deal with them some longer way.

Much the same can be said for corn on the cob. Microwave-steaming with only a little water and a lid cooks the cobs pretty fast, because the microwave energy heats the water inside the kernels as well as the water you added to the container, so it steams the corn from two directions at once.

Quantity and Layout

This method is pretty easy as long as you keep a couple of key factors in mind, namely how much food you’re trying to cook at once and how you lay it out in the container.

Raw corn cobs, shucked, rinsed and broken in half for microwaving

You wouldn’t want to try this for 20 ears of corn at a time, because the more food you microwave, the more energy and time it takes to get it all cooked, and it will cook less evenly and not be worth it. But for five or six people, you could probably do ok in one or two batches depending on what containers you have.

The other main thing about steaming ears of corn in the microwave is that you want them to cook as quickly and evenly as possible, just until they are cooked, which means you need to expose as much of the surface area of each cob as possible to the steam and, at the same time, to the microwave energy. So ideally you want them standing upright or at least diagonal, not lying flat on the bottom of the container or on each other if you can help it. You want the steam to circulate throughout the container, and you want the lid to keep it in and keep it focused on the corn.

A couple of ears left whole–lifting them up diagonally in the container helps them steam evenly.

For my containers, which tend to be 2.5 qt or liter snaplock boxes about 5 inches high, I break off the narrow “handle” and snap the ears in half after shucking them and rinsing off the last of the cornsilk threads. My hands are fairly strong so I just do it by hand, but you can also use a sharp knife to cut through the middle of each cob without too much sawing–the newer santoku-type knives or a microserrated paring knife would work pretty well. I can fit 3-4 ears’ worth of corn halves into one container, and I’ve done up to 8 ears of corn using two old-Pyrex mixing bowls, one over the other as a lid for a sort-of spherical container, so probably if I tried I could fit 6-7 whole ears into two large snaplocks, one used upside down as the lid. But I suppose your ability to try tall microwave containers and tall food in general depends on the size and height of your microwave.

The setup for 6 half-ears of corn

In any case, once you have the ears or half-ears arranged as best you can, you want to drizzle about 1/4 to 1/2 inch of water–no more–into the bottom of the container, and then put a lid on fairly well sealed so that when the microwave heats the water molecules, most of the steam stays in the container and doesn’t escape. If you’re resting one snaplock box on top of the other for a taller container, the seal won’t be tight but it should still keep most of the steam in where it can go to work on the corn.

For 3-4 ears’ worth of corn, I usually microwave on HIGH for 5-6 minutes and then let it sit a few more minutes to continue steaming inside the sealed container. Usually that’s enough to get it cooked all the way around the cob without starting to wilt or wrinkle the kernels. For more corn, you’ll need more time, maybe 8-9 minutes for 6-7 ears, whether broken into halves or kept whole. Obviously check progress after letting it steam on its own for a bit, and add a minute or two extra of microwave time if you need it. When the corn is just cooked, the cobs should be steaming hot (I hope this is obvious), the kernels should no longer be hard or opaque and chalky-looking, the way raw corn kernels are, but slightly translucent, and they should give a little when you press lightly against them with your finger.

If you have to lay the ears flat to fit a shallower container, the top part of each cob is going to cook more than the underside, and the underside will still be visibly raw after several minutes. Try to keep to one layer of corn so they don’t block each other from the microwave energy and make sure to stop the microwave in the middle of the cooking time and roll the ears over so the less-cooked bottom halves get some steam. Maybe also raise the container up off the turntable an inch or so by setting it on top of an overturned microwaveable saucer, bowl or shallow snaplock box to let more of the microwave radiation reach the bottom.

When the ears are done, carefully open a corner of the lid away from your face and drain the hot liquid out. Serve with whatever you like on corn–my current preference is a sprinkle of smoked paprika or chipotle salsa, ideally with a squeeze of fresh lime–all the best of barbecue without the grill, the grease, the heat, the wait, or the cleanup. You can reheat any leftover ears in the same microwave-steam setup but for just a minute or so, or cut the kernels off for a stir-fry with mushrooms and onions or as a stuffing for mild or slightly hot peppers–microwave all the way if it’s really hot out.

Mangia bene, b’te’avon, eat nice and keep as cool as you can.

microwave-steamed corn

Microwave-Pickled Eggplant for Felafel

What goes into a classic felafel pita? Tomato/cucumber diced salad, yes. Chopped or shredded cabbage or Greek-style lahanosalata–maybe. Hummus and tehina–of course.  Dab of z’khug, harissa, salat turqi and other medium-hot red pepper condiments, up to you. Olives? if Greek-style and not the black rubbery cheap flavorless American ones from a can. “Chipsim” (aka, chips or French fries)–not my thing but okay as long as they’re fresh and crisp, not soggy or lukewarm.  Hilbe–a sour fenugreek-based sauce something like mustard dressing.

And pickled eggplants. The true pickles for felafel, if you ask me. You can probably find them in cans in Arab and Armenian groceries or online, but they’re pretty full-on brined and have a lot of the same deficits of both commercial cucumber-type pickles and canned vegetables. Lot of salt, a bit metallic from the cans, and a little less than fresh. Plus with cans, you have to either use them up all in one go (at your huge felafel party) or else store the unused pickles in a fresh nonreactive container in the fridge. Which isn’t necessarily that big a sacrifice, if you’re really into them, have a lot of takers to share them with, and/or are planning to eat leftover felafel for the rest of the week (month?) But fresh-made eggplant pickles are a lot better if you just want them for a meal or two, or you want to control the salt level so you don’t wake up the next day with swollen ankles and fingers like cucumbers.

Classic pickles are made with the little finger-sized eggplants like the ones I used for Syrian stuffed eggplants a few years ago or else with long, thin eggplants sliced crosswise. But regular large ones will also work, cut into bite-size pieces.

If you have fresh eggplants of whatever size, you can pickle them in one of two ways, depending on your patience level. The first is your basic half-sour pickles fermented in a couple of days to a week in a mason or canning jar on a counter–much the same as for half-sour kosher dill pickles or pickled green tomatoes but maybe without the dill. When I lived in Israel back in the ’80s, I was surprised to see jars of eggplant fingers pickling on many people’s home kitchen counters. It seemed so Mediterranean-idyllic to me, coming straight out of a mainstream college town in the days before wholesale foodieism. For eggplant, as for the green tomatoes and cucumbers, use a standard salt and distilled vinegar brine that you’ve boiled and cooled, and pour it over the eggplant chunks and flavorings in the jar. Instead of dill, throw some well-scrubbed organic lemon slices and small whole dried hot peppers into the jar with the halved garlic cloves and whole coriander seed, pack the raw eggplant slices in tightly, and pour the brine over before capping the jar and letting it sit to ferment a couple of days. You’re not going to process these in a hot water bath, so keep them in the fridge and use them within a week or so.

However…there is a much faster way to get to pickled eggplant heaven in about 5 minutes–microwave marinating. If you just want a few right now, you want eggplant pickles that taste fresher and have lower salt, or you’ve never tasted them before and you’re not sure what you’ll think of them, a microwave will get you a reasonably small taster batch in about 5 minutes flat, and you can make them in a snaplock container that goes straight to the fridge once it’s cooled down. The taste and texture are both surprisingly authentic, based on my last two tries.

Why would you bother pickling an eggplant instead of cooking it, anyway? Well…I had a big eggplant that I hadn’t gotten around to using for a week. It was developing soft brown spots in places and I wasn’t sure was really going to make it much longer if I didn’t get on and do something with it, but I thought it was probably now too tough for straight eating–eggplants get tougher and sometimes more bitter inside as they age. So I cut off the spots on the peel and started slicing the rest into small wedges to see if I could do a quick version of eggplant pickles in the microwave and get somewhere close.

I’ve done it before with mild hot peppers (and occasionally, accidentally, with peppers that turned out not to be mild) and sometime this past year I tried it with a couple of green tomatoes too, despite having made pretty good deli-style pickled green tomatoes the official way a few years ago. The microwave tomatoes came out basically identical to the two-day jar-fermented version, which surprised me. So I can say with confidence that this microwave method seems mostly good.

But here’s the tricky bit.

When you microwave in a brine, you have to work out how soft or crisp you want the vegetables to be, and play around with the microwaving times and what you put in when so that you cook the vegetables just enough and let the brine penetrate, but not so much as to end up with limp mush. The hot vinegar and/or lemon juice will also “cook” and discolor some vegetables more than others. Commercial operations offset these and other problems by adding sodium metabisulfite, alum, and other tricky preservatives and texturizers at various stages, but they’re not easy to obtain for home use and can be dangerous if mishandled. I’m pretty sure they don’t actually improve the taste.

It’s both easier and a lot safer–not to mention cheaper–to play around a bit and figure out a microwave method that gets you where you want to be or at least close. Because you can. Of course you can.

Here are a couple of strategies for microwave-pickling depending on the kind of vegetable you have and what texture you’re aiming for, and then we’ll look at what I did with the eggplant slices.

Microwave Marinating Combinations

Do you want to microwave the veg and brine ingredients together, all in one step, and let the brine cook the vegetable? That works well for things like marinated artichoke hearts or sweet and sour red cabbage. You could do that as a first try and see if you like the texture, adding a bit of time if it’s not cooked enough for you or cutting back the next time if the veg is too soft. Easy enough.

But you can also adjust which part cooks more, the veg or the brine. You know at some point you’re going to have vegetables in a container with brine and a lid, but the order and degree of cooking are up to you.

Continue reading

Microwave Tricks: Felafel

In my last post, around Passover, I made (finally) successful microwave matzah balls more or less the same way I make microwave-to-frying-pan felafel, but then I realized I’ve never actually posted on how to make microwave-assisted felafel or why you might want to. So before getting into what I was hoping would be a nice quick extra, the eggplant pickles you need for a great streetside felafel pita (next post), I decided I should really put in a word for microwave-assisted felafel.

Felafel stands were few and far between in most of the US even before the pandemic hit, and most people still don’t make their own felafel at home, even from the available box mixes, because deep fat frying is expensive on oil and frankly kind of a pain.

If you’ve never eaten felafel, they’re kind of a crunchy, spicy fried vegetarian meatball made with chickpeas, favas, or a combination. At Israel’s felafel stands, Jewish or Arab, you get them served in a pita pocket and ask for whichever additions you want from a huge selection: finely chopped tomato/cucumber salad, tehina and hummus, harissa or z’khug, sour/spicy mustardlike sauces like hilbe (fenugreek-based) or amba (mango-based), sour pickles (the aforementioned eggplant pickle is my favorite and therefore obviously the best), sometimes they even squeeze in a couple of french fries, which I really don’t get, but to each their own, which is the point. All that ends up overstuffed precariously into the pita with the three to five felafel. As with a food truck burrito, there’s an art to dealing with it: you try hard to eat it before it falls apart and do your best not to drip all the different simultaneous sauces on your clothes.

The home version is a little easier, once the felafel are cooked, anyhow, but probably a little less exciting.

You might think that with all the toppings, the felafel would somehow get lost in the mix. But the felafel themselves are actually mission-critical. Especially at home, where you’re, as my mother would say, “Not a Restaurant” and not offering every possible permutation and topping ever, so the felafel are going to stand out more. They actually have to be good or it’s not a party.

Box mixes (Near East, Sadaf, etc.) tend to lean heavily on salt instead of more complex flavorings and they’re often pretty dry because people don’t let them hydrate and absorb water well enough before frying, so they’re never going to be great unless you doctor them with some extra fresh ingredients, and by that time you might as well make a really good felafel mix from scratch, which is what we’re doing today. It’s not actually much more work, it tastes a lot better, and the cooking, especially if you take advantage of a microwave, is lighter, easier and less dangerous as well.

GOOD felafel (I’m about to get seriously opinionated here–take it or leave it):

To get the best out of felafel, classic or microwaveable, what you’re aiming for is a crunchy browned ungreasy outside and a fluffy, cooked-through-but-tender-and-moist inside. And preferably flavored with something better and fresher than the usual box mix bare minimum dusting of faded cumin and garlic powder overcome by a ton of salt. And the main thing, which Whole Foods still doesn’t get–felafel must be served hot and crisp. Not refrigerated and thus leaden in the salad bar. And not dried out and tough to swallow–you don’t want to be biting into a golf ball.

So step one is to make your own felafel mix in a food processor or blender with a couple of cups of drained chickpeas plus fresh ingredients to taste.

Israeli chefs insist on raw soaked chickpeas for the classic deepfrying version of felafel–but this may not be so good if you’re microwaving, because they may not cook through well enough. I find that well-drained home-cooked chickpeas (I’m using my updated microwave black bean method these days) or well-rinsed and drained canned chickpeas work fine, and for that matter, so does chickpea flour made up to a thick paste with water and left to sit a while before blending in the other ingredients. I’ve even made pretty decent microwave-to-frying-pan felafel using leftover thick-from-scratch hummus as a base (note: NOT commercial supermarket hummus, which is too thin and too oily, with too little actual chickpea content, plus the taste is kind of shvach).

The all-important other ingredients are spices (cumin and garlic at a minimum) for flavor, a little flour for backbone, a dash of baking soda for fluff, plus–and this is where fresh beats the box–fresh vegetables and herbs for flavor, moisture, body, and general lightness of being. Onions and a good handful of parsley or cilantro–cilantro for preference–are typical but you can also sub in a chunk of cauliflower or zucchini in the food processor for maybe up to a quarter of the chickpeas and it’ll help keep the moisture. Other spices you might not have thought of but which give a more authentic and aromatic touch (in subtle pinch-not-spoonful amounts) include allspice, coriander, and caraway. Any of these in small amounts blends well with the cumin and garlic and elevates felafel above the standard box-mix “salt bomb” style.

When you’re happy with the mixture, process the whole deal until it’s a coarsely ground mixture that holds together with the chickpeas, onion and herbs in bits the size of toast crumbs or so, not too lumpy but also not too smooth or pasty (unless of course you went with chickpea flour or hummus as a base, but the added veg will still give it a little texture).

felafel mix ground up medium-fine with a bit of texture

As with the matzah ball mixture from April, when you microwave, you want a little more moisture in the felafel mix to start with because the microwave tends to dehydrate foods. You want the mixture ground fairly fine, capable of Continue reading

Microwaveable Matzah Balls–Yes We Can!

Microwave matzah ball in vegetarian not-chicken soup

Three years ago I tried out a couple of possibilities for making matzah balls in the microwave–mostly because I was cooking for just my husband and myself for the seder and because I hate waiting for a full stockpot to boil. Also just because. And it wasn’t a raving success–more like, “well…it was worth a try.” Or as I put it at the time, I try these things out so you don’t have to.

My conclusion then: you can’t microwave ordinary matzah balls the way you’d think, dolloping the mixture into boiling water and then heating with a lid, as I’d hoped. They’ll just start falling apart in the water and the ones that don’t will be awful and tough in the center and awful and gluey like undercooked oatmeal on the outsides, and in general not good and a complete waste of ingredients and your valuable effort.

At the time I also thought maybe I hadn’t used enough egg to make it work–because I only had one egg in the house for a cup of matzah meal, and the standard recipes for that amount called for two to four.

However, I discovered that a spinach-enhanced version would work okay, at least on a very small-batch basis, if I dolloped the mixture onto a plate and microwaved the dumplings that way, just to seal the surfaces and kind of steam them through to cook the egg and make them hold together, THEN put them in hot soup and let them sit a few minutes to absorb and fluff a little more. And…they were okay. Not fabulous. They still had a few corners on them.

But as a fairly dedicated microwave experimenter–I’m not quite up to claiming “maven” yet, that’s next week–that doesn’t really end the question for me, because I keep thinking, maybe I could possibly change something and make them work out after all? And wouldn’t that be cool? …I’m probably the only person I know who would answer “yes” on that, but too bad. Because, on take 3 1/2 or so, I finally think I’ve got it. And this time my husband actually agreed.

So picture me on Sunday afternoon, the first full day of Passover 5781 (aka 2021). Saturday evening we (meaning, mostly me) did manage to get all the kashering and cleaning and cooking done and ready for the first seder in reasonable time for the two of us, and we skipped soup and matzah balls because really, it was too much right then. Sunday, though, I decided I had time after lunch to make some not-chicken soup in the microwave and then–well, why not?–try a new tack on microwave matzah balls. Yet again.

This time I thought about those tough centers and decided what the matzah needed was a quick fluffing up before adding any other ingredients. I’m going to go out on a limb and say this idea should work decently for standard stovetop matzah balls as well. Might even let you get away with fewer eggs for the recipe and a little less time letting the mixture rest in the fridge.

So here I combined two tricks:

First, I poured boiling water on the matzah crumbs and let it all soak up for 15 minutes or so before adding the egg and oil and flavorings. Second, I used the same dollop-and-nuke-on-a-plate method I’d used last time Continue reading

Microwave Tricks: Passover Haste and Fresh Apple Sauce

(What? no pictures of apples? How could this be?!! Somehow I’ve never taken any during Passover–maybe Tuesday…)

I know, I know, it’s already Friday afternoon, Passover starts tomorrow night after sundown, and have I cleaned out my fridge? Have I found the all-important kosher-enough-for-me chocolate and kosher-enough-for-anyone cocoa powder? Um…no. I did just bake the remaining bowl of dough (why? why?) for dinner tonight and breakfast tomorrow. I kashered the oven afterward, if that’s any comfort. But really. I’ve been hating the idea of kashering for Passover this year more than usual, and that’s saying something. I hate it every year, especially the fridge. And all the boiling. And trying to remember which frying pan was going to be okay for dairy.

It’s just me and my husband this time, again, not even our daughter this year except by Zoom–and due to March Madness, she reports that the typical sports stupids on Syracuse’s campus have been partying maskless AGAIN, like it’s a big surprise that COVID is still around and still actually matters more than the coach’s son’s basketball talents. The distanced seder she was going to is not happening, or at least not for her. The lady in charge is sending her a Pesach kit so she can be a party of one at home–we’ll Zoom with her a couple of hours before we start and so she doesn’t have to be starting at 10 at night to be with us. But oy.

Passover ideas on this site

So I’m obviously not feeling all that brilliant and I don’t have a lot of new great ideas other than the ones I always have, to make best use of a microwave where you can–mostly for fresh vegetables–and to keep the matzah modest and out where you can identify it easily as matzah, not all kinds of dubious baked “treats.” More plain fruit than baked goods–citrus if you still can. Keep the vegetables in the soup, whether chicken or not-chicken. And mostly, don’t forget not to grate raw daikon radish and pour on any vinegar if you can’t find horseradish. That is sage advice, there, the actual one thing I would not do again, ever, so please learn from our hilarious but horrifying experience a few years ago!

I plan to honor my ancestors, including my grandfather whose memoir of escaping the Pale of Settlement I’m re-editing right now, by not wasting food if I can help it and not whining too much for things there just aren’t. Keep it simple, make do, try to make sure other people have food. Keep walking. Improvise.

If you want or need some ideas for microwaveable Passover stuff, look either in the Recipes tab at the top of the page or use the search to find “Passover”. Or in my fabulous “Microwaveable Passover/not-chicken” post from a coupla years ago, which has a roster of links you may or may not enjoy–sort of like second prize in a matzah-crunching competition…

And one more

Meanwhile, one quick, cheap microwaveable idea for the day: microwave applesauce from scratch.

Let’s say you have a couple of apples. Big ones. Maybe with a couple of bruises. And they’ve been sitting in your fridge or in your fruit bowl or (if you’re old-fashioned enough) apple barrel long enough to need using. What can you do with them that doesn’t take more effort than it’s worth? Actually, this is a good time to be using them up instead of tossing them and going back to the store before you really have to.

If you’re not interested in eating them as-is, then at least peel them, core them and cut them up–slices for microwave apple toaster pastry or an apple omelet, dice for throwing into microwave oatmeal, or just whole but peeled for grating…

Grating? yes. I mean, you could get out the food processor if you want, or if you have a lot of apples to do. But if you have a flat or box grater and only one or two apples to use up, it’s probably faster to do it by hand and you don’t have to wash as many utensils afterward. This is what I did on my one night of latke-making during Chanukah this year, because we had no applesauce in the house and I wasn’t about to dash out and buy some. Plus the grater was still handy. It was a seriously nice surprise that it wasn’t a flop.

Microwave Applesauce

Apple(s), washed and peeled–that’s it. Unless you want lemon juice or cinnamon or something–I’d say add that after microwaving, though, because cinnamon contains a compound that’s slightly hyperreactive in the microwave, and depending what and how much stuff you’re adding it to can result in unexpected boilover.

Make the applesauce:

Set the grater in or over a bowl, preferably microwaveable, and grate each peeled apple just about down to the core on one side, give it a quarter-turn and grate it down again, turn and grate the remaining sides and throw away or compost the core. Once you have the gratings in the bowl, stick the pulp in the microwave for about 1.5-2 minutes per cup, just enough to get it cooked through, and voilà! You have fresh (though hot) applesauce and nothing but. Obviously, if your grating bowl’s not microwave-friendly, transfer the stuff to a snaplock or other container that is before you nuke.

Or you could go the other way, especially if you’re making more than 1 or 2 apples’ worth of sauce. Peel and this time core the apples, quarter them, nuke them in a lidded container with a drizzle of water for a few minutes until they’re cooked, then mash them by hand or whiz them in a food processor.

Happy Passover, chag same’ach, stay safe, wear a mask, wash your hands, don’t poke yourself in the eye especially if you’ve been handling horseradish, and eat nice.

Microwave Wild Rice Pilaf

Thursday was kind of rushed–we started the morning late and kept being slow until it was nearly 2:30 and time to Zoom our family. But I managed to get a few Thanksgiving-type things going in the microwave for dinner before that and even managed to post about them at an almost-civilized length instead of going off on more tangents than anyone really wants to read even under current conditions. Artichokes–no big deal. Cranberry sauce, even less. Wild rice, though.

Wild rice, rinsed and ready to add water and microwave. Not very friendly-looking, is it?

Any grain with a tough husk takes a longish time to cook conventionally on a stovetop compared with something like white rice or rolled oats. And wild rice is tough enough that the Trader Joe’s package directions strongly recommend soaking the stuff in a bowl of water in the fridge overnight before attempting to boil it. A good suggestion that would help for microwaving too–a fine suggestion, if only we had started with things the day before. Not all that helpful when you need it the same day.

Microwaving works for brown rice, another long-cook whole grain, so it should (and in fact did) work for wild rice too. But it’s not quite the brief one-step kind of technique it is for white basmati rice. More a “nuke a few minutes to a simmer, let it sit 10 or so minutes to absorb hot liquid, stir, nuke a few more minutes and go away again, stir and check…..” kind of thing, similar to the way I cook beans, chickpeas and lentils, but with fewer rounds of cooking. I don’t know, it didn’t seem like a nuisance to me because I was doing two or three other things while it sat (one of those was sipping champagne while noshing with my husband on a few decorator cheeses and nuts and chatting with my in-laws and my daughter over Zoom). So I wasn’t in an overwhelming rush.

And it came out pretty nicely, so I’m posting it now. I would in fact do this again, because it came out pretty much as well as the original with a lot less work.

When I was younger and well before I had a child (who is now old enough to cook with her housemates, and did), I would make this pilaf in an electric wok with a lid, frying the onions and mushrooms first with the herbs, then adding the wild rice and some pearl barley and broth, bringing it to a boil and turning it down to simmer with a lid for however long, checking once in a while and stirring in the fruits and nuts and adding a little broth or water as needed. Similar idea to the microwaving, but on a stove or any heat element, you need to stay a lot more present. Microwaving lets you go away–it can stop itself and sit for a while without things drying out and scorching.

Continue reading